Have you ever faced a stubborn kitchen faucet handle that just won’t budge? Whether it’s leaking, loose, or you simply want to replace it, knowing how to remove your kitchen faucet handle can save you time and money.
In this guide, you’ll discover simple, step-by-step instructions that anyone can follow—even if you’re not a DIY expert. By the end, you’ll feel confident tackling this small repair yourself, avoiding costly calls to a plumber. Keep reading, and let’s get your faucet working smoothly again!
Tools Needed
Removing a kitchen faucet handle requires a few basic tools. Having the right tools makes the task easier and faster. It also helps prevent damage to the faucet or surrounding areas.
Gather all necessary tools before starting. This prevents interruptions and keeps the work smooth.
Adjustable Wrench
An adjustable wrench fits various bolt sizes. It helps loosen nuts holding the handle in place. Choose one with a comfortable grip for better control.
Screwdrivers
Both flathead and Phillips screwdrivers may be needed. Handles often have screws hidden under caps or covers. Use the correct type to avoid stripping the screws.
Allen Wrench (hex Key)
Many faucet handles use hex screws. An Allen wrench fits these screws perfectly. Keep several sizes handy to match your faucet’s screws.
Pliers
Pliers help grip and turn stubborn parts. Needle-nose pliers are useful for tight spaces. They also assist in removing small clips or pins.
Utility Knife
A utility knife can remove decorative caps or sealant. Use it carefully to avoid scratching the faucet surface.
Towel Or Rag
Protect the sink and faucet with a towel. It prevents scratches and catches small parts that may fall.
Safety Precautions
Before you start removing your kitchen faucet handle, safety should be your top priority. Ignoring safety measures can lead to accidents or damage to your plumbing. Taking simple precautions ensures a smooth and injury-free process.
Turn Off The Water Supply
Always shut off the water supply to the faucet before you begin. This prevents unexpected water sprays that can cause slips or damage. Locate the shut-off valves under the sink and close them tightly.
Use Proper Tools
Using the right tools reduces the risk of slipping and injuring yourself or damaging the faucet. Avoid makeshift tools; instead, use a screwdriver or Allen wrench that fits perfectly. Have a towel or rag handy to protect surfaces and improve grip.
Wear Protective Gear
Protect your hands by wearing gloves to avoid cuts or scrapes from sharp edges. If you expect debris or water to splash, safety goggles can keep your eyes safe. Simple gear like this helps you work confidently and comfortably.
Work In A Well-lit Area
Good lighting helps you see small screws and hidden parts clearly. Poor visibility can lead to mistakes or dropped tools. Use a flashlight or portable lamp if your kitchen lighting isn’t bright enough.
Beware Of Electrical Hazards
Check for any nearby electrical outlets or appliances before you start working. Water and electricity don’t mix, so unplug devices to avoid shocks. If you’re unsure about electrical safety, consider consulting a professional.
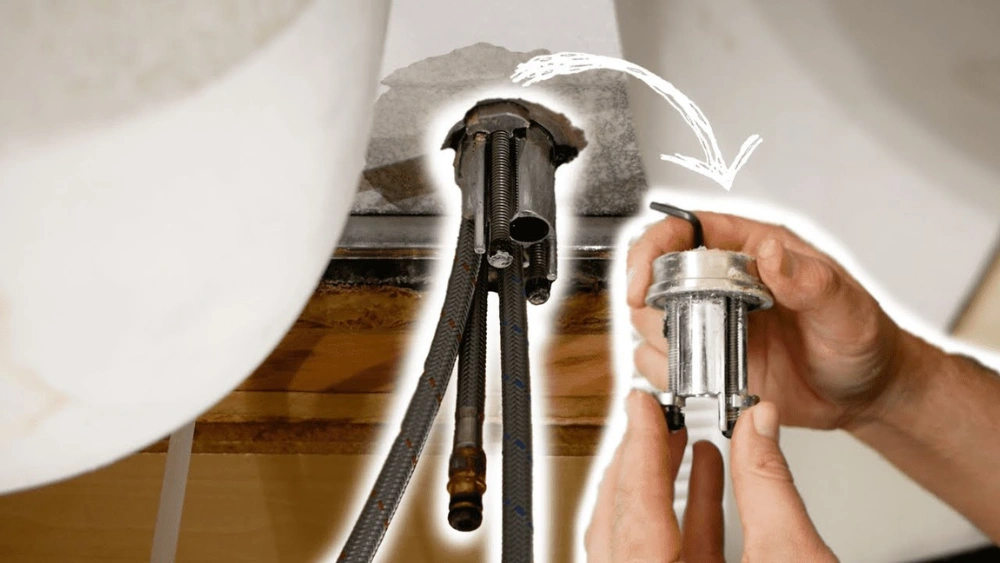
Locating The Screw
Finding the screw that holds your kitchen faucet handle in place is often the trickiest part of removal. Many handles hide the screw under decorative caps or behind small covers, making it easy to miss. Knowing exactly where to look saves you time and spares frustration.
Check Under The Decorative Cap
Most faucet handles have a small plastic or metal cap right on top. This cap is usually removable and conceals the screw beneath it. Gently pry it off with a flathead screwdriver or a thin knife. Be careful not to scratch the finish while doing this.
Look Around The Base Of The Handle
Sometimes the screw is located near the base of the handle, facing outward or downward. Rotate the handle and inspect all sides carefully. You might find a tiny hole or a recessed screw head hiding in plain sight.
Check For Hidden Screws On The Side
Some faucet designs place the screw on the side of the handle, especially on lever types. Run your fingers along the edges to feel for any indentations or slots. If you spot one, use the appropriate screwdriver to loosen it.
Use A Flashlight And Mirror For Tight Spots
If your faucet is in a tight or dimly lit area, a flashlight and a small mirror can reveal hidden screws. Shine the light at different angles while using the mirror to see behind or underneath the handle. This simple trick helped me spot a concealed screw I would’ve missed otherwise.
Consult The Faucet Manual Or Manufacturer’s Website
If you still can’t find the screw, check your faucet’s manual or the manufacturer’s website. They often provide diagrams showing the exact location of screws and how to remove the handle safely. Have you ever struggled to find a screw only to discover it was hidden under a sticker or label? It pays to double-check these resources.
Credit: www.homedepot.com
Removing The Screw
Removing the screw is a key step in taking off a kitchen faucet handle. The screw holds the handle securely in place. Removing it allows the handle to come off easily. Usually, the screw is hidden under a cap or cover.
Finding and accessing the screw can take some care. Using the right tools makes the task faster. Keep the screw safe after removal to avoid losing it.
Look for a small cap or plug on the handle. This cap often hides the screw beneath. Use a flathead screwdriver or a knife to gently pry off the cap.
Check the sides or the back of the handle if no cap is visible. Some screws may be on the bottom or inside the handle.
Choosing The Right Tool
- Use a Phillips screwdriver for cross-shaped screws.
- Use a flathead screwdriver for single groove screws.
- Use an Allen wrench for hex-shaped screws.
Using the wrong tool can strip the screw head. This makes removal harder.
Unscrewing The Handle
Turn the screwdriver or wrench counterclockwise to loosen the screw. Apply firm but gentle pressure. If the screw is tight, try using a lubricant like WD-40.
Remove the screw completely. Keep it in a small container to avoid losing it.
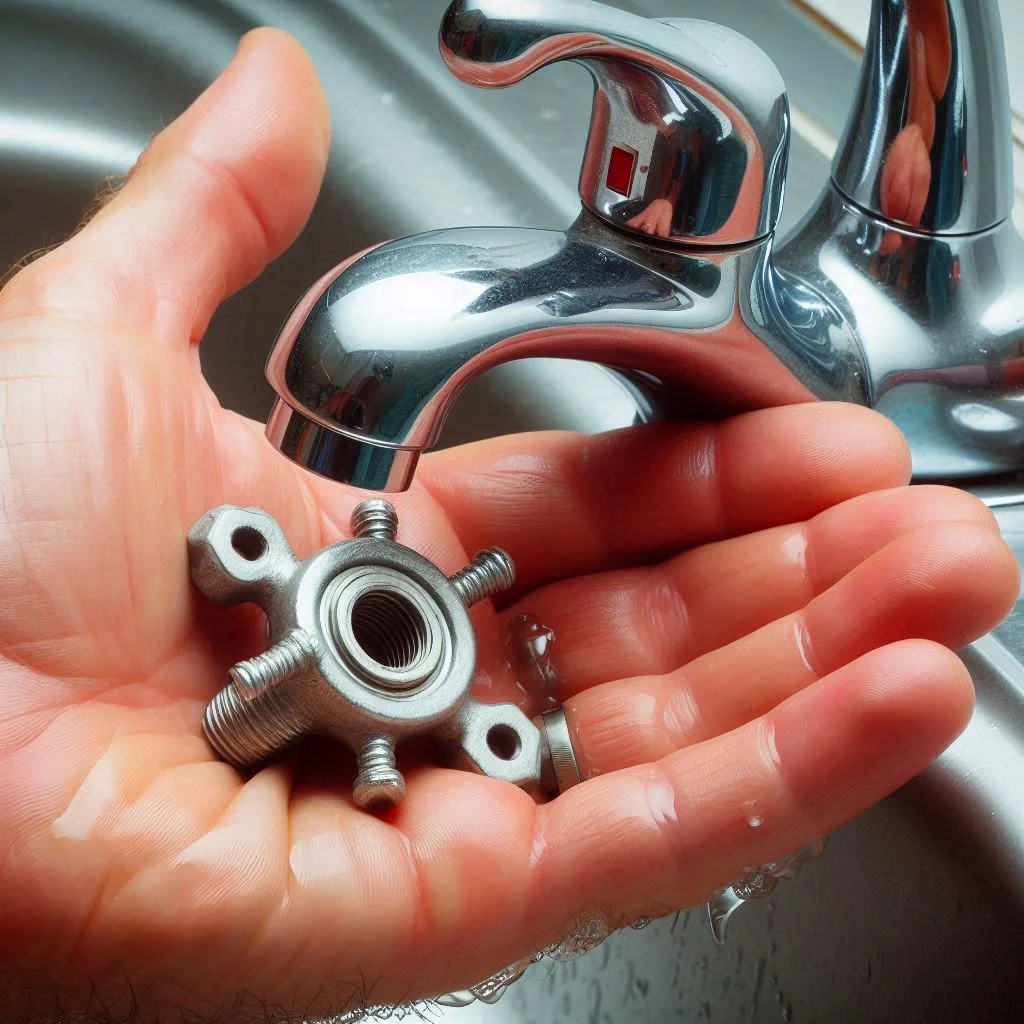
Detaching The Handle
Detaching the kitchen faucet handle is a simple task with the right approach. It involves removing a few screws or caps that hold the handle in place. This step is key before any repair or replacement can start. Proper tools and gentle handling prevent damage to the fixture.
Locate And Remove The Handle Cap
Most faucet handles have a small cap covering the screw. This cap hides the screw that secures the handle. Use a flathead screwdriver or a fingernail to gently pry off the cap. Set the cap aside carefully to avoid losing it.
Unscrew The Handle Fastener
Once the cap is removed, the screw becomes visible. Use a screwdriver that fits the screw head well. Turn the screwdriver counterclockwise to loosen the screw. Keep the screw safe for reinstallation.
Lift The Handle Off The Faucet
After removing the screw, the handle should lift off easily. Pull the handle straight up with steady force. If it feels stuck, wiggle it gently to loosen. Avoid using excessive force to prevent damage.
Check For Hidden Clips Or Pins
Some handles have extra clips or pins holding them. Inspect the base of the handle carefully. Use pliers or a small tool to remove any clips or pins. This ensures the handle detaches fully without damage.

Credit: m.youtube.com
Inspecting For Damage
Before removing your kitchen faucet handle, inspecting it for damage is essential. This step helps you identify any issues that may affect the removal process or require replacement parts. It also saves you time and frustration by avoiding surprises once the handle is off.
Checking For Visible Cracks And Wear
Look closely at the handle’s surface for cracks, chips, or worn-out spots. These signs may mean the handle is fragile and could break during removal. If you spot any damage, handle the faucet gently and consider having a replacement ready.
Testing The Handle’s Movement
Try turning or lifting the handle slightly to see if it moves smoothly. Stiff or stuck handles often indicate buildup or internal corrosion. This insight can help you decide if you need extra tools like lubricant or a wrench to remove it safely.
Inspecting The Set Screw And Fasteners
Locate the set screw, usually hidden under a decorative cap or on the side. Check if it’s rusted or stripped, which can make removal tricky. Knowing this ahead lets you prepare the right screwdriver or drill bit to avoid damaging the screw or handle.
Assessing Water Damage Or Corrosion
Look around the base of the handle for signs of water stains or rust. Corrosion can weaken metal parts and make removal harder. Spotting this early warns you to proceed carefully and maybe replace corroded components afterward.
Cleaning The Area
Cleaning the area after removing the kitchen faucet handle is essential. Dirt and grime often build up around the base and inside parts. This cleaning prevents damage and keeps the faucet working smoothly. Take time to clean carefully for the best results.
Gather Cleaning Supplies
Collect all necessary items before starting. Use a soft cloth, mild soap, a small brush, and a bowl of warm water. Avoid harsh chemicals that can damage the faucet finish.
Remove Loose Debris
Use a dry cloth or brush to clear away loose dirt and dust. Pay close attention to crevices and tight spaces around the faucet base.
Clean With Soap And Water
Dip the cloth or brush in warm soapy water. Gently scrub the faucet area to remove grease and buildup. Rinse the cloth often to keep it clean.
Use A Toothbrush For Tight Spots
A soft toothbrush works well for hard-to-reach areas. Scrub gently to avoid scratching the faucet surface. Focus on joints and edges where grime hides.
Dry The Area Thoroughly
Wipe the cleaned area with a dry, soft cloth. Removing moisture helps prevent rust and water spots. Ensure the area is completely dry before reassembling the handle.
Installing New Handle
Installing a new kitchen faucet handle can refresh the look of your sink and improve functionality. It’s a straightforward task that you can complete with just a few tools and a bit of patience. Before you start, make sure you have the correct replacement handle that fits your faucet model.
Preparing The Faucet For The New Handle
First, clean the area around the faucet stem to remove any grime or mineral deposits. This ensures the new handle fits snugly and operates smoothly.
Check the stem for any damage or wear. If the stem is rough or corroded, the new handle might not work properly, so consider replacing that part as well.
Aligning The New Handle Correctly
Place the new handle onto the stem, making sure it aligns with the screw holes or slots. Misalignment can cause the handle to wobble or not function.
Take a moment to test the movement before securing it. Does it turn easily? Is it stable? These checks save you time fixing issues later.
Securing The Handle In Place
Use the provided screws or set screws to attach the handle firmly. Tighten them just enough to hold the handle securely without stripping the threads.
If your handle has a decorative cap, snap or screw it on last. This step not only improves the look but also hides the screws for a cleaner finish.
Testing The New Handle
Turn the handle on and off several times to make sure it operates smoothly and controls water flow properly.
Does it feel comfortable and responsive? If not, double-check the alignment and tightness of the screws.
Testing The Faucet
Testing the faucet after removing the handle is crucial to ensure everything works smoothly before you reassemble or replace parts. It helps you catch leaks, check water flow, and confirm that the internal mechanism is functioning properly. Taking the time to test now can save you from future hassles and unexpected repairs.
Checking For Leaks
Turn the water supply back on slowly. Watch closely around the faucet base and where the handle was removed. Even small drips can signal issues with the seals or internal parts that need attention.
If you spot leaks, you might need to replace worn-out washers or O-rings. Don’t ignore minor leaks—over time, they can cause bigger problems like water damage or mold.
Assessing Water Flow
Open the faucet to check the water pressure and flow rate. Is the water coming out smoothly and consistently? If the flow is weak or sputtering, debris might be stuck inside, or the cartridge could be clogged.
Try flushing the faucet by running water for a minute. This often clears small blockages. If the problem persists, cleaning or replacing the cartridge might be necessary.
Testing Handle Movement
Even without the handle, you can manually move the cartridge stem to feel for smooth operation. It should move without resistance or grinding. Stiff or jerky movement usually means internal parts are worn or damaged.
Have you ever experienced a faucet handle that felt rough or stuck? That’s often a sign it’s time to replace the cartridge or clean internal components. Smooth movement now means a longer-lasting faucet.
Credit: streamlinebath.com
Frequently Asked Questions
How Do I Safely Remove A Kitchen Faucet Handle?
Turn off the water supply first. Use an Allen wrench or screwdriver to loosen the set screw. Gently pull the handle upward to remove it without damaging parts.
What Tools Are Needed To Remove A Kitchen Faucet Handle?
You typically need an Allen wrench, screwdriver, and possibly pliers. These tools help loosen screws and pull off the handle safely.
Can I Remove The Faucet Handle Without Turning Off Water?
No, always turn off the water supply first. This prevents leaks or water damage during handle removal.
How To Identify The Type Of Kitchen Faucet Handle?
Look for visible screws or a decorative cap. Identify if it’s a lever, knob, or cross handle to choose the right removal method.
Conclusion
Removing a kitchen faucet handle is easier than it seems. You just need a few simple tools and some patience. Take your time to avoid damage and follow each step carefully. Once the handle is off, cleaning or repairs become much simpler.
This small task can save you money and time. Now, you can handle faucet issues with more confidence. Keep this guide handy for any future faucet work. Simple fixes like this keep your kitchen running smoothly.


