If you’ve ever tried to clean or fix your kitchen faucet sprayer, you know it’s not always easy to figure out how to remove it without causing damage. But don’t worry—removing your kitchen faucet sprayer doesn’t have to be a frustrating task.
In this guide, you’ll discover simple, step-by-step instructions that anyone can follow. Whether you’re dealing with a stuck hose or just want to replace the sprayer, you’ll find practical tips that save you time and avoid costly mistakes. Keep reading, and by the end, you’ll feel confident handling your kitchen faucet like a pro.
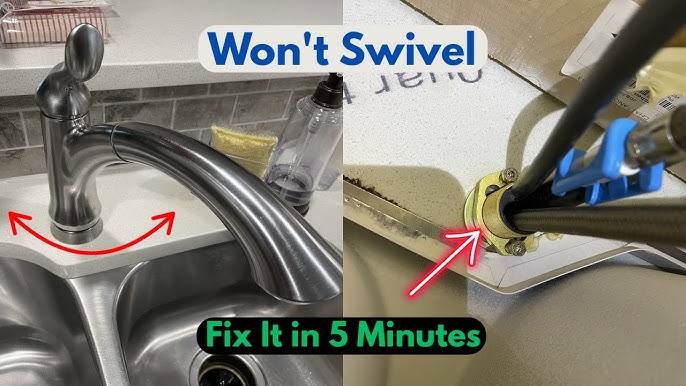
Credit: www.youtube.com
Tools Needed
Removing the sprayer from a kitchen faucet requires a few simple tools. Having the right tools ready makes the job easier and faster. Most of these tools are common in a basic household toolkit. Prepare each tool before starting to avoid interruptions.
Adjustable Wrench
An adjustable wrench helps loosen and tighten nuts under the sink. It fits different sizes of nuts and bolts. This tool is essential to disconnect the sprayer hose from the faucet.
Screwdriver
A screwdriver is needed to remove screws holding the sprayer in place. Check if you need a flathead or Phillips head screwdriver. Sometimes, both types might be required.
Pliers
Pliers provide a strong grip on small parts. They help twist and pull the sprayer hose if it is stuck. Use pliers carefully to avoid damaging the faucet parts.
Towel Or Rag
A towel or rag protects the sink and catches water drips. It also helps clean up any spills during the removal process. Keep it handy to keep your workspace dry and neat.
Bucket Or Bowl
Place a bucket or bowl under the sink to catch water. Disconnecting the sprayer hose may release water. This simple step prevents water from spilling on the floor.
Safety Precautions
Before you start removing the sprayer from your kitchen faucet, paying attention to safety is crucial. Handling plumbing parts without the right precautions can lead to unexpected injuries or damage to your faucet system.
Taking a moment to prepare and protect yourself will save you time and frustration. Have you ever tried fixing something only to end up making the problem worse? Let’s avoid that with some simple safety steps.
Turn Off The Water Supply
Always shut off the water supply to the faucet before you begin. This prevents water from spraying everywhere and causing a mess or potential water damage.
Look under your sink for the shut-off valves and turn them clockwise until fully closed. If your valves are old or stuck, consider using a wrench carefully to avoid breaking them.
Clear The Work Area
Make sure the space under your sink is clear of any clutter. This gives you room to move and reduces the risk of knocking over items or tripping.
Have a towel or small bucket ready to catch any water left in the hose or sprayer after disconnection. This simple step keeps your floor dry and safe.
Wear Protective Gear
Use gloves to protect your hands from sharp edges or grime inside the plumbing. Gloves also improve your grip when working with slippery parts.
Eye protection is a good idea too, especially if you expect water to drip or spray unexpectedly. You don’t want a surprise splash in your eyes while working.
Use The Right Tools
Using improper tools can damage your faucet or sprayer parts and even cause injury. Make sure you have adjustable wrenches, pliers, or screwdrivers that fit your faucet’s fittings.
Check tool conditions before starting—rusty or worn tools can slip and cause accidents. Investing in good tools makes your job easier and safer.
Test For Water Pressure Relief
After shutting off the water, open the faucet to release any remaining pressure. This step prevents water from unexpectedly spurting when you disconnect the sprayer hose.
Waiting a few seconds after opening the faucet helps ensure all pressure is gone. Have you noticed water squirting out after disconnecting plumbing before? This simple check stops that from happening.
Turn Off Water Supply
Turning off the water supply is the first and most important step to remove a kitchen faucet sprayer. This action stops water flow and prevents leaks or spills during the process. Always make sure no water will come out before starting any work on the faucet.
Shutting off the water ensures safety and avoids damage to your kitchen. It also makes the removal process easier and cleaner. Take your time to locate the right valves and turn them off completely.
Locate The Shut-off Valves
Look under the sink for two small valves. One controls hot water and the other controls cold water. These valves are usually near the water pipes. If you cannot find them, check the main water supply line.
Turn The Valves Clockwise
Use your hand to turn each valve clockwise. This closes the valve and stops water flow. Turn slowly and firmly until it stops. Avoid forcing the valve to prevent damage.
Test For Water Flow
Turn on the kitchen faucet after closing the valves. No water should come out. If water still flows, the valves may not be fully closed. Turn them again or check the main supply.
Use The Main Water Supply Valve If Needed
If there are no shut-off valves under the sink, find the main water supply valve. This valve controls water to the entire house. Turn it off to stop water flow completely.

Credit: www.youtube.com
Disconnect Sprayer Hose
Disconnecting the sprayer hose is a key part of removing your kitchen faucet sprayer. It might seem tricky at first, but with the right approach, it becomes a straightforward task. Let’s break down the process so you can confidently handle this step.
Locate The Sprayer Hose Connection
Start by looking under your sink to find where the sprayer hose connects to the water supply or faucet. It’s usually attached to a small plastic or metal fitting near the main faucet assembly.
Make sure you have enough light to see clearly. Sometimes, the space can be cramped, so a flashlight or phone light can be a big help.
Prepare Your Workspace
Before disconnecting, place a bucket or towel underneath the hose connection. This will catch any water that drips out when you detach the hose.
Turn off the water supply valves under the sink to avoid accidental leaks. It only takes a quick twist to shut off the flow.
Disconnect The Hose
Grip the hose fitting firmly and twist it counterclockwise. If it’s tight, you might need pliers, but be gentle to avoid damaging the threads.
Once loose, pull the hose away from the connection point. You might feel some resistance if there is a washer inside; wiggle gently to release it.
Check The Hose And Fittings
After removal, inspect the hose for any cracks or build-up that might affect performance. This is a good chance to clean or replace worn parts.
Also, check the threads on both the hose and faucet fitting. Damaged threads can cause leaks when reattaching, so take a moment to assess them carefully.
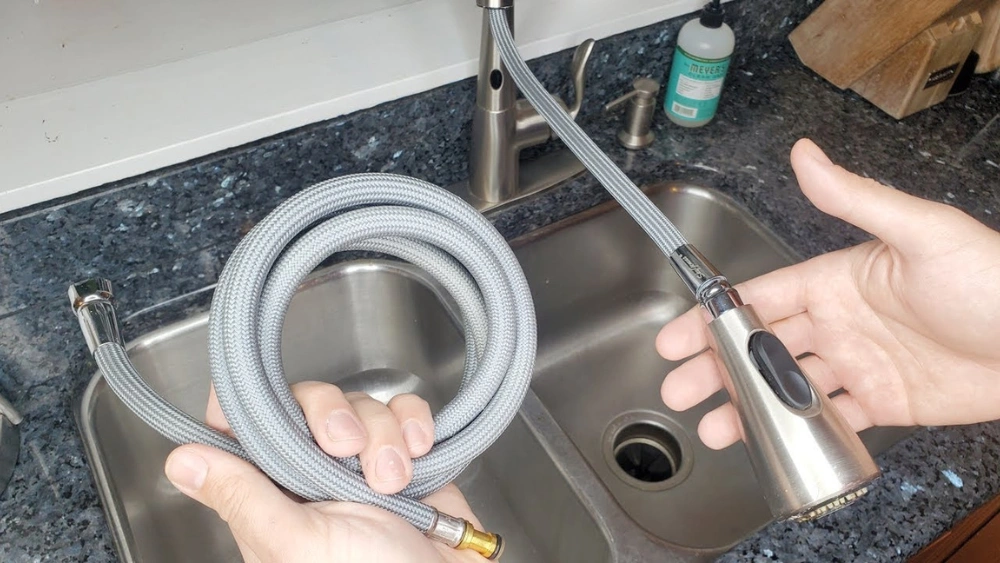
Remove Sprayer Head
Removing the sprayer head from a kitchen faucet is simple with the right approach. It allows cleaning, repair, or replacement. Understanding the removal process helps avoid damage and keeps your faucet working well.
Locate The Connection Point
Find where the sprayer head attaches to the hose. Usually, it screws on at the end of the flexible hose. This point is easy to spot near the base of the faucet or under the sink.
Unscrew The Sprayer Head
Hold the sprayer firmly. Turn it counterclockwise to loosen. Use your hand or a cloth for better grip. Avoid tools that can scratch the finish.
Check For Locking Mechanisms
Some sprayers have clips or buttons locking the head. Press or release these to free the sprayer. This step prevents damage to the sprayer or hose.
Clean The Threads And Hose End
After removal, clean the threads on the sprayer and hose. Use a soft cloth to remove dirt or mineral buildup. This keeps the parts in good condition for reinstallation.
Clean And Inspect
Cleaning and inspecting the sprayer after removal is a crucial step that many overlook. This process not only ensures your sprayer functions smoothly but also helps you catch any hidden damage early. You might be surprised how often buildup or small cracks cause big problems later.
Cleaning The Sprayer Head
Start by rinsing the sprayer head under warm water to remove loose dirt and grime. Use a soft brush or an old toothbrush to gently scrub away mineral deposits, especially around the nozzle holes. Avoid harsh chemicals; a mix of vinegar and water works wonders for breaking down stubborn scale.
Have you noticed water spraying unevenly or weakly before? This buildup is likely the culprit, and cleaning can restore your sprayer’s full power quickly.
Inspecting The Hose And Connections
Next, check the hose for any cracks, kinks, or wear that could cause leaks. Run your fingers along the hose to feel for weak spots or stiffness that may indicate damage. Don’t forget to examine the connections where the hose meets the faucet and sprayer head; loose or corroded fittings can cause leaks or reduce water flow.
Sometimes a small leak hides inside the connection, making it tricky to spot. Can you feel any dampness or see corrosion? Catching this now saves you from more extensive repairs later.
Checking The Sprayer Trigger And Button
Don’t overlook the trigger or button mechanism on the sprayer. Test it by pressing and releasing several times to ensure smooth operation without sticking or excessive resistance. If it feels stiff or doesn’t return properly, dirt or internal wear could be the cause.
Think about how often you use the sprayer—daily use can wear out these parts faster than you expect. Would a quick fix or replacement improve your kitchen routine?
Replace Or Reinstall
Deciding whether to replace or reinstall your kitchen faucet sprayer depends on its condition and your needs. Sometimes a simple reinstall fixes the problem, but other times a new sprayer can improve function and style. Let’s look at how to choose the right option for you.
Choosing A New Sprayer
Picking a new sprayer means considering compatibility with your existing faucet. Check the connection size and type to avoid surprises during installation. A universal sprayer might seem like an easy fix, but it can cause leaks if it doesn’t fit perfectly.
Think about the spray pattern and water pressure you want. Some sprayers offer multiple spray modes, which can make washing dishes easier. Also, consider the finish to match your kitchen’s look—chrome, brushed nickel, or matte black are popular choices.
When I replaced my sprayer, I chose one with a longer hose and a pause button. It made rinsing vegetables and filling pots much simpler. What features would make your kitchen tasks easier?
Reinstalling The Old Sprayer
If your sprayer is still in good shape, reinstalling it could save time and money. Before you start, inspect the hose and nozzle for cracks or blockages. Clean any debris you find to ensure smooth water flow.
To reinstall, align the sprayer with the hose connection and twist it on securely. Avoid overtightening to prevent damage. Test the sprayer by running water and checking for leaks or weak spray.
During my last reinstall, I realized the hose had a small kink. Straightening it instantly improved water pressure. Have you checked the hose path for any bends that might be slowing the flow?
Test For Leaks
Testing for leaks after removing the sprayer from your kitchen faucet is crucial. It helps ensure no water escapes from the connections. Leaks can cause water damage and increase your water bill. Checking carefully saves time and money later.
Turn on the water supply slowly and watch all joints. Pay close attention to areas where the sprayer was connected. Small drips can be easy to miss but cause problems over time.
Visual Inspection For Water Drips
Look under the sink and around the faucet base for any water drops. Use a flashlight to see dark or hidden spots. Wipe areas with a dry cloth to spot fresh moisture easily.
Feel For Moisture Around Connections
Run your fingers gently along hose connections and fittings. Moisture on your skin signals a leak. Check both hot and cold water lines to be sure.
Use Paper Towel To Detect Small Leaks
Place dry paper towels around the sprayer hose and fittings. Turn on water for a minute and then check towels. Wet spots on towels show where leaks happen.
Listen For Water Sounds
Sometimes leaks make quiet dripping or hissing noises. Stay silent and listen closely near the faucet area. Any unusual sound might mean a leak is present.
Fixing Minor Leaks Quickly
Tighten loose fittings with a wrench carefully. Avoid overtightening to prevent damage. Replace worn-out washers or seals if needed to stop leaks fast.
Troubleshooting Common Issues
Removing the sprayer for your kitchen faucet can sometimes lead to issues. Troubleshooting helps fix these problems quickly. Understanding common problems saves time and effort. Most issues relate to water pressure or leaks. Knowing how to identify and solve these issues keeps your faucet working well.
Low Water Pressure
Low water pressure often happens due to clogged spray heads. Mineral buildup blocks water flow. To fix this, soak the sprayer head in vinegar. Use a soft brush to clean small holes. Check the hose for kinks or bends that restrict water.
Another cause is a faulty valve inside the faucet. It may need tightening or replacement. Make sure to turn off the water supply before inspecting. Testing water pressure from the main faucet can help isolate the problem.
Leaking Connections
Leaks often appear where the sprayer hose connects to the faucet. Loose fittings cause water to drip or spray out. Tighten the connections gently with a wrench. Avoid overtightening to prevent damage.
Worn-out washers or O-rings inside the sprayer can cause leaks. Replacing these small parts often stops drips. Inspect the hose for cracks or holes that lead to leaks. Replacing the hose may be necessary if damaged.

Credit: www.reddit.com
Frequently Asked Questions
How Do I Disconnect The Kitchen Faucet Sprayer?
First, turn off the water supply under the sink. Next, detach the hose from the faucet base by unscrewing the connection. Finally, pull the sprayer out gently to remove it completely.
What Tools Are Needed To Remove A Kitchen Faucet Sprayer?
You typically need an adjustable wrench or pliers. A bucket or towel helps catch water drips. Sometimes, a flashlight is useful to see under the sink clearly.
Can I Remove The Sprayer Without Shutting Off Water?
It is not recommended to remove the sprayer without turning off the water. Leaving water on may cause leaks or water damage under the sink.
How To Prevent Damage When Removing A Faucet Sprayer?
Use gentle force when unscrewing or pulling parts. Avoid using excessive tools that may scratch or break fittings. Always follow manufacturer instructions for your specific faucet model.
Conclusion
Removing the sprayer from your kitchen faucet is simple. Follow the steps carefully, and you will succeed. Keep tools ready and work patiently. Check for leaks after reattaching parts. Regular maintenance helps keep your faucet working well. This task saves money and avoids calling a plumber.
Now, you can handle this job with confidence. A little effort goes a long way in home care.


