
Is your Moen kitchen faucet leaking or not working smoothly? Changing the cartridge might be the simple fix you need.
You don’t have to call a plumber or spend a lot of money. In this guide, you’ll learn step-by-step how to replace your Moen kitchen faucet cartridge quickly and easily. By the end, your faucet will feel like new again—and you’ll gain the confidence to tackle similar repairs on your own.
Let’s get started and save you time and frustration!
Credit: www.accio.com
Tools And Materials Needed
Replacing a Moen kitchen faucet cartridge requires a few basic tools and materials. Having everything ready makes the process smooth and quick. Each item plays a key role in removing and installing the cartridge safely.
Gather all the necessary tools before you start. This helps avoid interruptions and saves time. The right materials ensure a proper fit and prevent leaks after installation.
Basic Tools For Cartridge Replacement
- Adjustable wrench – for loosening nuts and bolts
- Screwdriver (Phillips and flathead) – for removing screws
- Allen wrench (hex key) – for set screws on some models
- Pliers – for gripping and turning parts
- Needle-nose pliers – for handling small clips and springs
- Utility knife – for cutting old seals or tape
- Bucket or towel – to catch water spills
Materials Needed For A Smooth Replacement
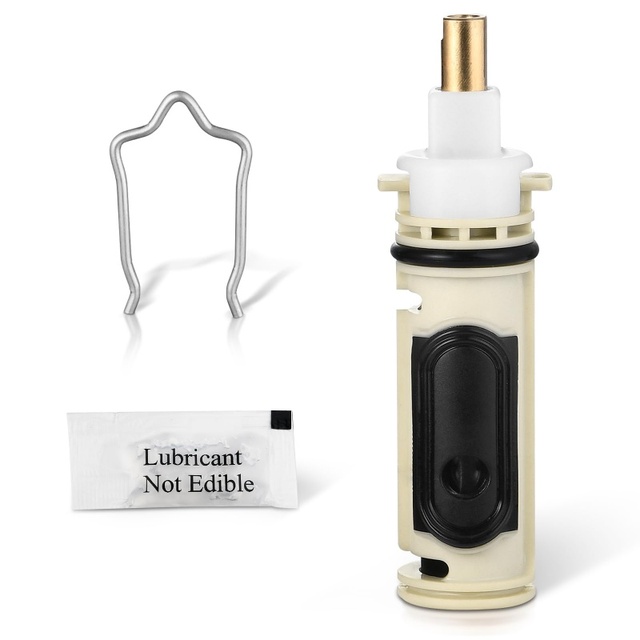
- New Moen cartridge – the exact model matching your faucet
- Plumber’s grease – to lubricate seals and moving parts
- Plumber’s tape (Teflon tape) – to seal threaded connections
- Clean cloth – to wipe parts and dry surfaces
- Replacement O-rings or seals – if your model requires them
Safety And Preparation Items
- Safety glasses – to protect your eyes from debris
- Work gloves – to protect your hands during the job
- Flashlight – for better visibility under the sink
- Shut-off valve knowledge – know how to turn off water supply
Preparing Your Workspace
Preparing your workspace is key before you start changing the Moen kitchen faucet cartridge. A well-organized area helps you work efficiently and avoid frustration. It also reduces the chances of losing small parts or damaging your faucet during the process.
Clear The Area Around Your Sink
Remove all items from under the sink and clear the countertop near your faucet. You want enough room to move freely and place tools where you can easily reach them. Clutter can slow you down and increase the risk of accidents.
Gather All Necessary Tools And Materials
Make sure you have everything ready before you begin. Common tools include an adjustable wrench, pliers, a screwdriver, and replacement cartridges. Having these on hand saves time and prevents interruptions.
Protect Your Sink And Surroundings
Lay down a towel or a small plastic sheet inside the sink to catch any dropped parts. This simple step can prevent scratches and keep your workspace tidy. It also makes cleanup easier once the job is done.
Turn Off Water Supply And Drain Lines
Locate the shut-off valves under your sink and turn them off to stop the water flow. Open the faucet to release any remaining water pressure. This prevents leaks and water damage while you work.
Set Up Good Lighting
Working in a well-lit space helps you see small parts clearly and avoid mistakes. Use a portable lamp or flashlight if your under-sink area is dark. Have you ever struggled to find a tiny clip in poor light? Proper lighting solves that problem.
Shutting Off The Water Supply
Shutting off the water supply is the first and most important step before changing a Moen kitchen faucet cartridge. It prevents water from spilling out and causing damage. Taking this precaution helps keep your kitchen dry and safe during the repair.
Most kitchen sinks have shut-off valves located under the sink. These valves control the flow of water to the faucet. Turning these valves off stops water from reaching the faucet, allowing you to work without worry.
Locate The Shut-off Valves
Look under the kitchen sink for two small valves. One controls hot water, the other controls cold. They usually connect to flexible water supply lines. These valves often have round or oval handles.
Turn Off The Valves
Rotate each valve clockwise to close it. Turn until you feel resistance and the valve stops. This action blocks water flow. Make sure to close both hot and cold valves.
Test The Faucet
After closing the valves, turn on the faucet handles. Water should stop flowing. If water still flows, the valves may not be fully closed. Try turning them a bit more.
Use The Main Water Supply If Needed
If under-sink valves are missing or broken, shut off the home’s main water supply. This valve is usually near the water meter or where water enters the house. Turning off this valve stops all water in the home.
Removing The Faucet Handle
Removing the faucet handle is the first key step to access the cartridge inside your Moen kitchen faucet. This part often looks simple but needs careful handling. A loose or stuck handle can cause damage if forced. Follow these tips to remove it smoothly and safely.
Locate The Handle Set Screw
Most Moen kitchen faucets have a small set screw holding the handle in place. This screw is usually hidden under a decorative cap or plug. Gently pry off the cap using a flathead screwdriver or a fingernail. Look carefully for the small screw inside the handle base.
Use The Right Tool To Unscrew
Use an Allen wrench or a screwdriver that fits the set screw perfectly. Turning the wrong tool can strip the screw head. Turn the screw counterclockwise to loosen it. Keep the screw safe for reassembly.
Remove The Handle Gently
Once the screw is loose, pull the handle straight up and off the faucet body. If it feels stuck, wiggle it slightly side to side. Avoid using excessive force to prevent breakage. If needed, apply a little penetrating oil and wait a few minutes before trying again.
Check For Additional Parts
Some Moen faucet models have extra parts like a cap or collar under the handle. Remove these parts carefully and place them aside. Keep track of each piece to avoid confusion during reassembly.
Accessing The Cartridge
Accessing the cartridge in your Moen kitchen faucet is a critical step. It requires careful attention to avoid damaging any components. Knowing exactly where and how to reach the cartridge can save you time and frustration.
Turn Off The Water Supply
Before you start, make sure to shut off the water supply under the sink. This prevents water from spraying out once you remove the faucet handle. Don’t forget to open the faucet briefly to drain any remaining water in the lines.
Remove The Faucet Handle
Look for a small cap or cover on the handle that hides the screw. Use a flathead screwdriver or an Allen wrench to remove it gently. Pull the handle straight up after the screw is out—you might need a little wiggle if it feels stuck.
Take Off The Retaining Clip Or Nut
After the handle is off, you’ll see the cartridge secured by a clip or a nut. Use needle-nose pliers to carefully remove the clip. If it’s a nut, a wrench will help loosen it. This step exposes the cartridge for easy removal.
Extract The Cartridge
Grip the cartridge firmly and pull it straight out. Some cartridges may be tight or stuck due to mineral buildup. If that happens, try gently twisting it back and forth while pulling. Remember, patience here prevents breakage.
Extracting The Old Cartridge
Extracting the old cartridge from your Moen kitchen faucet is a crucial step that requires patience and the right approach. If you rush or force parts, you might damage the faucet, leading to more costly repairs. Taking your time ensures you remove the cartridge cleanly and prepare your faucet for the new one.
Gather The Necessary Tools
Before you start, make sure you have the right tools on hand. A cartridge puller, adjustable wrench, and needle-nose pliers are often essential.
- Cartridge puller helps grip and extract the cartridge without damage.
- An adjustable wrench loosens retaining nuts.
- Needle-nose pliers assist in removing small clips or pins.
Missing a tool can turn a simple task into a frustrating ordeal. Have everything ready on your workspace before you begin.
Turn Off The Water Supply And Remove Faucet Handle
Start by shutting off the water supply valves under your sink. This prevents water from spraying unexpectedly.
Next, remove the faucet handle by loosening the set screw. Often, this screw hides under a decorative cap, so look carefully.
Once the handle is off, you’ll see the retaining clip or nut securing the cartridge.
Remove The Retaining Clip Or Nut
Use needle-nose pliers to carefully pull out the retaining clip. If your Moen faucet uses a nut instead, an adjustable wrench will loosen it.
Be gentle to avoid bending or breaking these parts since they hold everything in place.
Sometimes, these clips can be stubborn. Have patience and wiggle them slowly to avoid damage.
Pull Out The Old Cartridge
With the clip or nut removed, it’s time to extract the cartridge. Insert the cartridge puller into the cartridge and tighten it until it grips firmly.
Gently pull straight out to avoid twisting or damaging the faucet body.
If the cartridge sticks, try wiggling it slightly while pulling. Avoid using excessive force that might crack the faucet.
Inspect The Cartridge And Faucet Interior
After removal, check the old cartridge for wear or damage. This gives clues about what caused your faucet issues.
Also, look inside the faucet for debris or buildup. Cleaning this area can improve your faucet’s performance with the new cartridge.
Have you ever found mineral deposits blocking your faucet’s flow? Removing these before installing the new cartridge makes a big difference.
Installing The New Cartridge
Installing the new Moen kitchen faucet cartridge is a straightforward task that can save you both time and money. Once you’ve removed the old cartridge, it’s important to carefully place the new one to ensure your faucet functions smoothly and leak-free. Paying attention to the alignment and securing the cartridge properly will make a noticeable difference in your faucet’s performance.
Aligning The Cartridge Correctly
Before inserting the new cartridge, check for the small tabs or notches on its sides. These need to fit perfectly into the grooves inside the faucet body. If the cartridge isn’t aligned properly, the handle might not turn smoothly or the water flow could be uneven.
Take a moment to hold the cartridge up to the faucet opening and match the tabs carefully. It’s a simple step, but missing it can cause frustration later. Have you ever tried to force a part that just didn’t fit? Avoid that by confirming the alignment first.
Securing The Cartridge In Place
After aligning, gently push the cartridge all the way down into the faucet body. It should slide in smoothly without needing excessive force. Once seated, fasten the retaining clip or nut that holds the cartridge securely.
Use a screwdriver or wrench as needed, but don’t overtighten — this can crack the cartridge or damage the faucet. A snug fit is enough to prevent leaks and keep the cartridge stable during use.
Testing The Installation
Once the cartridge is installed and secured, turn the water supply back on slowly. Check the faucet handle for smooth operation and watch for any drips or leaks around the base. If you notice any issues, it’s worth double-checking the cartridge placement and the tightness of the retaining parts.
Does your faucet now move easily and deliver water without leaks? If yes, you’ve done the job right. If not, don’t hesitate to revisit the previous steps; a small adjustment can make all the difference.

Credit: www.aa-pat-testing.co.uk
Reassembling The Faucet
Reassembling the faucet is the final and important part of replacing your Moen kitchen faucet cartridge. It puts all the pieces back together and ensures your faucet works perfectly without leaks. Careful reassembly helps your faucet last longer and saves you from future problems.
Take your time during this process. Make sure each part fits correctly. This step is simple if you follow the right order and use the proper tools.
Place The Cartridge Back Into The Faucet Body
Align the cartridge with the faucet body. Make sure the tabs or notches match the slots. Gently push the cartridge into place until it fits snugly. Do not force it. A proper fit prevents leaks and ensures smooth operation.
Secure The Cartridge With The Retaining Clip
Locate the retaining clip or ring that holds the cartridge. Slide it carefully over the cartridge to lock it in position. Check that the clip sits flush and firmly holds the cartridge. This step keeps the cartridge stable inside the faucet.
Reattach The Faucet Handle
Place the handle back on the cartridge stem. Make sure it aligns correctly. Tighten the handle screw using an Allen wrench or screwdriver. Avoid overtightening. The handle should move smoothly without wobbling.
Replace The Decorative Cap Or Cover
Snap or screw the decorative cap onto the handle. This step hides the screws and gives a finished look. Make sure the cap fits securely and is not loose.
Turn On The Water Supply And Test The Faucet
- Turn on the water supply valves under the sink.
- Slowly open the faucet handle.
- Check for leaks around the cartridge and handle.
- Operate the handle to ensure smooth water flow.
- Shut off the faucet and confirm no dripping occurs.
Any leaks or stiffness may mean the cartridge or parts are not installed correctly. Adjust as needed before finishing.
Turning On The Water Supply
Turning on the water supply is an important step before installing the new Moen kitchen faucet cartridge. It ensures water flows smoothly through the faucet once the cartridge is in place. Before starting, check that all connections are secure to avoid leaks.
Locate the water shut-off valves under the sink. These valves control the water flow to the faucet. Usually, there are two valves: one for hot water and one for cold water.
Locate The Water Shut-off Valves
Look under your sink for two small valves. They are often near the pipes leading to the faucet. These valves control the water supply to the kitchen faucet.
Turn The Valves On Slowly
Turn each valve counterclockwise to open it. Open them slowly to prevent water pressure shocks. Listen for any unusual sounds or leaks during this process.
Check For Leaks Around The Valves
After opening the valves, inspect the connections. Look for water dripping or wet spots. Tighten any loose fittings if needed to stop leaks.
Test The Faucet Water Flow
Turn on the faucet handle to test water flow. Water should run smoothly and at full pressure. If the flow is weak, check the valves again.
Testing The Faucet
Testing the faucet after replacing the Moen kitchen faucet cartridge is essential to ensure everything works smoothly. This step lets you catch any leaks or issues before you finish the job. Taking the time to test will save you from future headaches and water damage.
Checking For Leaks
Turn on your water supply slowly and watch the faucet carefully. Look closely around the base and under the sink for any drips or moisture. Even a small leak can cause problems over time, so don’t ignore minor drops.
Testing Water Temperature And Flow
Operate the handle to check both hot and cold water. Does the water temperature change smoothly? Is the flow steady and strong? If you notice sputtering or inconsistent temperature, it might mean the cartridge isn’t seated correctly.
Listening For Unusual Noises
Pay attention to sounds as you turn the faucet on and off. Any strange noises like grinding or hissing can signal internal issues. These sounds might indicate that the cartridge isn’t aligned properly or that debris is stuck inside.
Verifying Handle Movement
Move the handle through its full range of motion several times. It should feel smooth without sticking or resistance. If the handle feels tight or loose, you may need to adjust the cartridge position or mounting screws.
Final Thoughts On Testing
Have you ever skipped testing a faucet after repair and regretted it? Taking a few extra minutes to check everything now can prevent a bigger mess later. Testing isn’t just about finding problems; it confirms your hard work paid off perfectly.
Troubleshooting Common Issues
Troubleshooting common issues with your Moen kitchen faucet cartridge can save time and prevent costly repairs. Many problems have simple fixes that do not require a plumber. Understanding these issues helps maintain smooth faucet operation and extends its life.
Leaks, low water pressure, and difficulty in handle movement are frequent signs of cartridge problems. Identifying the cause quickly allows for a faster, easier repair process. Below are common issues with clear solutions to help you troubleshoot effectively.
Leak Under The Faucet Handle
A leak under the handle often means the cartridge is worn out or damaged. Mineral buildup can also cause the cartridge to stick, leading to drips. Turn off the water supply before inspecting the cartridge. Remove the handle and check for cracks or debris. Clean or replace the cartridge if needed.
Low Water Pressure Or Irregular Flow
Low water pressure usually results from clogged cartridges or aerators. Debris blocks water flow inside the cartridge. Remove the cartridge and rinse it under water to clear blockages. Check the aerator at the faucet tip and clean it as well. Reinstall all parts properly after cleaning.
Handle Is Hard To Move Or Feels Stiff
A stiff handle signals cartridge wear or buildup of minerals. The cartridge may need lubrication or replacement. Use a silicone-based lubricant to ease handle movement. If stiffness remains, replace the cartridge with a new one. Ensure all parts fit correctly during reassembly.
Water Drips From The Spout
Dripping water from the spout means the cartridge seal is not tight. Worn seals inside the cartridge allow water to leak. Replace the cartridge or the seals inside it. Check the O-rings for damage and replace if necessary. This stops dripping and saves water.

Credit: www.youtube.com
Maintenance Tips
Proper maintenance keeps your Moen kitchen faucet working smoothly. Small, regular care prevents leaks and extends the faucet’s life. Simple habits protect the cartridge from damage and build-up.
Follow these tips to maintain your faucet and avoid frequent repairs. Clean parts gently and check for wear regularly. These steps save time and money in the long run.
Clean The Aerator Regularly
Remove the aerator to clear dirt and mineral deposits. Soak it in vinegar for 30 minutes. Rinse with water and reinstall to keep water flow steady.
Check For Leaks Early
Look under the sink for water drops or damp spots. Fix leaks quickly to stop water damage. Tighten connections or replace worn parts as needed.
Use Vinegar To Remove Mineral Deposits
Minerals clog the cartridge and reduce performance. Soak affected parts in vinegar overnight. Rinse thoroughly before putting them back.
Operate The Faucet Gently
Avoid using excessive force on the handle. Move the handle slowly to prevent cartridge wear. Gentle use prolongs the faucet’s lifespan.
Replace Cartridge When Necessary
Signs like dripping or difficulty turning signal cartridge wear. Replace the cartridge to restore smooth function. Keep a spare cartridge handy for quick fixes.
Frequently Asked Questions
How Do I Identify A Moen Faucet Cartridge?
Check the model number under the sink or on the faucet. Moen cartridges often have a unique shape and size. You can also visit Moen’s website for cartridge identification using your faucet model. Correct identification ensures you buy the right replacement part.
What Tools Are Needed To Change A Moen Cartridge?
You’ll need an Allen wrench, adjustable wrench, pliers, and a flathead screwdriver. A cartridge puller tool may help if the cartridge is stuck. Having the right tools makes the replacement process quicker and easier.
How Long Does It Take To Replace A Moen Faucet Cartridge?
Typically, it takes 20 to 30 minutes for a DIY replacement. Time varies based on experience and faucet model. Careful removal and installation prevent leaks and ensure proper function.
Can I Replace A Moen Cartridge Without Turning Off Water?
No, always shut off the water supply before replacing the cartridge. This prevents water damage and makes the process safer. Locate the shut-off valves under the sink and turn them off fully.
Conclusion
Changing a Moen kitchen faucet cartridge can save you money and time. Follow each step carefully and take your time. Use the right tools and keep parts organized. A smooth-running faucet means less stress and fewer leaks. Regular maintenance helps your faucet last longer.
You can do this job yourself with patience and care. Trust your skills and enjoy the results. Simple repairs like this make a big difference at home.


