
Is your mobile home kitchen faucet leaking or not working right? A faulty faucet can cause constant drips, waste water, and even raise your bills.
But don’t worry—you don’t need to call a plumber just yet. With a few simple steps, you can fix it yourself quickly and save money. In this guide, you’ll discover easy ways to repair your kitchen faucet, even if you’ve never done it before.
Ready to stop the drip and get your faucet working like new? Let’s dive in and get started!
Tools And Materials Needed
Before you start fixing your mobile home kitchen faucet, having the right tools and materials on hand makes the job smoother and faster. Missing a critical tool can turn a simple repair into a frustrating puzzle. Let’s look at what you’ll need to tackle the task confidently.
Basic Tools For Faucet Repair
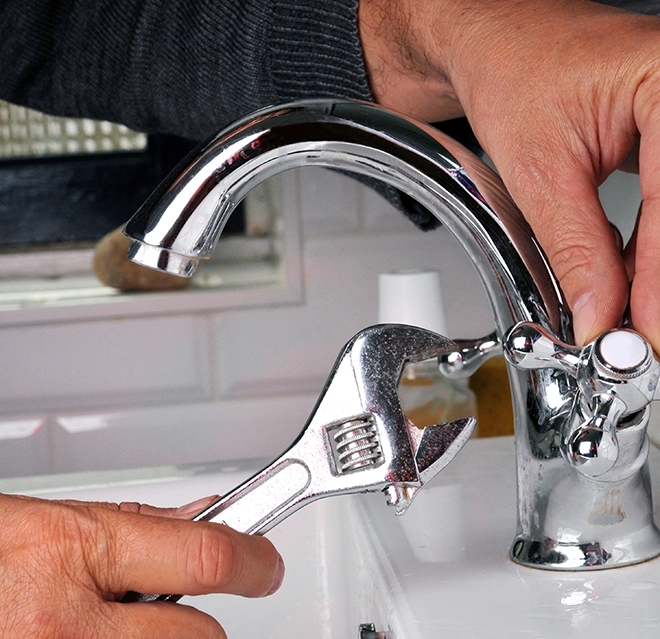
- Adjustable Wrench:Essential for loosening and tightening nuts without damaging them.
- Screwdrivers:Both flathead and Phillips types help remove screws holding the faucet parts.
- Pliers:Useful for gripping small parts or turning stubborn components.
- Allen Wrench:Some faucets use hex screws, so keep a set handy.
- Utility Knife:Handy for cutting old seals or trimming damaged parts.
Materials You’ll Need
- Replacement Washers and O-Rings:These are the most common culprits in leaks; having a variety of sizes is smart.
- Plumber’s Tape (Teflon Tape):Use this to seal threaded connections and prevent leaks.
- Faucet Grease:Keeps moving parts smooth and prevents future wear.
- Bucket or Bowl:To catch any water that drips during the repair.
- Rags or Towels:For cleaning up spills and drying parts.
Optional But Helpful Items
- Flashlight:Improves visibility in tight or dimly lit spaces under the sink.
- Needle-Nose Pliers:Perfect for reaching into narrow areas and handling small clips.
- Replacement Cartridge or Valve:If your faucet uses these parts, having spares ready can save you a second trip.
Have you ever started a repair only to realize you’re missing a key tool? That delay can break your momentum. Gathering everything beforehand lets you focus on the repair itself and get your kitchen faucet working smoothly again.
Credit: www.mrhandyman.com
Identifying The Problem
Knowing the exact issue with your mobile home kitchen faucet helps fix it faster. Problems can be simple or need part replacements. Careful checking saves time and money. Watch for common signs that point to the problem.
Leaky Faucet
A faucet that drips or leaks wastes water and causes stains. Check the spout and base for steady drips. Leaks often come from worn-out washers or seals inside the faucet. Look for puddles or water spots under the sink. These signs mean parts need replacing or tightening.
Low Water Pressure
Water flow that feels weak can make kitchen tasks slow. Check if water comes out in a thin stream or sputters. Low pressure may be caused by clogged aerators or pipes. Dirt or mineral buildup can block water. Cleaning or replacing parts restores strong flow.
Stiff Handle Movement
Handles that are hard to turn make using the faucet tough. Feel if the handle sticks or resists movement. Stiffness usually means buildup inside or worn parts. It can also signal dried-out or broken cartridges. Lubricating or swapping parts can ease handle action.
Preparation Steps
Before you jump into fixing your mobile home kitchen faucet, getting everything ready can save you a lot of hassle. Preparation is key to making the repair smooth and avoiding any unexpected mess or damage. Let’s look at the crucial steps you need to take to set yourself up for success.
Turning Off Water Supply
Shutting off the water supply is non-negotiable. It prevents flooding and water damage while you work on the faucet.
Locate the main water valve or the valve directly under your kitchen sink. These are usually easy to spot, but if you’re unsure, check your mobile home’s manual or ask a neighbor. Turn the valve clockwise until it stops. This completely stops water from flowing.
After turning off the valve, open the faucet to drain any remaining water in the pipes. This small step helps avoid surprises like water spurting out when you start disassembling the faucet.
Clearing The Workspace
A tidy workspace makes the repair less stressful and safer. Clear the area around your sink and under it where you’ll be working.
Remove any cleaning supplies, dishes, or clutter that might get in your way. You want enough room to move freely and place tools and parts without losing them.
Lay down a towel or a shallow pan under the faucet to catch any drips or small parts that might fall. This simple trick saved me from chasing tiny screws across the floor more than once.
Disassembling The Faucet
Disassembling the faucet is a crucial part of repairing your mobile home kitchen faucet. It allows you to identify the root cause of leaks or drips and gives you access to the components that need fixing or replacing. Taking this step carefully can save you both time and money.
Removing Faucet Handle
Start by turning off the water supply to avoid any unexpected splashes. Look for a small cap or decorative cover on the faucet handle. Gently pry it off with a flathead screwdriver to reveal the screw underneath.
Use a screwdriver to remove the screw holding the handle in place. If the handle feels stuck, try applying a little penetrating oil and wiggle it gently. Pull the handle straight up once it’s loose, and set it aside safely.
Accessing The Cartridge
With the handle removed, you’ll see the cartridge secured inside the faucet body. Sometimes, there’s a retaining clip or nut holding it in place; check for these and remove them carefully. If the cartridge is stuck, use pliers wrapped with a cloth to avoid damaging it while pulling it out.
Take note of the cartridge’s orientation before removal. This will help you install the new one correctly. If your faucet uses O-rings or seals, inspect them for wear and tear—they often cause leaks and should be replaced if damaged.
Fixing Common Issues
Fixing common issues in a mobile home kitchen faucet can save water and money. Most problems arise from worn parts or clogs. Simple repairs often restore smooth faucet function. Understanding these fixes helps maintain a reliable kitchen faucet.
Replacing Worn Washers
Worn washers cause dripping and leaks. Turn off the water supply before starting. Remove the faucet handle to access the washer. Take out the old washer and replace it with a new one of the same size. Tighten the parts carefully to avoid damage. Test the faucet to ensure the leak stops.
Cleaning Or Replacing Cartridge
The cartridge controls water flow inside the faucet. Dirt or mineral buildup can block it. Remove the handle and unscrew the cartridge carefully. Soak it in vinegar to dissolve deposits if cleaning. Replace the cartridge if it is damaged or worn out. Reassemble the faucet and check for smooth operation.
Addressing Water Pressure Problems
Low water pressure may come from clogged aerators or pipes. Unscrew the aerator at the faucet tip and clean it with a brush. Check for debris or mineral buildup in supply lines. Flush the pipes by running water for a few minutes. Replace any damaged or rusted pipes to restore proper pressure.

Credit: www.amazon.com
Reassembling The Faucet
Reassembling the faucet is the final step to bring your mobile home kitchen back to full function. It requires patience and attention to detail, but it’s not as tricky as it may seem. Getting the parts back in the right order ensures a leak-free, smooth-running faucet.
Reattaching Handle
Start by placing the handle back onto the faucet stem carefully. Make sure it fits snugly without forcing it; forcing can damage the internal parts. Secure the handle with the screw you removed earlier—tighten it just enough to hold firmly but avoid overtightening.
If your handle has a decorative cap, snap it back into place. This small detail makes your faucet look like new again and hides the screw.
Testing The Faucet
Turn the water supply back on slowly and watch for any leaks around the faucet base and handle. Open and close the handle a few times to check the water flow and ensure it’s smooth without sticking. If you notice drips or resistance, double-check the seals and the way the handle is attached.
Ask yourself: does the water stop completely when the handle is off? If not, a seal might still need adjustment. Testing now saves you from future headaches and water waste.
Maintenance Tips
Proper maintenance keeps your mobile home kitchen faucet working smoothly. Small efforts prevent big problems. Regular care saves time and money. Follow these simple tips to extend your faucet’s life and avoid common issues.
Regular Cleaning
Clean the faucet often to stop dirt build-up. Use a soft cloth and mild soap. Avoid harsh chemicals that can damage the finish. Focus on the handle, spout, and base. Removing grime helps water flow better and keeps the faucet looking new.
Clean the aerator by unscrewing it from the spout. Soak it in vinegar to remove mineral deposits. Rinse and reinstall for a steady water stream. This small step improves water pressure and saves water.
Checking For Leaks
Look for drips around the faucet base and under the sink. Even small leaks waste water and cause damage. Tighten loose parts gently with a wrench. Replace worn washers or seals to stop leaks. Early fixes prevent costly repairs later.
Check the water supply lines regularly. Replace cracked or stiff hoses to avoid bursts. Keep an eye on water stains or puddles near the faucet. These signs show hidden leaks that need attention.

Credit: www.tiktok.com
Frequently Asked Questions
How Do I Fix A Leaking Mobile Home Kitchen Faucet?
First, turn off the water supply. Check the faucet for worn washers or O-rings and replace them. Tighten any loose parts. If the leak persists, consider replacing the cartridge or seeking professional help.
What Tools Are Needed To Repair A Kitchen Faucet?
You’ll need an adjustable wrench, screwdriver, pliers, replacement washers or cartridges, and plumber’s tape. These tools help you disassemble, repair, and reassemble the faucet properly.
How Can I Stop My Faucet From Dripping Continuously?
Dripping often indicates worn washers or seals. Turn off water, disassemble faucet, and replace damaged parts. Clean components before reassembling to ensure a tight seal and prevent drips.
Is It Hard To Repair A Mobile Home Faucet Myself?
Basic repairs like replacing washers are easy with simple tools. More complex repairs may require plumbing knowledge. Follow step-by-step guides to save money and avoid calling a plumber.
Conclusion
Fixing your mobile home kitchen faucet saves time and money. Small leaks can cause big problems if left alone. Follow clear steps and use the right tools. Take your time and check for any issues carefully. A working faucet makes daily tasks easier and more pleasant.
Keep an eye on your faucet to catch problems early. Now, you can handle simple repairs with confidence. A little effort goes a long way in home maintenance.


