Is your kitchen faucet leaking or just not working the way it used to? Replacing a single handle kitchen faucet might seem tricky, but you can do it yourself without calling a plumber.
Imagine saving money and gaining the satisfaction of fixing something on your own. This guide will walk you through each simple step, making the process clear and stress-free. Keep reading, and you’ll have a brand-new faucet installed before you know it!
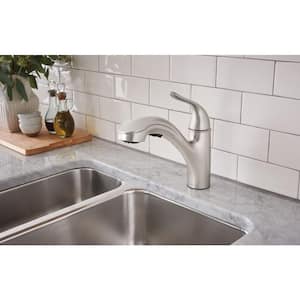
Credit: www.homedepot.com
Tools And Materials Needed
Before you start replacing your single handle kitchen faucet, gather all the necessary tools and materials. Having everything ready saves time and helps avoid frustrating interruptions. It also ensures you can handle unexpected challenges smoothly.
Essential Tools For Faucet Replacement
- Adjustable Wrench:Ideal for loosening and tightening nuts under the sink.
- Basin Wrench:Specifically designed to reach tight spots behind the sink basin.
- Screwdriver:Both flathead and Phillips types may be required to remove mounting screws.
- Plumber’s Putty or Silicone Sealant:To create a watertight seal around the faucet base.
- Bucket:Useful for catching any water that drips when disconnecting supply lines.
- Towels or Rags:To wipe up spills and keep the work area dry.
Materials You’ll Need
- Replacement Single Handle Kitchen Faucet:Double-check that the new faucet fits your sink configuration.
- Supply Lines (if not included):Flexible water supply hoses compatible with your faucet and plumbing.
- Plumber’s Tape (Teflon Tape):Helps prevent leaks on threaded connections.
Why Proper Tools Matter
Using the right tools makes the job faster and reduces damage risk. I once tried using pliers instead of a basin wrench and ended up scratching the sink’s finish. Don’t let simple mistakes cost you more time and money.
Clear the area under your sink. Good lighting and easy access make a big difference. Have your tools within reach but organized so you won’t waste time searching mid-task.
Do you have all these tools ready? If not, take a moment to gather them before diving in. Trust me, it will make your faucet replacement much smoother.
Preparing Your Workspace
Preparing your workspace is a key step before replacing a single handle kitchen faucet. A clean and organized area helps avoid mistakes and speeds up the process. Take time to set up properly. This saves effort and reduces stress.
Clearing The Area
Remove everything under the sink and on the countertop. Clear cleaning products, tools, and personal items. This gives you enough space to work comfortably. It also prevents damage to your belongings.
Place a bucket or towel below the faucet to catch water drips. Keep a flashlight nearby for better visibility. Make sure the floor is dry to avoid slipping.
Gathering Necessary Supplies
Collect all tools and materials before starting. Common supplies include:
- Adjustable wrench
- Basin wrench
- Screwdriver
- Plumber’s tape
- New single handle kitchen faucet
- Towels or rags
- Bucket for water
Having everything ready prevents trips to the store. Check the new faucet’s instructions for any special tools. Organize your supplies in one spot for easy access.
Turning Off Water Supply
Turning off the water supply is a crucial first step before replacing your single handle kitchen faucet. Skipping this step can lead to unexpected water spills and damage. Taking a moment to do it right saves you from costly cleanups and frustration later.
Locating Shut-off Valves
Start by looking under your kitchen sink. Most homes have two shut-off valves—one for hot water and one for cold water—usually attached to the pipes leading to your faucet.
If you can’t find them there, check near your home’s main water line or the basement. Sometimes, valves are hidden behind removable panels or inside cabinets.
Turn each valve clockwise to close it. You’ll feel resistance when fully shut. Don’t force it beyond this point, as that might damage the valve.
Draining Remaining Water
After closing the valves, open your faucet to release any water left in the pipes. This step reduces pressure and prevents water from spilling when you disconnect the faucet.
Keep the faucet open until the water flow completely stops. If water continues to drip, double-check that the valves are fully closed.
Consider having a small bucket or towel nearby. Even with the valves off, a little water can drip from the connections when you start loosening them.
Removing The Old Faucet
Removing the old kitchen faucet is the first step in installing a new one. It requires careful handling to avoid damage to your sink and plumbing. Begin by turning off the water supply. Then, work under the sink to disconnect and remove the faucet safely. Follow these key steps to remove the old faucet efficiently.
Disconnecting Water Lines
Locate the water shut-off valves under the sink. Turn them clockwise to stop the water flow. Use an adjustable wrench to loosen the nuts connecting the water lines to the faucet. Place a bucket or towel nearby to catch any water drips. Once loose, carefully disconnect both hot and cold water lines.
Loosening Mounting Nuts
Look under the sink for the mounting nuts holding the faucet in place. These nuts secure the faucet to the sink or countertop. Use a basin wrench or adjustable wrench to turn the nuts counterclockwise. They may be tight or corroded, so apply steady pressure. Remove all mounting nuts completely to free the faucet.
Lifting Out The Faucet
With the water lines and mounting nuts removed, the faucet is ready to lift out. Grasp the faucet firmly at the base. Pull straight up to avoid bending or damaging any parts. If stuck, gently wiggle the faucet back and forth to loosen it. Once free, lift the old faucet out and set it aside for disposal or recycling.
Cleaning The Sink Surface
Cleaning the sink surface is a crucial step before you replace your single handle kitchen faucet. A clean and dry surface helps prevent debris from falling into the plumbing during installation. It also gives you a clear view of any damage or wear that might need attention.
Gathering The Right Cleaning Supplies
You don’t need fancy products to get your sink spotless. Grab a mild dish soap, a soft sponge, and a microfiber cloth. Avoid harsh abrasives that could scratch your sink’s finish.
Removing Debris And Old Sealant
Start by wiping away any food particles or grease. If you spot old plumber’s putty or sealant around the faucet base, gently scrape it off with a plastic scraper or an old credit card. This prevents lumps from interfering with the new faucet’s seal.
Disinfecting The Surface
After cleaning, disinfect the area with a solution of equal parts water and white vinegar. Spray it on, let it sit for a minute, then wipe it off. This step kills bacteria and ensures the surface is hygienic before installation.
Drying And Inspecting The Sink Area
Use a microfiber cloth to dry the sink thoroughly. Check for cracks, rust, or stains that might need fixing before you proceed. A smooth, clean surface guarantees a better fit and longer-lasting installation.
Installing The New Faucet
Installing the new faucet requires careful attention to detail. Follow each part carefully to ensure a secure fit and proper function. Take your time to position, secure, and connect everything correctly.
Positioning The Faucet Base
Start by placing the faucet base into the sink hole. Align it so the handle faces the right direction. Make sure the gasket or putty is under the base to prevent leaks. Press down gently but firmly for a tight seal.
Securing Mounting Nuts
Under the sink, thread the mounting nuts onto the faucet shanks. Tighten them by hand at first, then use a wrench for a snug fit. Avoid over-tightening to prevent damage. Check that the faucet does not move.
Connecting Water Lines
Attach the hot and cold water supply lines to the faucet’s threaded connections. Hand-tighten first, then secure with a wrench. Turn on the water valves slowly and check for leaks. Tighten connections further if needed, but do not force.
Testing The New Installation
After installing your new single handle kitchen faucet, it’s essential to test the setup thoroughly. This step ensures everything works properly and prevents potential water damage. Taking the time to check your work now saves you headaches later.
Turning On Water Supply
Before you turn on the water, make sure all connections under the sink are tight and secure. Slowly open the shutoff valves—usually located beneath the sink—by turning them counterclockwise. Opening them gradually helps avoid sudden pressure that could loosen fittings.
As the water starts flowing, operate the faucet handle to allow water through both hot and cold lines. Pay attention to the water pressure and temperature to confirm everything functions as expected. Does the water flow smoothly without sputtering or unusual noises?
Checking For Leaks
With the water running, inspect every connection point carefully. Use a flashlight if needed to spot any drips or moisture around the supply lines, faucet base, and underneath the sink. Even a tiny leak can cause damage over time.
If you find any leaks, tighten the fittings slightly and recheck. Sometimes a small adjustment is all it takes. Have a towel or bucket nearby to catch any water during this process—it helps keep your workspace clean and dry.

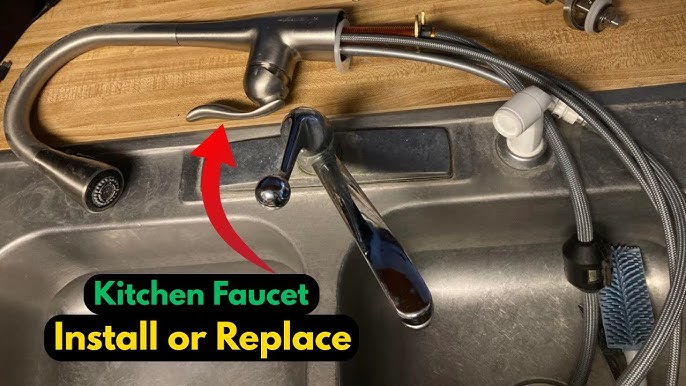
Credit: www.youtube.com
Final Adjustments
After installing your new single handle kitchen faucet, the final adjustments are crucial to ensure everything works smoothly and looks perfect. This stage is about fine-tuning the handle’s position and checking the water flow to avoid any surprises when you start using the faucet daily. Taking a bit of extra time here can save you from leaks or awkward handle placement later on.
Aligning Faucet Handle
The faucet handle should sit comfortably and align with the sink’s layout. If it feels stiff or loose, it’s usually a simple fix by adjusting the mounting nut under the sink or repositioning the handle itself.
Try moving the handle fully from hot to cold. Does it stop exactly where you want? If not, loosen the handle screw slightly, shift the handle, and tighten it back. This ensures smooth operation without hitting the backsplash or other obstacles.
Ensuring Proper Water Flow
Turn on the water supply slowly and observe the flow from the faucet. Are both hot and cold water coming out as expected? Uneven or weak flow might mean an issue with the supply lines or an aerator clog.
Check the aerator by unscrewing it from the faucet tip and cleaning out any debris. It’s surprising how often a simple cleaning can restore strong water pressure. Also, listen for any unusual sounds, which might hint at trapped air or loose connections.
Maintenance Tips
Maintaining your single handle kitchen faucet helps it last longer and work better. Small checks and cleanings keep problems away. A little care saves time and money on repairs.
Regular Cleaning
Clean the faucet often to stop dirt build-up. Use a soft cloth with mild soap and water. Avoid harsh chemicals that can damage the finish. Wipe dry to prevent water spots and stains. Clean the aerator by unscrewing it and rinsing under water. This keeps the water flow smooth and clear.
Checking For Wear And Tear
Look at the faucet parts regularly for damage or leaks. Check the handle for smooth movement. Listen for dripping sounds that mean a leak. Inspect the base and connections for loose fittings. Tighten screws and nuts if needed. Replace worn-out washers or cartridges to avoid bigger issues.

Credit: www.youtube.com
Frequently Asked Questions
How Do I Remove A Single Handle Kitchen Faucet?
Turn off the water supply first. Unscrew the mounting nuts under the sink. Disconnect the water lines carefully. Lift the faucet out once all connections are loose.
What Tools Are Needed For Faucet Replacement?
You will need an adjustable wrench, basin wrench, screwdriver, plumber’s tape, and a bucket. These tools help you loosen fittings and prevent leaks.
How Long Does It Take To Replace A Kitchen Faucet?
Replacing a single handle kitchen faucet typically takes 30 to 60 minutes. Time depends on your experience and faucet model complexity.
Can I Replace The Faucet Without Turning Off Water?
No, always turn off the water supply before replacing the faucet. This prevents water damage and accidental leaks during removal.
Conclusion
Replacing a single handle kitchen faucet is simple and quick. Follow each step carefully to avoid mistakes. Take your time and use the right tools. A new faucet can improve your kitchen’s look and function. You do not need to hire a plumber for this task.
Enjoy the satisfaction of completing a home project yourself. Keep instructions handy for future maintenance or repairs. This small change can make a big difference in your kitchen.


