Have you ever needed to drill a hole in glass but felt unsure about how to do it without cracking or breaking it? You’re not alone.
Glass can be tricky and delicate, but with the right tools and techniques, you can achieve a clean, precise hole safely. Using a Dremel makes this task easier and more manageable, even if you’re not a pro. You’ll discover simple, step-by-step tips to drill into glass confidently.
Keep reading—you’ll be surprised how straightforward it can be when you know the secrets.
Tools And Materials Needed
Drilling a hole in glass requires the right tools and materials. Using proper equipment ensures safety and success. Prepare everything before starting the project.
Choosing the correct tools helps make a clean hole without cracking the glass. Materials like water and tape protect the surface during drilling.
Essential Tools For Drilling Glass
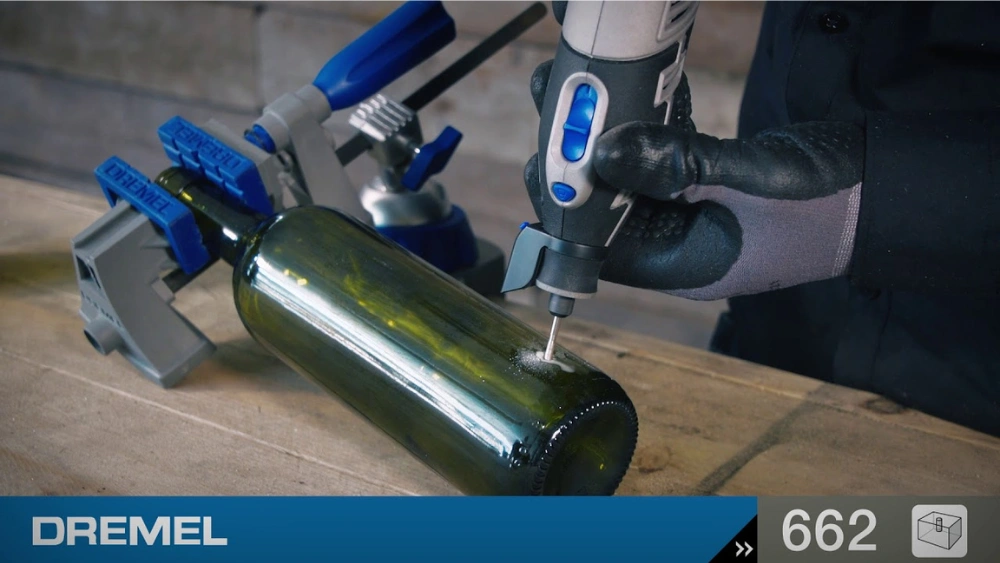
- Dremel rotary tool with variable speed settings
- Diamond-coated drill bits designed for glass
- Protective safety glasses to shield your eyes
- Masking tape or painter’s tape to mark and protect
- Clamps or a stable surface to hold the glass steady
Materials To Protect And Cool The Glass
- Water for cooling the drill bit and glass
- Small container or sponge to apply water continuously
- Soft cloth to clean the glass before and after drilling
Credit: www.tiktok.com
Safety Precautions
Drilling a hole in glass with a Dremel requires careful attention to safety. Glass can break easily and cause injuries. Protecting yourself and your workspace is essential to avoid accidents. Follow these safety precautions to work confidently and safely.
Wear Protective Gear
Always wear safety goggles to shield your eyes from glass shards. Use gloves to protect your hands from sharp edges. A dust mask helps prevent inhaling glass dust particles. Long sleeves can protect your arms from flying debris.
Secure The Glass Properly
Place the glass on a stable, flat surface. Use clamps or a non-slip mat to hold it firmly. This prevents the glass from moving or slipping during drilling. Movement can cause cracks or uneven holes.
Use The Right Drill Bit And Speed
Select a diamond-coated drill bit designed for glass. Avoid using bits meant for wood or metal. Set your Dremel to a low speed to prevent overheating. High speed can crack or shatter the glass.
Keep The Glass Cool
Drilling glass generates heat, which can cause cracks. Use water or a cooling spray to keep the area wet. Cool the glass continuously throughout the drilling process. This reduces heat and protects the glass.
Work In A Clean, Well-lit Area
Clear your workspace of clutter to avoid accidents. Good lighting helps you see the drilling spot clearly. A tidy area reduces distractions and improves focus.
Preparing The Glass
Preparing the glass properly is key to a smooth drilling process and helps prevent cracks or damage. Taking the time to clean and mark your glass ensures precision and safety. You’ll find the drilling much easier when the surface is ready.
Cleaning The Surface
Start by wiping the glass with a soft cloth and some rubbing alcohol or glass cleaner. This removes dust, grease, and fingerprints that could cause the drill bit to slip. Avoid abrasive materials that might scratch the glass before you start.
Once clean, dry the glass thoroughly. Moisture can interfere with marking and drilling, so make sure the surface is completely dry before moving on. Have you ever tried drilling only to have your drill slip because of dust? Cleaning stops that problem right away.
Marking The Spot
Marking the exact point to drill is crucial. Use a fine-tip permanent marker or a piece of masking tape to create a visible target. Masking tape also helps to reduce slippage by giving the drill bit extra grip.
Double-check your measurements before marking. It’s easy to misjudge placement, especially on a smooth surface like glass. If you’re drilling multiple holes, consider making a simple template out of cardboard or paper to keep your marks consistent.
Have you noticed how a clear, well-placed mark can boost your confidence during drilling? It keeps your focus sharp and helps you maintain control over the tool.
Setting Up Your Dremel
Setting up your Dremel correctly ensures a clean and safe drilling process on glass. This step requires focus and the right tools. Preparing your Dremel properly will help prevent cracks and chips in the glass. Follow these tips to get your tool ready for the job.
Choosing The Right Bit
Select a diamond-coated or carbide-tipped bit for drilling glass. These bits provide better durability and precision. Avoid using regular drill bits; they can cause damage. The size of the bit depends on the hole you need. Use smaller bits for tiny holes and larger ones for bigger holes.
Adjusting Speed Settings
Set your Dremel to a low or medium speed. High speeds can overheat the glass and cause cracks. Start slow and increase speed carefully if needed. Keeping a steady speed helps control the drill and reduces risks. Always test on a scrap piece before drilling the actual glass.
Drilling Technique
Drilling a hole in glass can feel intimidating, but with the right technique, you can achieve clean results without cracks or chips. The key lies in how you start and maintain control throughout the process. Each move you make affects the glass’s integrity, so precision and patience are your best tools.
Starting The Drill
Begin by marking the exact spot where you want the hole. Use a piece of tape over the mark to prevent the drill bit from slipping. This simple trick helped me avoid frustration and saved my project from unwanted scratches.
Set your Dremel to a low speed. High speeds generate heat, which can crack the glass. Gently press the bit against the tape and start drilling with light pressure.
Let the drill do the work; don’t force it. If you push too hard, you risk breaking the glass. Notice how the bit slowly grinds into the surface—that’s exactly what you want.
Maintaining Control
Keep your hand steady and your wrist firm. Unsteady movements increase the chance of slipping and ruining your work. If you feel your hand shaking, pause and adjust your grip.
Use water as a coolant by dripping it on the drilling area or dipping the glass in water. This keeps the bit cool and reduces dust. I found that a constant water supply prolongs the bit’s life and keeps the glass intact.
Take breaks often to check your progress. This prevents overheating and lets you assess if you’re drilling straight. Are you feeling the glass give way gently? That’s your sign to continue carefully.

Credit: www.youtube.com
Cooling And Lubrication
Cooling and lubrication are essential when drilling glass with a Dremel. Glass heats quickly and can crack without proper care. Keeping the drill bit and glass cool helps prevent damage. Lubrication also reduces friction, making the drilling smoother and safer. Use simple techniques to keep everything cool and working well.
Using Water
Water is the easiest coolant to use while drilling glass. It keeps the drill bit and glass surface cool. You can apply water in several ways:
- Dip the drill bit in water before and during drilling.
- Use a spray bottle to mist water on the drilling area.
- Place the glass piece in a shallow tray filled with water.
Water absorbs heat and reduces the risk of glass cracking. It also washes away glass dust, improving visibility.
Preventing Overheating
Overheating is the main cause of cracks in glass. Avoid applying too much pressure on the drill. Let the Dremel do the work at a slow speed. Pause frequently to let the drill bit cool down. Use short drilling bursts instead of continuous drilling. If the glass or bit feels hot, stop and cool them with water. This careful approach protects both the tool and the glass.
Finishing Touches
After drilling a hole in glass with your Dremel, the job isn’t quite finished yet. The final steps are crucial to ensure the hole is smooth, safe, and ready for use. Paying close attention here can make all the difference between a clean, professional result and a cracked or jagged mess.
Inspecting The Hole
Take a good look at the hole from different angles. Is the edge smooth or chipped? Sharp edges can cause injury or damage, so spotting imperfections now helps you decide if further smoothing is needed.
Hold the glass up to the light to check for cracks extending beyond the hole. Even tiny fractures can worsen over time, risking the entire piece. If you find any, reconsider using the glass or handle it with extra care.
Cleaning Up
Glass dust is fine and can be harmful if inhaled, so gently wipe the area with a damp cloth to remove debris. Avoid using harsh chemicals that might damage the glass or leave residue.
Use a small brush or a cotton swab dipped in rubbing alcohol to clean inside the hole. This removes any leftover dust and helps the hole look neat and polished.
Finally, dry everything thoroughly before moving on. Moisture left behind might cause slipping or weaken adhesives if you plan to attach hardware.
Troubleshooting Common Issues
Drilling a hole in glass with a Dremel can be tricky, and you might run into some common issues that slow you down or risk damaging your project. Knowing how to spot and fix these problems early can save you time and frustration. Let’s look at some typical challenges you might face and what you can do about them.
Cracking Glass
Cracks often appear when too much pressure is applied or if the glass heats up too quickly. You might feel tempted to push harder to speed things up, but this usually causes the glass to shatter.
Keep your Dremel moving gently over the surface and use water to cool the glass constantly. Water acts like a shield, preventing heat buildup that makes glass fragile. Have you ever noticed how glass feels warmer if you keep drilling without a break? That’s a sign to pause and cool down.
If a crack starts, stop immediately and assess the damage. Sometimes, slowing down and adjusting your angle can prevent the crack from spreading.
Uneven Edges
Uneven edges can ruin the look and function of your drilled hole. This usually happens if the bit wobbles or if you apply inconsistent pressure.
Try to keep your Dremel steady and hold it perpendicular to the glass surface. A shaky hand can cause jagged edges that are hard to fix later.
Using a guide or tape can help maintain a straight line. After drilling, smooth the edges with a fine-grit sanding bit or a diamond file to get a clean finish. Have you tried this approach before? A little extra time smoothing edges makes a big difference in the final look.

Credit: www.youtube.com
Frequently Asked Questions
How Do I Safely Drill A Hole In Glass With A Dremel?
Wear protective gear like goggles and gloves. Use a diamond drill bit and keep the glass wet to prevent cracking. Drill slowly with steady pressure to avoid overheating or breaking the glass.
What Type Of Drill Bit Works Best For Glass?
Diamond-coated drill bits are ideal for glass. They provide precision and reduce the risk of cracking. Avoid regular steel bits, as they can damage the glass surface.
Can I Drill Through Tempered Glass Using A Dremel?
No, drilling tempered glass is not recommended. Tempered glass is designed to shatter under stress. Instead, use annealed glass or consult a professional for tempered glass modifications.
How Do I Prevent Glass From Cracking While Drilling?
Keep the glass wet to reduce heat and friction. Use slow, steady pressure and avoid rushing. Supporting the glass firmly also minimizes vibrations that cause cracks.
Conclusion
Drilling glass with a Dremel takes care and patience. Use the right drill bit and keep the speed slow. Always protect your eyes and hands for safety. Keep the glass wet to avoid cracks. Take your time and work gently.
These steps help you make a clean hole. Practice on scrap glass before the real project. You can achieve good results with simple tools. Stay safe and enjoy your DIY work.


