Are your C9 LED bulbs flickering or not lighting up like they used to? Replacing them might seem tricky at first, but it’s actually simpler than you think.
Whether you’re decorating for the holidays or just need to fix a few bulbs, knowing how to replace C9 LED bulbs quickly can save you time and frustration. In this guide, you’ll get easy, step-by-step instructions that anyone can follow.
By the end, you’ll feel confident handling your lights like a pro—and have your decorations shining bright again. Keep reading to learn how to make your C9 LED bulbs work perfectly!

Credit: www.amazon.com
Tools And Materials Needed
Replacing C9 LED bulbs requires a few basic tools and materials. Having the right items ready makes the job easier and safer. Prepare everything before starting to avoid interruptions.
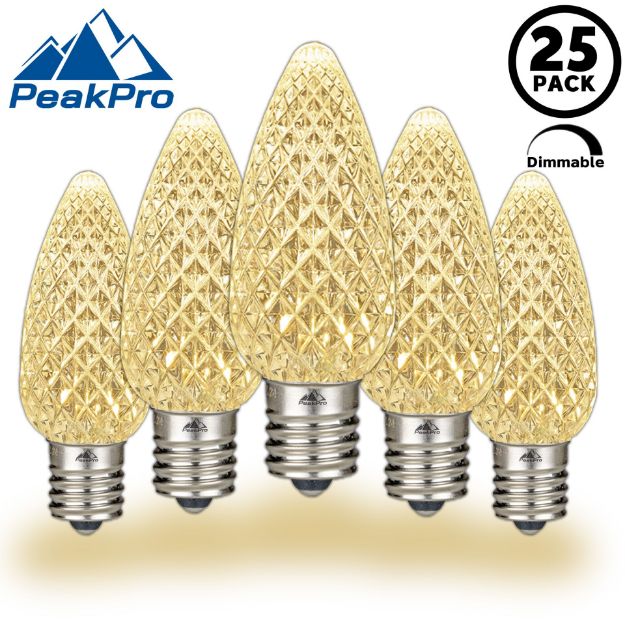
Replacement C9 Led Bulbs
Choose the correct size and color for your needs. Ensure the bulbs are LED type for energy efficiency and durability.
Gloves
Wear gloves to protect your hands and avoid fingerprints on bulbs. Gloves also help prevent static electricity damage.
Ladder Or Step Stool
Use a sturdy ladder or step stool to reach high places safely. Make sure it is stable and placed on a flat surface.
Soft Cloth Or Towel
Keep a soft cloth to wipe bulbs before installation. It helps remove dust and keeps bulbs clean.
Electrical Tape
Have electrical tape handy to secure any loose wires. It adds extra safety and prevents short circuits.
Safety Precautions
Replacing C9 LED bulbs might seem straightforward, but overlooking safety can lead to accidents or damage. Taking proper safety precautions protects you and ensures the bulbs work perfectly after replacement. Let’s look at essential steps you should never skip before and during the process.
Turn Off The Power Source
Always switch off the power before touching any bulbs. Unplug the string lights or turn off the circuit breaker to eliminate the risk of electric shock. Have you ever felt a small jolt while changing a bulb? Avoid that entirely by cutting the power first.
Use A Stable Ladder Or Step Stool
If your lights are installed high up, make sure you use a secure ladder or step stool. Wobbly support can cause falls, which are often more dangerous than electrical issues. Take a moment to check the ladder’s stability before climbing.
Wear Protective Gloves
Gloves protect your hands from sharp edges and potential burns if the bulbs were recently on. They also help you grip the bulbs better, preventing slips. Have you noticed how slippery some LED bulbs can be? Gloves solve that problem instantly.
Check Bulbs For Damage Before Installation
Inspect new bulbs for cracks or defects before placing them in the socket. Damaged bulbs can cause shorts or fail prematurely. Handling bulbs carefully also prevents breakage during installation.
Avoid Replacing Bulbs In Wet Conditions
Never replace bulbs outside when it’s raining or the lights are wet. Water and electricity do not mix and increase the risk of shock. Wait for dry weather or dry the bulbs and sockets thoroughly before proceeding.
Follow Manufacturer’s Guidelines
Each brand may have specific instructions for replacing their C9 LED bulbs. Ignoring these can lead to incorrect installation or void warranties. Have you checked the manual or packaging to confirm you’re using the right bulb type?
Removing The Old Bulbs
Removing old C9 LED bulbs is simple and quick. It ensures safety and prepares the string for new bulbs. Take your time and handle bulbs gently to avoid damage.
Turn off the power before starting. This prevents electric shock and protects the bulbs. Working with the lights off also helps you see better.
Locate The Bulb That Needs Replacement
Find the specific bulb that is burnt out or broken. Look closely along the string to spot any dark or cracked bulbs. Mark the bulb if needed to avoid confusion.
Gently Twist Or Pull The Bulb Out
Hold the base of the bulb firmly. Twist it counterclockwise or pull it straight out, depending on the bulb type. Use a steady hand to avoid breaking the bulb.
Dispose Of The Old Bulbs Properly
Place old bulbs in a container or wrap them in paper. This keeps broken glass from causing injuries. Recycle bulbs if your local facility accepts them.
Credit: noveltylights.com
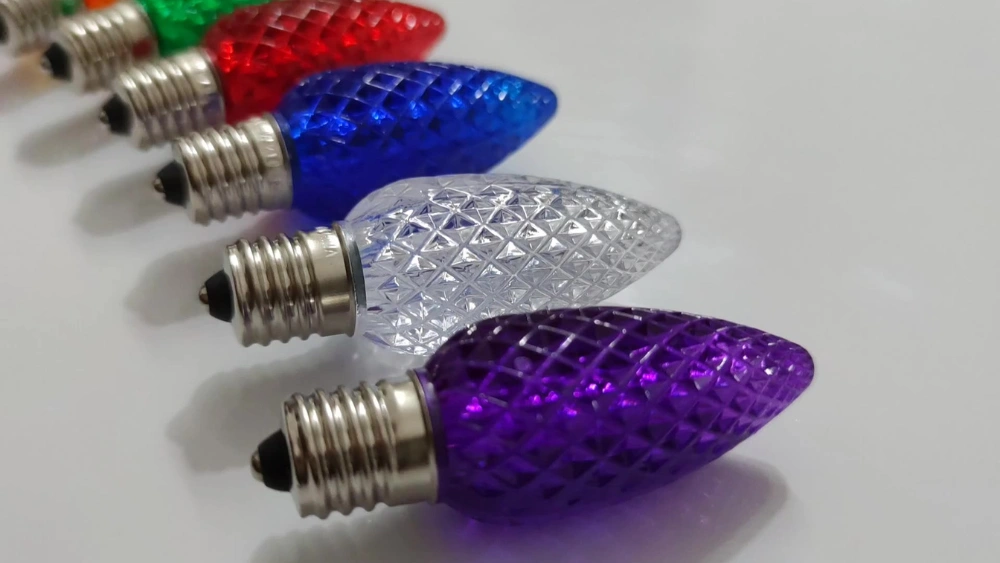
Choosing The Right C9 Bulbs
Choosing the right C9 bulbs is key to bright and safe holiday lights. Picking bulbs that match your string light’s specifications ensures they work well together. Wrong bulbs can cause flickering or even damage the string.
Understanding bulb size, voltage, and color helps you make the best choice. Here are important factors to consider before buying new C9 bulbs.
Check the Bulb Size and Base TypeC9 bulbs have a standard size and base. Make sure your replacement bulbs match the original ones. The base type is usually an E17 screw base. Using a different size or base can cause poor connection and loose bulbs.
Match the Voltage and WattageEach C9 bulb has a voltage and wattage rating. Check the string light’s label for these numbers. Using bulbs with incorrect voltage can burn out the bulbs or damage the string. Wattage affects brightness and energy use. Match the original wattage for best results.
Choose the Right Color and BrightnessC9 bulbs come in many colors and brightness levels. Select colors that fit your decoration style. Brightness varies by bulb type. LED bulbs are brighter and use less power than incandescent bulbs. Pick brightness that suits your needs and setting.
Consider LED vs. Incandescent BulbsLED C9 bulbs last longer and save energy. They run cooler and reduce fire risk. Incandescent bulbs give a classic warm glow but use more power. Choose LED bulbs for durability and efficiency. Use incandescent if you prefer traditional lighting.
Buy from Trusted BrandsQuality matters. Buy bulbs from known brands or reputable stores. Poor quality bulbs may not fit well or last long. Trusted brands often offer warranties and better customer support. This helps avoid issues with your holiday lights.
Installing The New Bulbs
Installing new C9 LED bulbs is a simple task that brightens your home instantly. It requires care and attention to avoid damage. Follow these clear steps to install bulbs safely and correctly.
Preparing The Socket For New Bulbs
First, make sure the power is off to avoid shocks. Check the socket for dirt or debris. Clean gently with a dry cloth if needed. This helps the bulb fit properly and last longer.
Inserting The New C9 Led Bulbs
Hold the bulb by the base, not the glass, to prevent breakage. Align the bulb’s base with the socket opening. Push the bulb firmly but carefully until it clicks into place. Avoid forcing it to prevent damage.
Checking The Connection And Power
After all bulbs are in place, turn the power back on. Watch for any bulbs that do not light up. If a bulb is off, remove it and reinsert it securely. Ensure all bulbs are seated properly for the best lighting.

Credit: www.amazon.com
Testing The Installation
Testing the installation of your C9 LED bulbs is a crucial step that ensures safety and functionality. You want to avoid any surprises like flickering lights or non-working bulbs after the effort you’ve put into replacing them. Taking a little extra time here can save you from future headaches and even electrical issues.
Checking For Proper Connections
Start by visually inspecting each bulb socket to make sure the bulbs are seated firmly. Loose connections often cause flickering or prevent the bulb from lighting up at all. Wiggle the bulbs gently to confirm they don’t move around, and verify that the wiring is secure and not frayed or damaged.
Powering On Safely
Before you plug in your string of bulbs, double-check that the power source is off. Once everything looks good, turn on the power and watch closely. Do the bulbs light up evenly? If some stay dark or flash, it could mean a faulty bulb or an issue with the wiring.
Using A Multimeter For Electrical Testing
If you want to be thorough, use a multimeter to test the voltage across the bulb sockets. This helps confirm that electricity is flowing correctly through the entire string. I once skipped this step and ended up chasing a loose wire for hours—don’t let that happen to you!
Spotting Flickers And Dimming
Flickering or dim bulbs often signal a problem that’s not visible at first glance. Keep an eye on the bulbs for several minutes after powering on. If you notice any flickering, try tightening connections or swapping out the suspect bulb to isolate the issue.
Testing In Different Conditions
Consider testing your C9 LED bulbs at different times of the day or during various weather conditions if they’re outdoors. Sometimes, temperature changes or moisture affect performance. Have you noticed your lights behave differently on chilly nights? That’s a sign to check seals and connections again.
Troubleshooting Common Issues
Troubleshooting common issues with C9 LED bulbs helps save time and effort. Many problems come from simple causes. Knowing how to check and fix these keeps holiday lights bright and safe. This section guides you through typical issues and easy fixes.
Checking For Loose Connections
Loose connections often cause bulbs to flicker or not light up. Inspect the bulb sockets carefully. Make sure each bulb fits tightly in its slot. Check the wiring for any gaps or breaks. Secure any loose plugs or sockets before testing again.
Replacing Burnt-out Bulbs
Burnt-out bulbs affect the whole strand. Identify bulbs that are dark or broken. Remove them gently and replace with new C9 LED bulbs. Ensure the replacement bulbs match the voltage and type of the original ones. This prevents further damage to the strand.
Testing The Power Supply
Power issues cause entire strings to fail. Check if the outlet works by plugging in another device. Use a voltage tester to confirm proper current. Replace damaged extension cords or power strips. Make sure the power source can handle the load of your lights.
Inspecting For Water Damage
Outdoor C9 LED bulbs face weather risks. Water inside sockets or wires causes shorts. Dry the area completely before use. Replace any parts showing corrosion or rust. Use weatherproof covers to protect your lights in the future.
Using A Bulb Tester
A bulb tester helps find faulty bulbs quickly. Insert each bulb into the tester. The tester lights up if the bulb works. Replace bulbs that do not light up. This tool saves time and avoids guesswork during repairs.
Maintaining Your C9 Bulbs
Maintaining your C9 LED bulbs is key to keeping your holiday lights bright and your decorations looking fresh year after year. Proper care not only extends the life of each bulb but also saves you time and money on replacements. A few simple habits can make a big difference in how your lights perform.
Cleaning Your C9 Led Bulbs Regularly
Dirt and dust can dim your bulbs and cause uneven lighting. Use a soft, dry cloth to wipe each bulb gently before storing or after outdoor use. Avoid harsh chemicals that might damage the bulb’s surface or its electrical components.
Have you noticed how a quick wipe can instantly brighten your display? It’s a small task that pays off in a big way.
Inspecting For Damage And Loose Connections
Take time to check each bulb for cracks, discoloration, or loose bases. Damaged bulbs can cause flickering or short circuits. Make sure the sockets are tight and the wires aren’t frayed—this helps prevent electrical hazards and keeps your display safe.
Think about the last time a single loose bulb caused your entire strand to go dark. Catching issues early can save frustration during your decorating season.
Storing Your C9 Led Bulbs Properly
When the season ends, how you store your bulbs matters. Wrap strands loosely to avoid tangles and use sturdy containers to protect them from moisture and crushing. Label your storage boxes so you can find what you need quickly next year.
Imagine opening your decorations to find bulbs tangled and broken. Proper storage prevents this and keeps your bulbs ready to shine.
Using The Right Power Source
Plug your C9 bulbs into a power source that matches their voltage requirements. Overloading an outlet can cause bulbs to burn out faster. Consider using a surge protector to guard against power spikes that might damage your lights.
Have you ever lost multiple bulbs after a storm? A surge protector can be a small investment that protects your entire setup.
Replacing Burned-out Bulbs Promptly
Don’t wait for your entire strand to fail before swapping out bulbs. Replacing burned-out bulbs promptly prevents strain on the rest of the circuit. Keep a few spare C9 LED bulbs handy so you can fix your lights quickly.
What’s better than a fully lit display? One that stays that way all season long because you caught problems early.
Frequently Asked Questions
How Do I Safely Remove A C9 Led Bulb?
Turn off the power before handling the bulb. Gently twist the bulb counterclockwise to loosen it. Pull it straight out without force to avoid damage.
What Tools Are Needed To Replace C9 Led Bulbs?
No special tools are required. Just use your hands to twist and pull the bulb. For hard-to-reach spots, a sturdy ladder and gloves may help.
How To Identify A Faulty C9 Led Bulb?
Look for flickering, dim light, or no light at all. Check if the bulb is warm or has visible damage. These signs indicate the bulb needs replacement.
Can I Use Any Led Bulb To Replace C9 Bulbs?
No, use bulbs specifically labeled as C9 LED. They fit properly and match voltage requirements. Using incorrect bulbs can cause damage or poor performance.
Conclusion
Replacing C9 LED bulbs is simple and safe with the right steps. Always turn off power before starting work. Handle bulbs gently to avoid damage. Use correct bulb types for best results. Regular checks keep your lights bright and working well.
Following these tips saves time and avoids frustration. Enjoy your festive lights shining brightly all season long. Small effort brings big holiday cheer.


