Are you ready to transform your daily shower into a spa-like experience? Installing a rain shower head can instantly elevate your bathroom and bring a soothing, luxurious feel to your routine.
But maybe you’re wondering if the installation is too complicated or time-consuming. The good news is, with a few simple steps, you can easily upgrade your shower without calling a plumber. In this guide, you’ll discover exactly how to install a rain shower head quickly and confidently, so you can enjoy that relaxing cascade of water every day.
Keep reading to unlock the secret to your perfect shower upgrade!

Credit: www.amazon.com
Choosing The Right Rain Shower Head
Choosing the right rain shower head is crucial for creating a relaxing and enjoyable shower experience. Not all rain shower heads are the same, and picking the one that fits your needs and bathroom setup can make a big difference. Let’s look at what options you have and which features really matter.
Types Of Rain Shower Heads
Rain shower heads come in different shapes, sizes, and installation styles. Here are the main types you’ll encounter:
- Ceiling-mounted:These are installed directly above you, offering a true rainfall effect. They require plumbing in the ceiling, so installation might be more involved.
- Wall-mounted:Easier to install on an existing shower arm, these offer a rainfall experience but from a slightly angled position.
- Handheld rain shower heads:Combine the rain effect with flexibility. You can detach the head for targeted rinsing.
- LED rain shower heads:Add a fun visual element with built-in lighting. They often include temperature-sensitive colors.
Which type fits your bathroom layout and lifestyle? That’s the first question you should ask yourself.
Features To Consider
After narrowing down the type, think about the features that will impact your daily use:
- Size:Larger heads cover more area but may need higher water pressure to perform well.
- Material:Stainless steel and brass last longer and resist corrosion better than plastic.
- Spray settings:Some rain shower heads offer multiple spray patterns, adding versatility to your shower.
- Water efficiency:Look for models with low flow rates that save water without sacrificing comfort.
- Ease of cleaning:Silicone nozzles reduce limescale buildup, making maintenance simpler.
Think about your water pressure at home and how much you want to spend on upkeep. What features will enhance your shower routine the most?
Gathering Necessary Tools
Before installing a rain shower head, collect all tools. Having everything ready saves time and avoids frustration. Knowing the tools helps prepare for a smooth installation process.
Basic Tools Required
- Adjustable wrench – to loosen and tighten fittings
- Plumber’s tape (Teflon tape) – to seal threads and prevent leaks
- Screwdriver – for removing or securing screws
- Cleaning cloth – to wipe off dirt and water spots
- Bucket or small container – to catch water drips
Optional Tools For Enhanced Installation
- Pipe wrench – for extra grip on stubborn pipes
- Plumber’s putty – to create watertight seals on joints
- Step ladder – to reach higher shower fixtures safely
- Silicone sealant – to reinforce waterproof seals
- Flashlight – to see clearly in dark or tight spaces
Preparing The Shower Area
Preparing your shower area before installing a rain shower head is essential for a smooth upgrade. Taking the time to clean and inspect the space ensures that your new fixture works perfectly and lasts longer. Let’s dive into what you need to do to get your shower ready.
Cleaning And Removing Old Fixtures
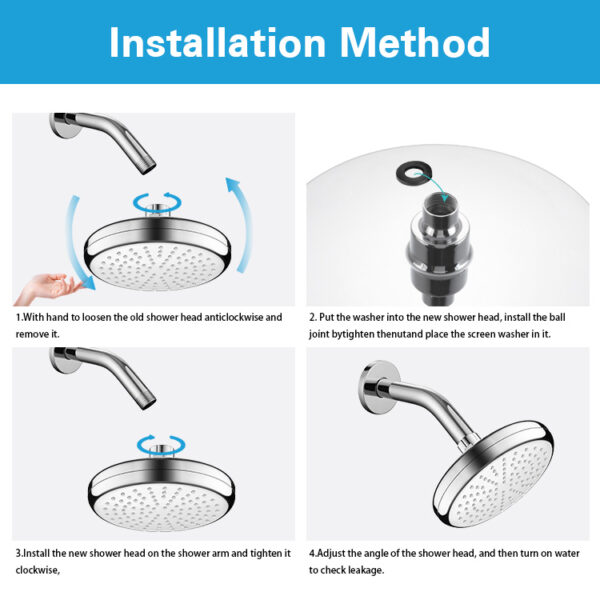
Start by turning off the water supply to avoid any leaks or sprays while you work. Remove the existing shower head carefully; sometimes they’re hand-tightened, but you might need a wrench. Protect the fixture by wrapping it with a cloth before using tools to avoid scratches.
Once removed, clean the shower arm threads thoroughly. Old plumber’s tape, mineral deposits, and grime can block a secure fit for your new rain shower head. Use a brush or cloth with some vinegar to loosen stubborn buildup.
Don’t rush through this step. A clean, smooth surface means your new shower head will attach tightly and won’t leak. Have you ever installed a fixture only to find water dripping later? Cleaning first helps you avoid that hassle.
Checking Water Pressure
Your rain shower head needs good water pressure to work well. Before installation, test your shower’s water pressure using a pressure gauge or by observing the water flow. If the pressure is weak, the large rain shower head might not deliver the refreshing experience you expect.
Low pressure can result from clogged pipes or valves, so check those if your water flow is weak. Sometimes, simply cleaning the shower valve or replacing an old pipe section can improve pressure. If you notice persistent low pressure, consider installing a booster pump or choosing a shower head designed for low pressure.
Have you checked your water pressure lately? It’s a quick step that can save frustration and ensure your new rain shower head performs beautifully right from the start.

Credit: www.theshowerheadstore.com
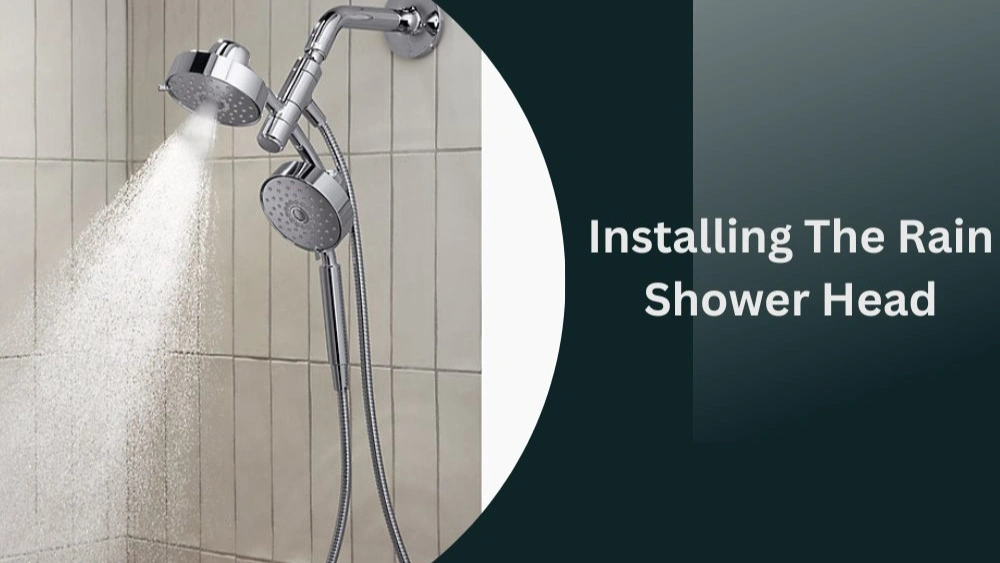
Installing The Rain Shower Head
Installing a rain shower head transforms your daily shower into a luxurious experience. The process involves a few simple steps that anyone can handle with basic tools. Paying attention to details during installation ensures a leak-free and secure setup that lasts.
Attaching The Shower Arm
Start by wrapping plumber’s tape around the threads of the shower arm. This prevents leaks and creates a tight seal. Screw the shower arm into the wall pipe by hand, then tighten it gently with a wrench—avoid overtightening to protect the plumbing.
Check that the arm is angled correctly to direct water flow where you want it. If it feels loose, adjust and re-tighten carefully. Have you considered how much water coverage you want? The arm position makes a big difference.
Securing The Shower Head
Next, apply plumber’s tape to the threads of the shower head to ensure a secure fit. Screw the rain shower head onto the shower arm by hand until it’s snug. Use a soft cloth with a wrench to tighten it further without scratching the finish.
Test the shower head by turning on the water to check for leaks. If water seeps out, tighten the connection slightly more or add extra plumber’s tape. How often do you check your shower for leaks? Catching them early saves a lot of hassle.
Ensuring Proper Seal And Function
Ensuring a proper seal and function is key to enjoying your new rain shower head without annoying drips or poor water pressure. A tight seal prevents water wastage and damage to your bathroom, while correct function guarantees a relaxing shower experience. Taking the time to test and adjust your setup now saves you from future headaches.
Testing For Leaks
After installing the shower head, turn on the water slowly and watch closely for any drips around the connection points. Even a small leak can lead to water damage over time, so don’t ignore tiny drops.
- Check the joint between the shower arm and the shower head.
- Feel for moisture around the threaded connections.
- Use a dry cloth to wipe and spot any developing leaks.
If you notice leaks, consider tightening the connection by hand and then with a wrench, but avoid overtightening to prevent damage. Applying plumber’s tape to the threads before securing the head can create a better seal. Have you ever ignored a small leak only to find a puddle later? Catching it early is much easier.
Adjusting Water Flow
Rain shower heads often come with adjustable flow settings. Play around with these to find the pressure that feels best for you.
- Start with a moderate flow to avoid splashing outside the shower.
- Increase pressure if the water feels too gentle.
- Reduce flow if water waste concerns you or if your home has low water pressure.
Remember, a luxurious shower isn’t just about volume but the quality of water distribution. Try adjusting the angle and height as well to maximize coverage and comfort. How does your shower experience change when you tweak the settings? Small adjustments can make a big difference.
Credit: leelongs.com
Adding Finishing Touches
After installing your rain shower head, adding the finishing touches is key to creating a polished look and enhancing your overall shower experience. These small details can make a big difference in both function and style. Paying attention to these aspects ensures your shower not only works well but also looks inviting and feels refreshing every time you use it.
Enhancing Shower Design
Think about how your rain shower head fits into the rest of your bathroom decor. Matching the finish of the shower head with other fixtures like faucets, towel bars, or shower handles creates a unified look. You might choose sleek chrome for a modern vibe or brushed nickel for a softer, more classic feel.
Adding a stylish shower arm or an adjustable mount can also improve both the look and functionality. Have you considered installing a rain shower head with LED lights? It adds a fun and luxurious touch that can brighten your shower routine.
Don’t forget to select a shower curtain or glass door that complements your new setup. The right choice here can highlight your rain shower head and keep water where it belongs.
Maintaining Your Shower Head
Keeping your rain shower head clean is essential for lasting performance and water flow. Mineral buildup can clog the nozzles, reducing water pressure and ruining your perfect shower experience.
- Regularly wipe the shower head with a soft cloth to remove soap scum and grime.
- Soak the shower head in a vinegar solution every few months to dissolve mineral deposits.
- Check for leaks or loose fittings to prevent water waste and damage.
Have you noticed water spraying unevenly or less forcefully? Cleaning or replacing the shower head might be necessary. Simple upkeep keeps your rain shower head feeling brand new longer and saves you money on repairs or replacements.
Frequently Asked Questions
What Tools Are Needed To Install A Rain Shower Head?
You need an adjustable wrench, plumber’s tape, a cloth, and a ladder. These tools help ensure a secure and leak-free installation.
How Do I Prepare The Shower Arm For Installation?
Clean the shower arm threads and wrap plumber’s tape clockwise. This prevents leaks and ensures a tight fit for the rain shower head.
Can I Install A Rain Shower Head Myself?
Yes, most rain shower heads are DIY-friendly. Basic tools and following instructions carefully make installation simple and quick.
How Do I Avoid Leaks During Installation?
Apply plumber’s tape properly and tighten connections without overdoing it. This creates a tight seal and prevents water leaks effectively.
Conclusion
Installing a rain shower head can improve your bathroom experience. Follow the steps carefully for a smooth setup. Take your time to avoid leaks or damage. Use the right tools and materials for best results. Enjoy the relaxing water flow once the job is done.
Regular cleaning keeps the shower head working well. A small effort brings big comfort every day. Give your bathroom a fresh, modern look easily. Simple changes often make the biggest difference.


