
Have scratches on your vinyl floor that just won’t go away? You’re not alone.
Scratches can make your beautiful floor look old and worn out, but the good news is you don’t have to replace it. Imagine restoring your floor’s smooth, shiny surface with simple steps you can do yourself. You’ll discover easy and effective ways to fix those scratches and bring back the fresh look your home deserves.
Keep reading to learn how to protect your floor and save money at the same time!

Credit: www.angi.com
Identify Scratch Types
Identifying the types of scratches on your vinyl floor is the first step in restoring its pristine appearance. Scratches can vary significantly, both in depth and effect on the floor’s surface. Understanding these differences will help you choose the right approach for repair and maintenance. Whether you’re dealing with surface scratches that mar the finish or deep gouges that require more intensive treatment, pinpointing the scratch type is crucial for effective repair.
Surface Scratches
Surface scratches are the most common and often the easiest to fix. They occur when something lightly grazes the floor, leaving behind a mark without penetrating deeply. The good news is that these scratches often only affect the top layer or finish.
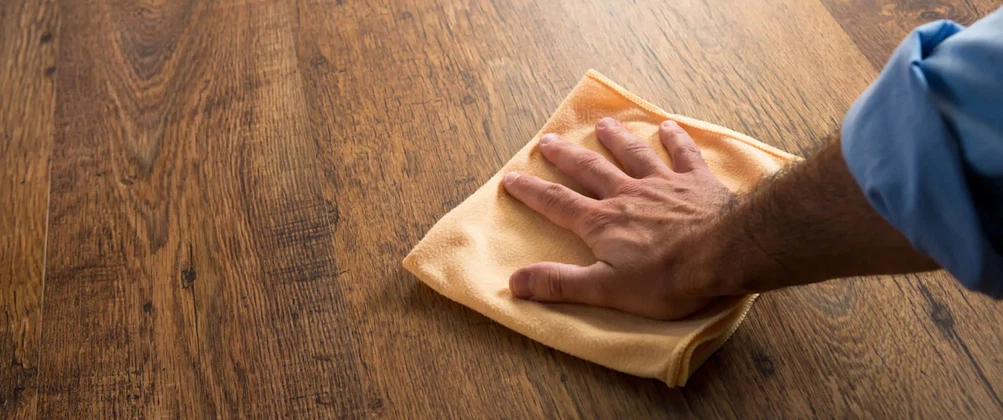
To fix surface scratches, you might consider using a gentle cleaner and a soft cloth to buff out the marks. Sometimes, a simple DIY solution involving a mixture of water and vinegar can help restore the floor’s shine. Have you ever tried using a homemade polish to tackle these minor blemishes?
Deep Gouges
Deep gouges are more challenging as they penetrate beyond the surface layer. These scratches can be caused by heavy objects or sharp items dragged across the floor. They might even expose the underlying material, making them more noticeable.
Repairing deep gouges may require filling the scratch with a vinyl floor repair kit. These kits often include a color-matched filler and a tool to smooth it out. Consider whether the gouge might benefit from professional repair if the damage is extensive. Would you invest in a kit or seek expert help for a flawless finish?
Gather Repair Materials
Gathering the right materials is essential to fix scratches on vinyl floors. Using proper supplies makes the repair easier and more effective. Prepare everything before starting the repair process for best results.
Cleaning Supplies
- Mild detergent or vinyl floor cleaner
- Soft cloth or microfiber towel
- Warm water
- Isopropyl alcohol (for stubborn dirt)
Cleaning the scratched area is the first step. Dirt and dust can hide the scratch and affect the repair. Use a gentle cleaner and a soft cloth to avoid more damage.
Repair Kits
- Vinyl floor repair kit with putty or filler
- Color matching markers or crayons
- Clear sealant or finish
Repair kits contain materials made for vinyl floors. Choose a kit that matches your floor color. These kits help fill in scratches and restore the floor’s look.
Tools Needed
- Plastic putty knife or scraper
- Fine-grit sandpaper
- Small paintbrush
- Tweezers
Use tools carefully to avoid more floor damage. A putty knife helps spread filler evenly. Sandpaper smooths the repair area. A small brush applies sealant gently.
Prepare The Floor
Preparing your vinyl floor before fixing scratches is essential for a smooth and lasting repair. You want to make sure the surface is clean and completely dry so the repair materials stick properly. Neglecting this step can cause the fix to fail or look uneven.
Clean The Area
Start by removing all dust, dirt, and debris from the scratched spot. Use a soft broom or vacuum cleaner to pick up loose particles without damaging the floor further. Then, gently wipe the area with a damp cloth and a mild detergent solution to lift any stubborn grime.
Pay special attention to the edges of the scratch, as dirt often hides there. If you skip this, the scratch might remain visible even after the repair. Have you noticed how even a tiny speck of dust can ruin a fresh coat of paint? The same principle applies here.
Dry Completely
After cleaning, allow the floor to dry thoroughly before applying any repair products. Moisture trapped under repair material can cause bubbles or peeling later on. Use a dry, lint-free cloth to blot the area and then let it air dry for at least 30 minutes.
If you’re in a hurry, a fan or hairdryer on low heat can speed up the drying process. Just be careful not to overheat the vinyl, as excessive heat can cause warping. Have you ever tried fixing something only to realize the surface was still wet? Avoid that frustration here by being patient.

Credit: www.angi.com
Fix Light Scratches
Light scratches on vinyl floors can be frustrating, especially when they stand out on an otherwise smooth surface. The good news is that many of these minor blemishes are easy to fix without professional help. With a little patience and the right tools, you can restore your floor’s appearance quickly.
Use A Vinyl Floor Repair Kit
A vinyl floor repair kit is designed specifically to handle light scratches and scuffs. These kits usually include colored putty or markers that match your floor’s shade, making the repair nearly invisible.
Start by cleaning the scratched area to remove dirt and debris. Then, apply the putty or marker carefully into the scratch. Allow it to dry fully, and you’ll often find the scratch blends perfectly with the rest of the floor.
Have you noticed that some kits come with multiple shades? This allows you to mix colors and get an exact match for your floor, which really improves the final look.
Apply Heat Method
Heat can sometimes help make light scratches less noticeable by softening the vinyl surface. Use a hairdryer on a low setting and hold it a few inches away from the scratch for about 30 seconds.
Once the vinyl warms up, gently rub the scratch with a soft cloth or your finger. The heat encourages the vinyl to expand slightly, which can smooth out shallow scratches.
Be careful not to overheat the area, as too much heat may damage the vinyl further. Have you tried this method before? It’s surprising how often a simple household item like a hairdryer can fix what looks like a tough problem.
Repair Deep Scratches
Deep scratches on vinyl floors can spoil the look of your entire room. Fixing them requires more than just cleaning. You need to fill the scratch and smooth the surface for a seamless repair. This process helps restore the floor’s original appearance and protects it from further damage.
Fill With Vinyl Filler
Start by cleaning the scratched area thoroughly. Remove all dirt and dust to ensure the filler sticks well. Use a vinyl filler that matches your floor color. Apply the filler directly into the scratch using a putty knife or a small spatula. Press the filler firmly to fill the entire depth of the scratch.
Allow the filler to dry completely. Drying times vary, so check the product instructions. Avoid walking on the area until it is fully dry. This step ensures the filler sets properly and creates a strong bond with the vinyl.
Sand And Smooth
Once the filler is dry, sand the area gently. Use fine-grit sandpaper to avoid damaging the surrounding vinyl. Sand until the surface is even with the rest of the floor. Wipe away any dust with a damp cloth.
This step helps blend the repair with the floor. A smooth finish makes the scratch less noticeable. Finish by applying a vinyl floor polish or sealant to protect the repair and add shine.
Credit: flooringking.co.uk
Restore Floor Finish
Restoring the finish on your vinyl floor can bring back its original shine and hide those annoying scratches that catch your eye every time you walk by. It’s about more than just appearance—repairing the finish helps protect the floor from further damage. You don’t need fancy tools or expensive products to make a noticeable difference; simple, well-chosen techniques can do the trick.
Apply Floor Polish
Start by choosing a floor polish designed specifically for vinyl surfaces. Applying the right polish not only covers minor scratches but also adds a protective layer that keeps your floor looking fresh longer.
Make sure the floor is clean and dry before you apply the polish. Use a soft cloth or mop to spread a thin, even layer. Avoid thick coats; they can cause buildup and make your floor slippery.
Have you ever noticed how some polishes dry quickly while others take their time? A fast-drying polish can save you time but may require multiple layers. Test a small area first to see how the polish reacts with your floor.
Buffing Techniques
Buffing is key to making the polish blend seamlessly into the floor. Using a soft cloth or a low-speed buffer, gently rub the surface in small, circular motions.
Don’t apply too much pressure; let the polish and the buffing tool do the work. This step smooths out the finish and enhances the shine, making scratches less visible.
If you don’t own a buffer, a microfiber cloth works well too. Buffing by hand can take a little more effort but gives you precise control over the areas that need attention most.
Prevent Future Scratches
Preventing scratches on your vinyl floor is just as important as fixing them. Once you’ve restored its smooth look, taking simple steps can keep your floor looking new longer. Are you willing to make small changes that save you from costly repairs later?
Use Floor Protectors
Floor protectors act like a shield for your vinyl surface. Place felt pads under chair legs, table feet, and heavy furniture to stop them from dragging across the floor.
Think about how often you move your chairs. Without protection, tiny scratches form over time. Felt pads are cheap and easy to replace, making them a smart choice for daily use.
Besides felt, rubber or silicone protectors work well for heavier furniture. They provide a firm grip without damaging the floor. Have you checked your furniture lately to see if it needs new pads?
Regular Maintenance Tips
Dust and dirt act like sandpaper on vinyl floors. Sweeping or vacuuming your floor regularly removes these particles before they scratch the surface.
Use a soft-bristle broom or a vacuum designed for hard floors. Avoid vacuums with beater bars that can cause damage.
Mopping with a damp microfiber mop helps keep the floor clean without excess water, which can weaken vinyl over time. What cleaning routine fits easily into your schedule?
- Wipe up spills immediately to prevent stains and water damage.
- Place doormats at entrances to catch dirt and grit before it reaches your floor.
- Avoid walking on your vinyl floors with high heels or cleats.
These small habits protect your investment and keep your home looking fresh. How much time do you spend caring for your floors each week?
Frequently Asked Questions
How Can I Remove Minor Scratches From Vinyl Floors?
Use a vinyl floor cleaner and a soft cloth to buff minor scratches gently. For deeper marks, try a vinyl floor repair kit designed for scratch removal.
What Household Items Fix Scratches On Vinyl Flooring?
You can use baking soda paste or a mixture of vinegar and water for light scratches. Apply gently with a soft cloth, then wipe clean and dry.
Are There Specific Products For Vinyl Floor Scratch Repair?
Yes, vinyl floor repair kits and scratch removers are available. They often include putty, markers, or sealants that match your floor color.
Can I Prevent Scratches On Vinyl Floors?
Use furniture pads and avoid dragging heavy objects. Regular cleaning with a soft broom or mop helps maintain the floor’s finish and prevent scratches.
Conclusion
Fixing scratches on vinyl floors is easier than it seems. Small scratches can disappear with simple home methods. For deeper scratches, use repair kits made for vinyl. Regular cleaning helps keep floors looking fresh and new. Taking care of your floor saves money in the long run.
A little effort brings back your floor’s smooth look. Keep your vinyl floor shining and scratch-free with these tips. Your home will feel cleaner and more inviting. Try these fixes and enjoy your beautiful floor again.


