
Are you tired of dull, lifeless vinyl floors that make your whole room look tired? You don’t need expensive products or harsh chemicals to bring back that beautiful shine.
Imagine your floors gleaming with a natural glow that catches every eye—without extra effort or cost. You’ll discover simple, natural ways to make your vinyl floors shine like new. Ready to transform your space and impress everyone who walks in?
Keep reading, because your floors are about to get the shine they deserve.
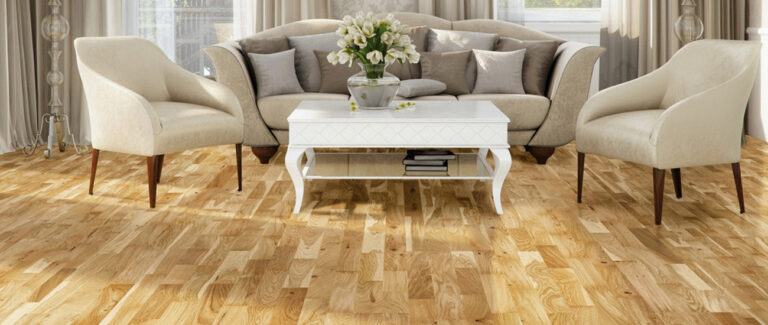
Credit: flooringking.co.uk
Benefits Of Natural Shine
Choosing to make your vinyl floors shine naturally brings a variety of benefits that go beyond just aesthetics. It supports your well-being, saves money, and helps protect the environment. Understanding these advantages can motivate you to switch to natural shine methods for your floors.
Health And Safety Advantages
Natural shine methods use ingredients like vinegar, baking soda, and olive oil, which are safe for your family and pets. Unlike chemical cleaners, these do not release harmful fumes or irritate sensitive skin.
Have you noticed how some commercial floor polishes leave a strong smell that lingers for days? Using natural products prevents that discomfort and keeps your indoor air fresh and clean.
Cost-effective Solutions
Natural shine ingredients are often items you already have at home, meaning no extra trips to the store or expensive purchases. This saves you money while still giving your vinyl floors a beautiful, lasting shine.
Think about how many times you’ve bought specialized floor cleaners that didn’t last long or left streaks. Natural solutions can be mixed in small batches, reducing waste and stretching your budget further.
Environmental Impact
Natural shine methods reduce the use of harsh chemicals that pollute water and soil during disposal. Choosing eco-friendly options helps you minimize your carbon footprint right from your living room.
Imagine how many homes switch to natural cleaning every year—small changes like these add up to a big positive impact on our planet’s health.
Preparing Vinyl Floors
Preparing your vinyl floors properly is the key to achieving that natural shine you want. It sets the stage for every cleaning step that follows and helps you avoid spreading dirt or causing damage. Taking your time here means the finish will last longer and look better.
Clearing The Area
Start by removing all furniture and rugs from the room. This makes it easier to reach every corner and prevents accidental stains or scratches during cleaning. You’ll also want to keep pets and kids out of the way to avoid interruptions and accidents.
Removing Dust And Debris
Next, sweep or vacuum the floor thoroughly to get rid of loose dirt and dust. Use a soft broom or a vacuum with a hard floor setting to protect the vinyl surface. Don’t rush this part—small particles can scratch your floor if left behind during deeper cleaning.
Deep Cleaning Techniques
For a deeper clean, mix warm water with a few drops of mild dish soap or vinegar. Use a microfiber mop to gently scrub the floor, paying special attention to stains or sticky spots. Avoid harsh chemicals or abrasive tools that can dull or damage the vinyl finish.
After mopping, rinse the floor with clean water and dry it with a soft cloth to prevent water spots. Have you noticed how even a small amount of residue can make your floor look dull? That’s why this rinse step is crucial for a natural shine.
Natural Cleaning Ingredients
Natural cleaning ingredients offer a safe way to keep vinyl floors shiny. They avoid harsh chemicals that can damage the surface. These ingredients are easy to find and cost-effective. Using them regularly helps maintain the floor’s beauty and extends its life.
Vinegar And Water Mix
Vinegar is a natural cleaner that cuts grease and grime well. Mixing one cup of white vinegar with one gallon of warm water creates a gentle solution. Use a mop or cloth to clean the floor with this mix. Avoid soaking the floor; just damp mop to prevent damage.
Baking Soda Applications
Baking soda works great for removing stains and odors. Sprinkle a small amount on a damp cloth or sponge. Gently scrub the stained area in a circular motion. Rinse with clean water and dry with a soft towel. Baking soda also brightens the floor without scratching it.
Lemon Juice Benefits
Lemon juice has natural disinfecting and freshening properties. Mix lemon juice with water to create a mild cleaner. Use it to wipe down sticky spots or dull areas. The natural acids help restore shine and leave a fresh scent. Avoid using lemon juice on floors with wax finishes.
Credit: www.decosurfaces.com
Step-by-step Shining Process
Clean the floor with warm water and mild soap to remove dirt. Dry it completely before applying a natural shine solution like vinegar and olive oil. Buff gently with a soft cloth until the floor gleams naturally.
Vinyl floors are a popular choice for many homes due to their durability and affordability. However, keeping them looking shiny and new can be a challenge. Fortunately, you don’t need harsh chemicals to achieve that brilliant shine. This step-by-step process will guide you through using natural methods to make your vinyl floors gleam.
Applying Natural Cleaners
Begin by choosing the right natural cleaner for your vinyl floors. White vinegar is a great option due to its acidity, which helps break down grime and dirt. Mix one cup of vinegar with a gallon of warm water. Dip a mop into the solution, ensuring it’s damp but not soaking wet. Gently mop the floor, focusing on areas that look dull or dirty. If you’re worried about the vinegar smell, add a few drops of essential oil to the mix for a pleasant aroma.
Buffing Methods
Buffing is the secret to achieving that desired shine. After mopping, take a soft cloth or microfiber towel and buff the floor in circular motions. This action helps to remove any residue left by the cleaning solution and enhances the natural shine. Alternatively, if you have a buffing machine, it can save time and effort. Set the machine to a low setting and guide it slowly across the floor. Notice how the shine begins to appear more pronounced as you buff—it’s a rewarding sight.
Drying Tips
Proper drying is crucial to prevent streaks. Open windows or use fans to circulate air and speed up the drying process. Avoid walking on the floor until it is completely dry to prevent marks. If you’re in a hurry, a dry mop or towel can be used to gently pat the floor dry. This method ensures no water spots are left behind, maintaining a clean appearance. Have you ever noticed how a well-dried floor seems to sparkle more? It’s all in the details.
Maintaining Vinyl Floor Shine
Maintaining the shine of vinyl floors requires simple and steady care. Regular attention keeps floors looking clean and bright. Small daily actions prevent dullness and damage over time.
Regular Cleaning Habits
Clean vinyl floors often to avoid dirt buildup. Use a soft broom or vacuum without a beater bar. Mop with warm water and a mild detergent. Dry floors quickly with a clean cloth to prevent water spots.
Avoiding Harsh Chemicals
Skip strong cleaners with ammonia or bleach. These can strip the floor’s protective layer. Use gentle, vinyl-safe cleaning products instead. Test any new cleaner on a small area first.
Protective Measures
Place mats at entrances to catch dirt. Use furniture pads to prevent scratches. Avoid dragging heavy items across the floor. Keep pet nails trimmed to reduce floor damage.
Credit: www.tiktok.com
Common Mistakes To Avoid
Keeping your vinyl floors shiny without damaging them requires more than just the right cleaning products. Many people unknowingly make mistakes that dull the finish or even cause long-term harm. Avoiding these common errors will help you maintain a beautiful, natural shine for years.
Using Abrasive Tools
Scrubbing vinyl floors with rough brushes or steel wool can create scratches that trap dirt and dull the surface. Even if you’re trying to remove a tough stain, harsh tools do more harm than good.
Instead, use soft cloths or microfiber mops designed for delicate flooring. Have you ever noticed how a gentle wipe often removes more grime than aggressive scrubbing?
Over-wetting Floors
Vinyl is water-resistant but not waterproof. Pouring too much water or using soaking wet mops leaves moisture trapped under the surface, which can cause warping or peeling.
Use a damp mop rather than a wet one, and dry floors quickly after cleaning. Think about how a sponge left soaking wet starts to deteriorate—your floors react similarly.
Ignoring Floor Damage
Small scratches, dents, or peeling spots might seem minor, but ignoring them can lead to bigger problems. Dirt and moisture can seep into damaged areas, worsening the condition.
Address damage promptly by repairing or replacing affected sections. Have you checked your floors recently for subtle signs of wear? Catching issues early keeps your floors shining naturally longer.
Enhancing Shine With Diy Polishes
Giving your vinyl floors a natural shine doesn’t require harsh chemicals or expensive products. DIY polishes offer a gentle and effective way to enhance the gloss and beauty of your flooring. These simple mixtures use household items that you might already have, making the process both budget-friendly and eco-conscious.
Olive Oil Mixture
Olive oil can bring a warm, natural shine to vinyl floors. Mix 1 cup of olive oil with 2 tablespoons of white vinegar and 1 gallon of warm water. Use a soft mop to apply the solution evenly, then buff the floor with a dry cloth for a smooth finish.
Have you noticed how olive oil adds a subtle glow without leaving a greasy residue? It’s a gentle way to refresh your floors and keep them looking polished.
Cornstarch Polish
Cornstarch helps absorb dirt and adds a soft sheen to vinyl surfaces. Combine 1 tablespoon of cornstarch with 1 cup of warm water, stirring until smooth. Apply this mixture with a damp cloth, then wipe away with a clean, dry towel to reveal a dust-free, shiny floor.
What’s great is cornstarch’s ability to lift grime while enhancing shine, making it perfect for quick touch-ups. You’ll appreciate how easy it is to keep your floors gleaming without extra effort.
Carnauba Wax Alternatives
If you’re looking for a plant-based wax to boost shine, carnauba wax alternatives like beeswax or soy wax work well. Melt a small amount of wax and mix it with a few drops of lemon juice and olive oil. Apply sparingly with a soft cloth and buff gently for a durable, natural shine that protects your floors.
Using these wax alternatives lets you avoid synthetic chemicals while maintaining a glossy finish. Have you tried applying wax yourself? The satisfaction of a self-made polish is hard to beat.
Frequently Asked Questions
How Do I Naturally Make Vinyl Floors Shine?
Use a mixture of water and white vinegar to mop vinyl floors. This solution cleans and adds shine without harsh chemicals. Avoid abrasive tools that can dull the surface.
Can Baking Soda Clean Vinyl Floors Effectively?
Yes, baking soda gently removes stains and grime from vinyl floors. Sprinkle it on, scrub lightly with a damp cloth, then rinse well for a natural shine boost.
What Natural Oils Help Polish Vinyl Floors?
Olive oil or lemon oil can add a subtle shine to vinyl floors. Apply a small amount, buff gently, and avoid overuse to prevent slipperiness.
Is Vinegar Safe For Vinyl Floor Cleaning?
White vinegar is safe and effective for cleaning vinyl floors. It dissolves dirt and bacteria while restoring shine without damaging the surface.
Conclusion
Natural shine on vinyl floors comes from simple, regular care. Use gentle cleaning solutions and soft cloths to keep them bright. Avoid harsh chemicals that can dull the surface. Small steps like wiping spills quickly help maintain the floor’s look.
Shine will last longer with consistent, careful cleaning. Your vinyl floors can look fresh and inviting every day. Enjoy the beauty of your home with easy, natural methods.


