Are you struggling with a clogged or leaking shower head? Knowing how to disassemble your shower head can save you time and money.
Whether you want to clean out mineral buildup or replace a faulty part, taking it apart is easier than you think. In this guide, you’ll find simple, step-by-step instructions that anyone can follow. By the end, you’ll feel confident handling your shower head like a pro—and enjoy a better shower experience every day.
Keep reading to unlock the secrets to quick and hassle-free shower head disassembly.
Tools Needed
Gathering the right tools makes disassembling your shower head easier. Having everything ready saves time and avoids frustration. Basic tools help protect your fixtures from damage.
Some tools are common in most homes. Others might need a quick trip to the store. Knowing what each tool does helps you work safely and effectively.
Adjustable Wrench
An adjustable wrench helps loosen tight nuts on the shower arm. It fits various sizes and provides a strong grip. Use it gently to avoid scratching the metal.
Flathead Screwdriver
This screwdriver removes small screws that hold parts together. It also helps pry off covers or seals carefully. Choose a size that fits the screws well to avoid damage.
Pliers
Pliers offer a firm grip on stubborn parts. They can twist and pull with control. Needle-nose pliers work well in tight spaces.
Cleaning Brush
A small brush removes mineral buildup inside the shower head. This makes disassembly easier and keeps parts clean. An old toothbrush works perfectly.
Cloth Or Rag
Wrap a cloth around the shower head or wrench to protect the finish. It prevents scratches and keeps tools from slipping. Soft cotton cloths work best.
Safety Precautions
Disassembling a shower head requires care to avoid injury or damage. Taking safety precautions helps protect you and your plumbing. Simple steps can make the process safer and easier.
Turn Off The Water Supply
Stop water flow before removing the shower head. This prevents leaks and water damage. Locate the main water valve or the shower valve and close it completely.
Use Proper Tools
Choose tools that fit well to avoid slipping. Wrenches or pliers with soft grips work best. Avoid using excessive force to prevent breaking parts.
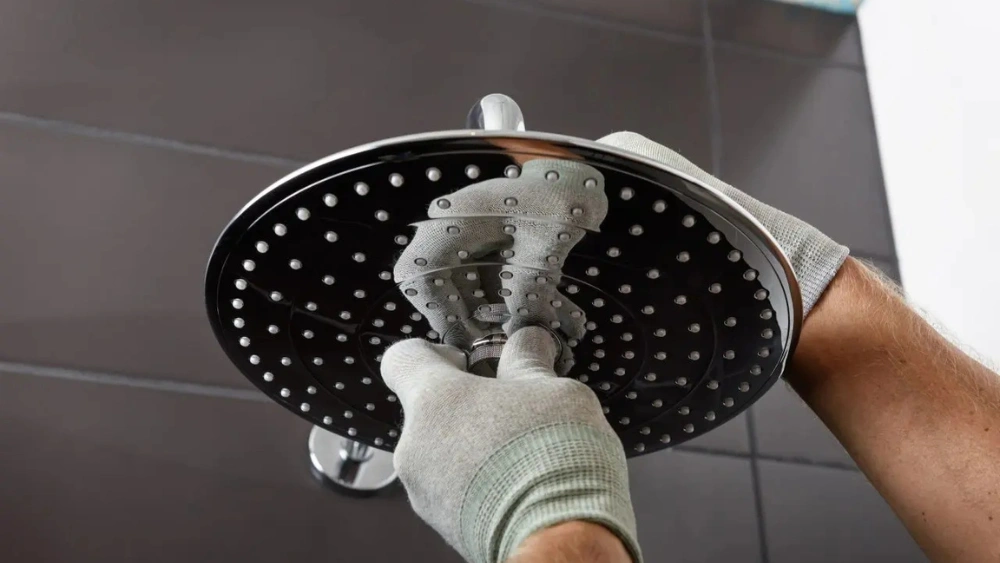
Protect Your Hands
Wear gloves to keep your hands safe. Gloves provide grip and protect against sharp edges. They also keep your skin clean from dirt and rust.
Place A Towel Or Cloth
Wrap a towel around the shower arm before using tools. It prevents scratches and dents on metal surfaces. This simple step keeps your bathroom looking good.
Work In A Dry Area
Ensure the floor and shower area are dry. A wet surface can cause slipping or falling. Clean up any water before starting the job.
Turning Off Water Supply
Turning off the water supply is a crucial first step before you start disassembling your shower head. Skipping this can lead to unexpected water bursts that make the job messier and potentially damage your bathroom. Knowing how and where to shut off the water ensures a smooth and safe process.
Locate The Main Water Shut-off Valve
Every home has a main water shut-off valve, usually near the water meter or where the main pipe enters your house. You might find it in the basement, garage, or outside near the foundation. Turning this valve off stops all water flow, including your shower.
Find The Shower’s Local Shut-off Valve
Some homes have a local shut-off valve specifically for the shower or bathroom. This valve is often hidden behind an access panel or under the sink. Using this valve lets you cut water to just the shower without affecting the rest of your home.
Turn The Valve Clockwise To Shut Off Water
Once you find the valve, turn it clockwise to close it. If it’s a lever type, position it perpendicular to the pipe. You should feel resistance as the valve shuts, which means water flow is stopping.
Test The Water Flow After Shutting Off
After turning off the valve, open the shower handle to check if water stops flowing. If water still runs, the valve might not be fully closed or you might have the wrong valve. Double-check your valves to avoid surprises during disassembly.
Prepare For Any Residual Water In Pipes
Even after shutting off the water, some water may remain in the pipes. Keep a towel or small container handy to catch drips when you remove the shower head. This helps keep your workspace dry and clean.
Credit: www.tiktok.com
Removing Shower Head
Removing your shower head is the first step toward cleaning, repairing, or upgrading it. The process might seem simple, but sometimes the fixture resists, testing your patience and skills. Understanding how to properly detach the shower head can save you time and prevent damage to your plumbing.
Detaching The Head
Start by turning off the water supply to avoid any unexpected sprays. Use a cloth or rag to protect the shower arm’s finish from scratches when gripping it with a wrench.
Turn the shower head counterclockwise to loosen it. If it feels tight, don’t force it immediately—apply steady pressure and try gentle rocking motions to help break the seal.
Dealing With Stubborn Fixtures
Have you ever faced a shower head that just won’t budge? Mineral deposits and corrosion can make fixtures tough to remove. To tackle this, soak a cloth in white vinegar and wrap it around the connection point.
Let it sit for 15-30 minutes to dissolve the buildup. Afterward, try loosening the shower head again. If it remains stuck, applying a penetrating lubricant can help. Just be sure to wipe away any residue before reassembling.
Cleaning Components
Cleaning the shower head components is key to keeping water flow strong. Removing dirt and mineral buildup helps maintain performance. Regular cleaning also extends the shower head’s life. Focus on the parts that come in contact with water. These usually collect the most deposits and grime. Use simple household items to clean safely and effectively.
Soaking In Vinegar
Vinegar is a natural cleaner that breaks down mineral deposits. Fill a bowl with white vinegar and submerge the parts. Let them soak for at least 30 minutes. For tough buildup, leave them overnight. Vinegar softens hard water stains and calcium deposits. After soaking, rinse the parts under warm water. This prepares them for detailed cleaning.
Scrubbing Mineral Deposits
Use a soft brush or old toothbrush to scrub the parts. Focus on small holes and crevices where deposits gather. Avoid harsh scrubbing to prevent damage. Use gentle circular motions to remove stubborn buildup. Rinse the parts again after scrubbing. This clears loose debris and vinegar residue. Repeat scrubbing if needed for a thorough clean.
Credit: www.tiktok.com
Inspecting Parts
After you’ve taken apart your shower head, it’s time to inspect each component carefully. This step is crucial to find out what’s working fine and what needs attention. A thorough inspection can save you from future leaks or poor water flow issues.
Checking For Damage
Look closely at every part for cracks, corrosion, or mineral buildup. Even small cracks in the plastic or metal can cause leaks or break down the entire unit over time. Don’t forget to examine the rubber washers and O-rings—they often get brittle or cracked after long use.
Have you ever noticed water leaking from your shower head even after tightening it? That’s usually due to damaged seals or worn-out parts you might find at this stage. Use a magnifying glass if needed to spot tiny fissures or rough surfaces that can block water flow.
Replacing Worn Pieces
Once you identify damaged components, replace them with exact matches to ensure a proper fit. Many hardware stores offer shower head repair kits that include washers, seals, and screws. Keep the old parts as references to find the right replacements easily.
Don’t hesitate to swap out worn pieces even if they seem okay at first glance. A fresh washer or new O-ring can improve water pressure and prevent leaks. It’s often cheaper and less frustrating than dealing with full shower head replacement later.
Have you checked your shower head parts lately? Taking the time to inspect and replace worn parts can boost your shower’s performance and extend its life significantly.
Reassembling Shower Head
Reassembling your shower head properly is key to ensuring it works smoothly and lasts longer. Paying attention to how each part fits back together can save you from leaks and poor water flow. Let’s focus on aligning the components and making sure all seals are tight for a perfect finish.
Aligning Components
Start by carefully lining up each part exactly as it was before disassembly. The spray face, the gasket, and the connecting pieces must sit flush. Misalignment can cause uneven water spray or make the head wobble.
Check the orientation of the rubber washers and nozzles. They often have a specific direction to fit correctly. If you’ve ever put a puzzle together, you know how one piece out of place can ruin the whole picture—that’s the same with shower heads.
Take your time here. Gently press the parts together without forcing them. If something doesn’t slide easily, double-check the alignment before moving forward.
Ensuring Tight Seals
Seals prevent water from leaking out where parts join. After aligning, inspect the rubber washers and O-rings for any signs of wear or cracks. Replacing these if damaged will save you from drips later.
Apply plumber’s tape or thread sealant on threaded connections for extra security. This small step can stop annoying leaks that often go unnoticed until water damage starts.
Hand-tighten connections first, then use a wrench for a snug fit—but don’t overtighten. Too much force can crack plastic parts or strip threads, causing bigger problems.
Have you ever ignored a small leak only to find it causing stains or mold? Tight seals are your first defense against that hassle. Make sure every joint feels secure before testing your shower head.

Credit: www.hanoverplumbing.co.nz
Testing Functionality
Testing the functionality of your shower head after disassembly is a key step to ensure everything works perfectly before you put it back together. It helps you spot any issues that might affect your shower experience. Paying close attention here can save you from future leaks or weak water flow.
Checking Water Flow
Turn on your water supply and observe how water flows through the shower head. Is the pressure strong and steady, or do you notice sputtering or weak streams?
Sometimes debris inside the shower head blocks water flow. If you see uneven spray patterns or weak pressure, it could mean buildup inside the nozzles. Cleaning or replacing parts might be necessary to restore a consistent stream.
Think about your last shower—did the water feel less powerful? Testing now can confirm if the problem lies with the shower head or your plumbing.
Looking For Leaks
Carefully inspect all connections and joints for any water leaks. Even a small drip can waste water and cause damage over time.
Run the water at full pressure and look around the base where the shower head attaches to the pipe. Is there any moisture or water escaping?
If you spot leaks, tightening the fittings or applying plumber’s tape can often fix the issue. Don’t ignore minor leaks—they tend to get worse quickly.
Frequently Asked Questions
How Do I Remove A Shower Head Safely?
To remove a shower head safely, turn off the water supply first. Use an adjustable wrench to loosen the connection. Wrap a cloth around the shower arm to prevent scratches. Turn counterclockwise gently until the shower head detaches.
What Tools Are Needed To Disassemble A Shower Head?
You need an adjustable wrench, pliers, and a cloth to disassemble a shower head. These tools help loosen and protect parts. Sometimes, a screwdriver might be needed for specific models.
Can I Clean A Shower Head After Disassembly?
Yes, after disassembly, soak the shower head in vinegar to remove mineral buildup. Use a brush to clean small holes. Rinse thoroughly before reassembling to ensure proper water flow.
How To Avoid Damaging The Shower Head During Disassembly?
Use a cloth to protect the finish when using tools. Apply gentle pressure and avoid forcing parts. If stuck, use penetrating oil to loosen connections carefully.
Conclusion
Disassembling a shower head can save you time and money. Just follow the steps carefully and take your time. Use the right tools and keep all parts safe. Cleaning and fixing become easier once it is apart. Remember to check for worn-out parts to replace.
This simple task helps maintain good water flow. Now, you can handle shower head issues yourself. A little effort goes a long way in home care. Keep practicing, and it will get easier each time.


