Are you thinking about upgrading your floors but wondering if you can lay tile over your existing vinyl? You’re not alone.
Many homeowners face this exact question when planning a renovation. The good news is, you might be able to save time and money by tiling right over your vinyl floor—but there are important things you need to know first. Keep reading to discover the key steps, potential challenges, and expert tips to make sure your new tile floor looks perfect and lasts for years to come.

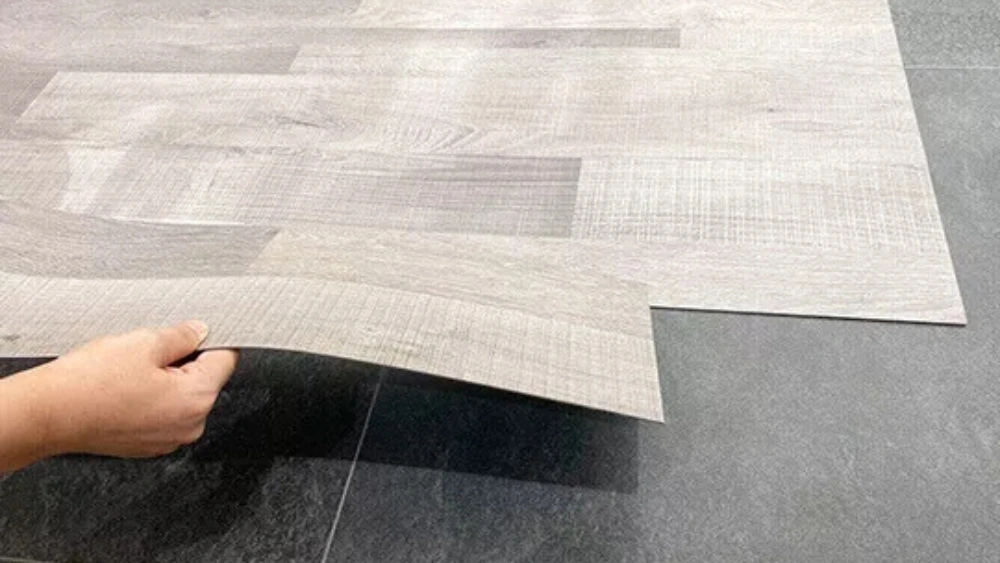
Credit: www.reddit.com
Assessing Your Vinyl Floor
Before laying tile over a vinyl floor, assess the current floor carefully. This step ensures the new tiles will last longer and stay in place. A proper assessment prevents future problems like cracking or lifting.
Check For Damage And Stability
Look closely at the vinyl floor for any cracks, tears, or bubbles. Uneven or damaged spots can cause tiles to crack. Press on different areas to see if the floor feels firm. Soft or spongy spots mean the floor is not stable enough for tile.
Determine The Vinyl Type
Identify if the vinyl floor is sheet vinyl or vinyl tiles. Sheet vinyl is usually glued down and can be smooth or textured. Vinyl tiles might be loose or glued. Some vinyl types do not bond well with tile adhesives. Knowing the type helps choose the right installation method.
Consider Thickness And Adhesion
Measure the thickness of the vinyl floor. Thin vinyl may not support the weight of tile. Thick vinyl could create too much height when tiled over. Also, check how well the vinyl sticks to the subfloor. Poor adhesion can cause the tile to fail. Proper thickness and strong adhesion improve tile durability.
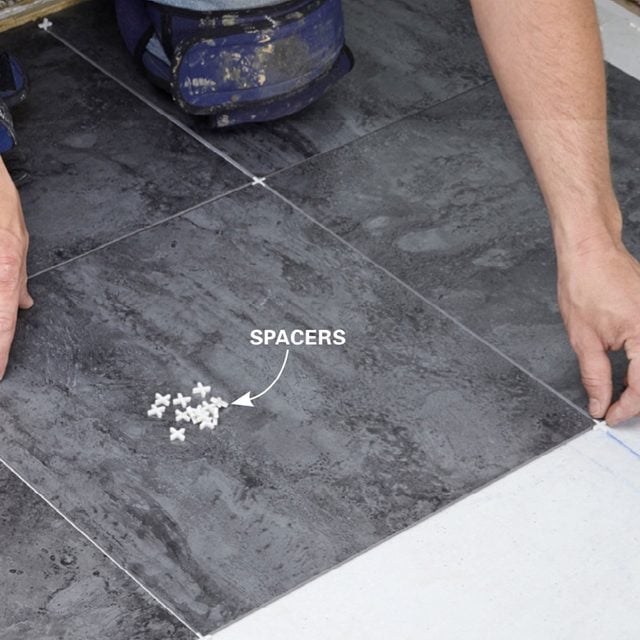
Credit: www.familyhandyman.com
Preparing The Surface
Preparing the surface is a crucial step before laying tile over a vinyl floor. It affects how well your new tiles will stick and how long they will last. Skipping or rushing through this step can lead to tiles lifting or cracking, which wastes time and money.
Clean And Remove Contaminants
You need to make sure the vinyl floor is spotless. Dirt, grease, and wax create barriers that prevent adhesives from bonding properly. Use a strong cleaner and a scrub brush to remove all grime.
Rinse thoroughly and let the floor dry completely. Have you ever tried sticking a sticker on a dusty surface? It peels off quickly. Tile adhesive behaves the same way.
Repair Imperfections
Look closely for any bumps, cracks, or loose vinyl sections. These imperfections can cause your tiles to crack or become uneven. Fill small holes with a floor patch or leveling compound designed for vinyl floors.
If the vinyl is lifting, glue it down securely before continuing. This step creates a stable, flat base for your tiles. How smooth is your floor to the touch?
Sand For Better Adhesion
Vinyl floors are often very smooth, which makes it hard for tile adhesive to grip. Lightly sanding the surface roughens it up and improves the bond. Use medium-grit sandpaper and sand evenly across the entire floor.
After sanding, clean up the dust with a vacuum and a damp cloth. A properly prepped surface will make your tile job much stronger and more durable. Would you rather redo the floor or take a few extra minutes to prep it right?
Choosing The Right Tile
Choosing the right tile depends on the condition of the vinyl floor beneath. Smooth, clean vinyl can support tile, but rough or damaged surfaces need repair first. Proper preparation ensures tiles stick well and last longer over vinyl floors.
Choosing the right tile is crucial when considering laying tile over a vinyl floor. The tile you select can determine the longevity and aesthetic appeal of your flooring project. It’s not just about picking any tile that catches your eye; it’s about ensuring the tile complements the existing vinyl and serves your lifestyle needs. Let’s dive into the essential factors you should consider.Selecting Suitable Tile Materials
Begin by evaluating the tile materials. Ceramic tiles are popular for their durability and ease of maintenance. They’re ideal for kitchens and bathrooms where spills and moisture are common. Porcelain tiles, although pricier, offer superior strength and water resistance, making them a fantastic option for high-traffic areas. Natural stone tiles, such as granite or marble, can add a touch of luxury but require more care to prevent staining and damage. Ask yourself what level of upkeep you’re willing to commit to, and how the tile material fits into your overall design vision.Tile Size And Thickness Considerations
The size and thickness of your tile can significantly impact the installation process and final look. Larger tiles can create a seamless appearance and cover more area quickly, but they may require more precision during installation to avoid uneven surfaces. Consider the thickness in relation to the existing vinyl flooring. Thicker tiles might require adjustments to ensure doors and appliances function properly without obstruction. Assess whether your space can accommodate thicker tiles without compromising functionality. Selecting the right tile is more than just aesthetics; it’s about finding the perfect balance between form and function. What do you prioritize in your home – style or practicality?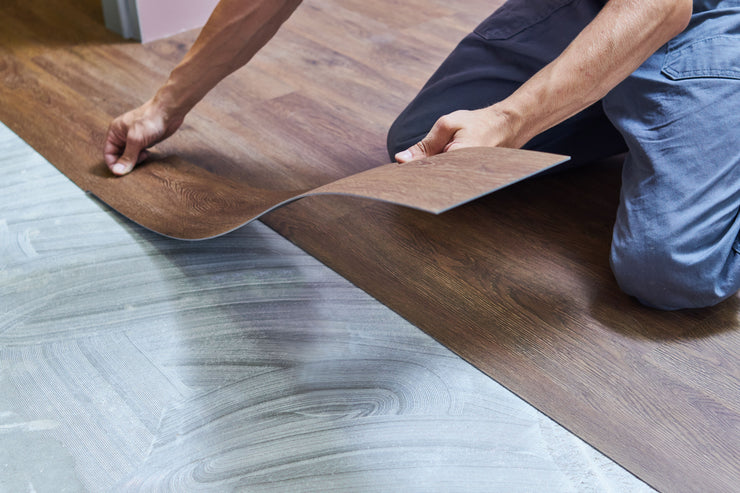
Credit: merseyflooring.co.uk
Best Adhesives For Vinyl Subfloors
Choosing the right adhesive is vital for tiling over vinyl floors. The wrong choice can cause tiles to lift or crack. Adhesives must bond well with the vinyl surface and support tile weight. Some adhesives offer better flexibility and strength, ideal for vinyl subfloors. Understanding different adhesives helps ensure a durable tile installation.
Types Of Mortar And Thinset
Thinset mortar is a popular choice for tiling over vinyl. It is a cement-based adhesive that sticks tiles firmly. Modified thinset contains polymers that improve flexibility and adhesion. Unmodified thinset is less flexible and may not bond well with vinyl.
Mortar types include:
- Modified Thinset:Best for vinyl as it bonds tightly and resists movement.
- Unmodified Thinset:Works on cement but less ideal for vinyl.
- Epoxy Mortar:Strong and waterproof but expensive and harder to work with.
Using Primer And Bonding Agents
Primers improve the bond between vinyl and adhesive. They prepare the surface by cleaning and sealing it. Bonding agents create a sticky layer that helps mortar stick better. Applying primer or bonding agents reduces tile lifting risks.
Steps include:
- Clean the vinyl floor thoroughly.
- Apply a vinyl-specific primer evenly.
- Use bonding agents if recommended by the adhesive manufacturer.
Installation Tips
Installing tile over a vinyl floor requires care and precision. Proper preparation and technique ensure a long-lasting, attractive result. These installation tips help avoid common mistakes and improve your tile work.
Layout Planning And Measurements
Start by cleaning the vinyl floor thoroughly. Remove dirt, grease, and any loose material. Plan the tile layout to minimize small cuts at edges. Use a chalk line to mark straight reference lines on the floor.
Measure the space carefully. Calculate how many tiles fit along each wall. Account for grout lines between tiles. Dry lay some tiles to check the pattern and fit. Adjust the layout to balance cuts on opposite sides.
Applying Adhesive Properly
Choose an adhesive made for bonding tile over vinyl surfaces. Follow the manufacturer’s instructions for mixing and application. Use a notched trowel to spread the adhesive evenly. Apply only enough adhesive for a small section at a time.
Press tiles firmly into the adhesive. Wiggle each tile slightly to ensure full contact. Avoid air bubbles beneath the tile. Clean any excess adhesive from tile edges before it dries. Let the adhesive cure fully before walking on the tiles.
Tiling Techniques For Durability
Use tile spacers to keep grout lines consistent. Check each tile for level as you go. Tap tiles gently with a rubber mallet if needed. Allow room for expansion around the room edges using spacers or trim.
Grout with a flexible grout suitable for floors. Seal the grout after it dries to prevent moisture damage. Avoid heavy traffic on the tiled floor for several days. This ensures the tile set and adhesive stay strong.
Common Challenges And Fixes
Installing tile over a vinyl floor can save time and effort, but it comes with its own set of challenges. Understanding these common issues and how to fix them will help you avoid costly mistakes and ensure your new tile floor looks great and lasts long.
Dealing With Uneven Surfaces
Vinyl floors often have dips, bumps, or seams that create an uneven base for tiles. If you ignore these irregularities, your tiles may crack or come loose over time.
Start by checking the vinyl surface carefully. Use a straightedge to find any high or low spots. To fix this, apply a floor leveling compound designed for such surfaces. It fills in the low areas and smooths out bumps, creating a flat base.
Remember, even a small uneven spot can cause grout lines to crack. Take your time with leveling—it’s worth the effort for a strong tile installation.
Preventing Tile Lifting
One of the biggest risks of tiling over vinyl is tile lifting, where tiles pop up after some time. This usually happens because vinyl is a flexible material, and tiles need a rigid surface to adhere properly.
You can prevent this by firmly securing the vinyl or adding a cement backer board over it. The backer board acts as a solid, stable layer for the tiles to stick to. Make sure to use the right adhesive recommended for your specific materials.
Ask yourself: Is the vinyl firmly attached to the subfloor? If it’s loose or peeling, removing it might be better than covering it up. A solid base is non-negotiable for a durable tile floor.
Handling Moisture Issues
Moisture trapped under tiles can cause mold, mildew, and tile damage. Vinyl floors can sometimes trap moisture, especially if they were installed over concrete or in humid areas.
Before tiling, check for any signs of moisture or water damage on the vinyl. Use a moisture barrier or waterproof membrane between the vinyl and tiles to prevent moisture problems.
Don’t underestimate how moisture can affect your floor’s longevity. Would you rather deal with a quick fix now or a costly repair later? Taking moisture control seriously saves headaches down the road.
Maintenance And Longevity
Maintaining tile laid over a vinyl floor ensures its beauty and strength for years. Proper care prevents damage and keeps the surface looking fresh. Knowing the right cleaning methods and inspection routines extends tile life significantly.
Cleaning Tiles Over Vinyl
Use a soft broom or vacuum to remove dust daily. Mop with warm water and a mild detergent to avoid harsh chemicals. Avoid abrasive cleaners that can scratch tiles or damage vinyl below. Dry the floor after cleaning to prevent water from seeping under the tiles. Spot clean spills quickly to stop stains from setting in.
Regular Inspections And Repairs
Check tiles regularly for cracks or loose spots. Early detection stops small problems from growing. Look for signs of moisture between tiles and vinyl that may cause damage. Replace damaged grout to keep tiles secure and prevent water seepage. Address any lifting tiles promptly to avoid tripping hazards and further damage.
Frequently Asked Questions
Can You Lay Tile Directly Over Vinyl Flooring?
Yes, you can lay tile over vinyl if the vinyl is firmly glued and smooth. Make sure the surface is clean and level for proper tile adhesion.
What Preparation Is Needed Before Tiling Over Vinyl?
Clean the vinyl thoroughly and repair any damage. Sand glossy vinyl to roughen the surface. Use a suitable primer or underlayment for better tile bonding.
Will Tiles Stick Well To Vinyl Floors?
Tiles can stick well if the vinyl floor is stable and properly prepared. Use a high-quality thin-set adhesive designed for non-porous surfaces to ensure strong adhesion.
Are There Risks Of Laying Tile Over Vinyl?
Yes, risks include tile cracking or adhesive failure if the vinyl floor is uneven or loose. Also, moisture trapped under tiles can cause problems over time.
Conclusion
Laying tile over vinyl floors can save time and effort. Make sure the vinyl is clean and flat before starting. Check if the floor feels solid and does not move. Use the right adhesive for better tile hold. This method works well for many rooms.
Remember, proper prep leads to a strong, lasting floor. Tiles add style and durability to your space. Careful steps help avoid future problems. Choose materials that fit your needs and budget. Simple care keeps your new floor looking great.


