Is your kitchen faucet not flowing like it used to? You might be dealing with a clogged aerator.
Cleaning your aerator kitchen faucet is easier than you think, and it can save you from costly repairs or replacements. You’ll discover simple, step-by-step tips to get your faucet running smoothly again. Keep reading to learn how to bring back strong water flow and enjoy a cleaner, more efficient kitchen sink.
Tools Needed
Cleaning the aerator of your kitchen faucet requires a few simple tools. Having the right tools makes the job easier and faster. Most of these tools are common in household toolkits or easy to buy. Prepare everything before you start to avoid interruptions.
Adjustable Wrench
An adjustable wrench helps loosen and tighten the aerator. It fits different sizes of nuts and bolts. Use it carefully to avoid scratching the faucet.
Needle-nose Pliers
Needle-nose pliers reach tight spaces and grip small parts firmly. They work well to remove the aerator if it is stuck.
Old Toothbrush
An old toothbrush cleans dirt and mineral buildup on the aerator. Its bristles reach small holes and crevices effectively.
White Vinegar
White vinegar dissolves mineral deposits inside the aerator. It is a natural cleaner that is safe and inexpensive.
Small Bowl
A small bowl holds the aerator parts while soaking them in vinegar. It keeps everything organized and prevents loss.
Soft Cloth Or Towel
Use a soft cloth or towel to dry the parts after cleaning. It prevents water spots and protects the faucet’s finish.

Credit: www.yahoo.com
Preparing The Area
Preparing the area is the first step to clean the aerator on your kitchen faucet. A clean and organized workspace makes the task easier and safer. Clearing the space around the sink helps prevent accidents and keeps your tools within reach. Protecting your sink also avoids scratches or damage during the cleaning process.
Good preparation saves time and reduces frustration while cleaning the aerator. It also ensures that no parts get lost or dropped during removal. Taking a few minutes to prepare the area will make your cleaning experience smooth and efficient.
Clear The Sink And Countertop
Remove dishes, soap bottles, and any clutter around the sink. Wipe the countertop to create a clean surface. This prevents dirt or debris from mixing with the aerator parts.
Gather Necessary Tools
- Adjustable wrench or pliers
- Old toothbrush or small brush
- Bowl or container for soaking parts
- Soft cloth or towel
Having all tools ready saves trips back and forth during cleaning.
Protect The Sink Surface
Place a soft cloth or towel at the bottom of the sink. This cushions the faucet parts if they fall. It also prevents scratches on your sink’s surface.
Turn Off The Water Supply
Locate and close the shut-off valves under the sink. Turning off the water prevents leaks or sprays while removing the aerator. Open the faucet to release any remaining water before starting.
Removing The Aerator
Removing the aerator from your kitchen faucet is the first step to a thorough cleaning. The aerator controls water flow and can collect dirt and mineral buildup. Taking it off carefully prevents damage and helps maintain good water pressure.
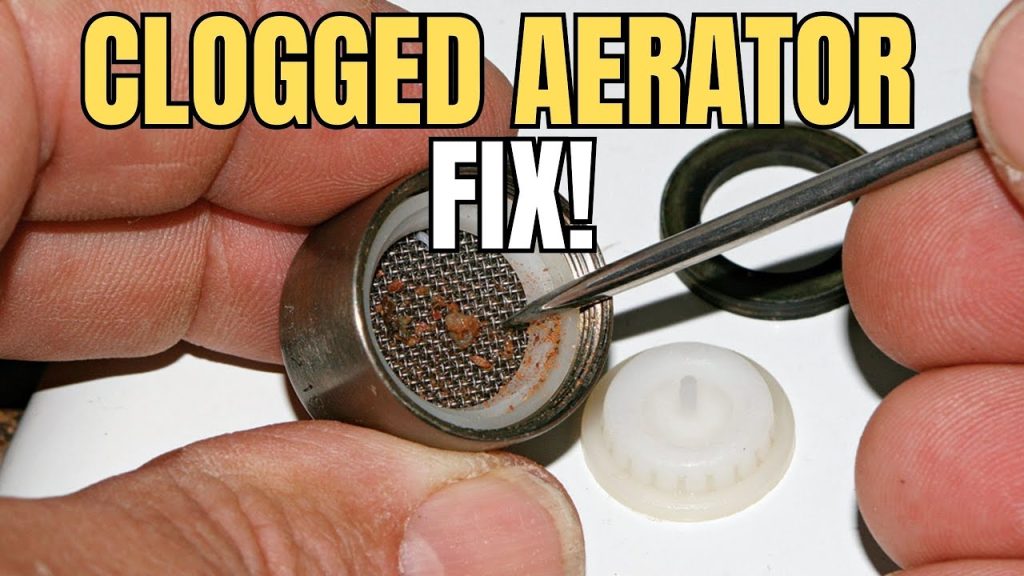
Identifying The Aerator Type
Look closely at the faucet tip to spot the aerator. Most aerators are round and have small holes. Some may have a screen or a plastic casing. Check if it screws on or snaps into place. Knowing the type helps choose the right removal method.
Using A Wrench Or Pliers
Grip the aerator gently with a wrench or pliers if it is tight. Wrap a cloth around it to avoid scratches. Turn counterclockwise to loosen. Stop if you feel strong resistance to avoid breaking parts. This tool is best for metal aerators.
Unscrewing By Hand
Try twisting the aerator with your fingers first. Wetting your hands can improve grip. Turn counterclockwise with steady pressure. Hand removal works well for plastic or new aerators. If it won’t budge, switch to using pliers or a wrench.
Cleaning The Aerator
Cleaning the aerator of your kitchen faucet is a simple task that can make a big difference in water flow and quality. Over time, mineral deposits and debris build up, causing reduced pressure and uneven spray. Regular cleaning restores your faucet’s efficiency and helps avoid costly repairs.
Soaking In Vinegar Solution
Start by removing the aerator from your faucet carefully. Place it in a small bowl filled with white vinegar. Let it soak for about 30 minutes to an hour; vinegar breaks down mineral deposits effectively.
If your aerator is heavily clogged, you might want to leave it soaking overnight. After soaking, you’ll notice that grime and buildup have softened, making the next steps easier.
Brushing Away Debris
Use an old toothbrush or a small brush to scrub the aerator gently. Focus on the mesh screen and the tiny holes where debris tends to collect. Don’t rush; a thorough scrub ensures all particles are removed.
Be careful not to damage any parts while brushing. If you see stubborn spots, dipping the brush in vinegar again can help loosen the grime.
Rinsing Thoroughly
Rinse the aerator under running water to wash away loosened debris and vinegar residue. Shake it gently to remove any trapped particles inside the tiny holes. Reassemble the aerator and screw it back onto your faucet.
Before calling a plumber or buying a new faucet, ask yourself: Could a quick clean fix the problem? Often, you’ll be surprised at how much better your faucet works after this simple maintenance.
Inspecting For Damage
Inspecting the aerator for damage is key before cleaning. It helps spot issues that affect water flow and faucet performance. Careful checks prevent leaks and ensure smooth operation.
Checking The Screen
The screen filters debris from water. Look for tears, holes, or clogs in the mesh. A damaged screen lets dirt pass through and can cause blockages inside the faucet. Clean or replace it if needed.
Examining The Washer
The washer seals the connection between parts. Check for cracks, hardening, or flattening. A worn washer causes leaks and reduces water pressure. Swap it out to maintain a tight seal and proper function.
Reassembling The Aerator
Reassembling the aerator is a crucial step that ensures your faucet works smoothly and prevents leaks. After cleaning, putting the parts back together correctly will save you time and avoid frustration. Let’s focus on how to align the components properly and secure them tightly with the right tools.
Aligning Components
Start by identifying each part of the aerator — the screen, washer, and casing. These pieces must fit together exactly as they were before disassembly. Pay close attention to the orientation of the screen; reversing it can block water flow.
Try laying out the parts in order before assembling. This visual guide helps prevent mistakes. If something doesn’t fit easily, don’t force it. Check if the washer sits flat and the screen aligns with the threading inside the casing.
Securing With Tools
Once aligned, you need to tighten the aerator back onto the faucet. Use your hands first to screw it in gently. If it’s too tight, use an adjustable wrench or pliers, but protect the aerator’s finish by wrapping it with a cloth.
Be careful not to overtighten, as this can strip the threads or crack the casing. A snug fit is enough to prevent leaks and keep the aerator stable. After securing, turn on your faucet and check for any drips or unusual water flow. If you notice issues, loosening and realigning might be necessary.
Testing The Faucet Flow
Testing the faucet flow helps ensure your kitchen faucet works properly after cleaning. It shows if water pressure is correct and if leaks exist. This simple check confirms the aerator is clean and functioning well.
Checking Water Pressure
Turn on the faucet fully to observe the water flow. The stream should be steady and strong without sputtering. A weak or uneven flow might mean the aerator is still clogged or damaged.
Watch for any dripping or unusual noises while water runs. These signs can indicate blockages or issues within the faucet parts. Clear flow means cleaning was successful.
Ensuring No Leaks
Look closely around the faucet base and handles for water drops. Leaks can waste water and cause damage to your sink area. Tighten connections if you spot any leaks.
Check under the sink for wet spots or dampness. This area often shows hidden leaks early. Proper sealing keeps water inside the pipes and prevents problems.

Credit: www.youtube.com
Maintenance Tips
Keeping your kitchen faucet aerator clean extends its life and improves water flow. Proper maintenance prevents buildup and clogs. Simple habits protect your faucet and ensure consistent performance.
Regular Cleaning Schedule
Set a cleaning routine for your aerator. Clean it every three months to stop mineral deposits from forming. Remove the aerator and soak it in vinegar for 30 minutes. Use a soft brush to clear any debris. Rinse well and reattach. This quick step keeps water flowing smoothly and prevents damage.
Using Water Filters
Install a water filter to reduce dirt and minerals reaching your faucet. Filters catch particles that cause buildup in the aerator. Choose a filter that fits your water quality needs. Change the filter regularly to maintain clean water. Clean water lowers the chance of clogging and extends faucet life.

Credit: www.yahoo.com
Frequently Asked Questions
How Often Should I Clean My Kitchen Faucet Aerator?
Clean your kitchen faucet aerator every 3 to 6 months. Regular cleaning prevents mineral buildup and ensures steady water flow. More frequent cleaning may be needed in hard water areas. This simple maintenance keeps your faucet working efficiently and extends its lifespan.
What Tools Do I Need To Clean An Aerator Faucet?
You need a wrench or pliers, a small brush, and white vinegar. A cloth helps protect the faucet from scratches. These basic tools make aerator cleaning easy and effective, removing debris and mineral deposits to restore water flow.
Can Vinegar Effectively Remove Mineral Deposits From Aerators?
Yes, white vinegar dissolves mineral deposits efficiently. Soak the aerator parts in vinegar for 30 minutes. Then scrub gently with a brush. Vinegar is a safe, natural cleaner that removes buildup without damaging faucet components.
How Do I Reassemble The Aerator After Cleaning?
Rinse all parts thoroughly before reassembling. Align the screen and rubber washer correctly. Screw the aerator back onto the faucet carefully. Tighten by hand or with a wrench gently to avoid damage and leaks.
Conclusion
Cleaning your kitchen faucet aerator keeps water flow smooth and steady. Regular cleaning stops clogs and removes dirt build-up. This simple step saves money on repairs and water bills. Just follow easy steps and use basic tools. A clean aerator helps your faucet work like new again.
Small effort, big difference. Keep your kitchen faucet fresh and working well every day.


