Are you struggling with a leaky or rusty shower head arm? Removing it might seem tricky, but with the right steps, you can do it quickly and without damage.
This guide will walk you through the simple process, saving you time and money on repairs. Keep reading to learn how to remove your shower head arm easily and confidently, even if you’ve never done it before. Your bathroom upgrade starts here!
Tools Needed
Removing a shower head arm might seem straightforward, but having the right tools can make the process smoother and save you from potential frustration. You don’t need a toolbox full of gadgets—just a few key items that fit well and work efficiently. Knowing exactly what to grab before you start can prevent damage to your plumbing and make your job faster.
Adjustable Wrench
An adjustable wrench is essential for gripping and turning the shower arm without slipping. It adapts to different sizes, so you don’t need multiple wrenches. If you’ve ever struggled with a rusty pipe, you’ll appreciate how a good adjustable wrench gives you the control to loosen tough fittings.
Pipe Wrench
A pipe wrench offers extra leverage for stubborn shower arms that refuse to budge. Its serrated jaws grip tightly around round pipes, reducing the risk of rounding off the metal. If the arm feels stuck, this tool can save you a lot of elbow grease and prevent damage.
Teflon Tape (plumber’s Tape)
Teflon tape is crucial for sealing threads when you reinstall or replace the shower arm. Wrapping it correctly keeps the connection watertight and avoids leaks. It’s a small item but makes a big difference in maintaining your shower’s integrity.
Rag Or Cloth
Wrap a rag or cloth around the shower arm before using a wrench to protect the finish. This simple step prevents scratches and keeps your bathroom looking good. It’s a quick trick that’s easy to overlook but really pays off in the end.
Penetrating Oil
If the shower arm is rusted or stuck, penetrating oil helps loosen the threads. Apply it and wait a few minutes before trying to turn the arm. This often turns a frustrating job into a much easier one, saving you from using excessive force.
Safety Precautions
Removing a shower head arm needs care and attention. Safety must be your top priority before starting any work. Taking simple safety steps helps avoid accidents and damage. Always prepare your workspace and tools properly. This prevents problems and keeps the task easy and safe.
Turn Off Water Supply
Shut off the water supply to the shower. This stops water from spraying out during removal. Check if the main valve or local valve controls the water. Turning off water avoids leaks and water damage.
Use Proper Tools
Choose the right tools like a pipe wrench or adjustable wrench. Using wrong tools can harm the shower arm or plumbing. Tools should fit well and be in good condition. This ensures a firm grip and safe removal.
Protect Your Hands
Wear gloves to protect your hands from sharp edges and dirt. Gloves also improve grip on slippery parts. Keep a clean cloth nearby to wipe sweat or water.
Work In A Dry Area
Make sure the floor and area around the shower are dry. Wet floors cause slips and falls. Use a towel or mat to keep the space safe.
Check For Electrical Hazards
Look for electrical devices near the shower area. Water and electricity do not mix and can be dangerous. Turn off electricity if needed before starting work.
Turning Off Water Supply
Turning off the water supply is the first and most important step before removing a shower head arm. This action prevents water from spraying out and causing a mess. It also protects your plumbing and tools from damage. Always ensure the water is completely off to work safely and efficiently.
Water can come from different sources in your home. Knowing where to shut it off helps avoid confusion. Some homes have a main water valve, while others have a local valve near the bathroom. Checking both can save time and effort.
Locating The Main Water Shut-off Valve
The main water shut-off valve controls water flow to the entire house. It is often found near the water meter or where the main pipe enters your home. Turn the valve clockwise to close it. This stops all water supply, including the shower.
Finding The Bathroom Shut-off Valve
Some bathrooms have a separate shut-off valve. This valve is usually near the shower or under the sink. Turning this valve clockwise stops water only to the bathroom. It allows work on the shower without affecting other areas.
Testing The Water Flow
After shutting off the valve, test if the water is off. Turn on the shower tap and check for water flow. If water still comes out, recheck the valve or try the main shut-off. No water flow means it is safe to remove the shower head arm.

Credit: www.mineralstream.co
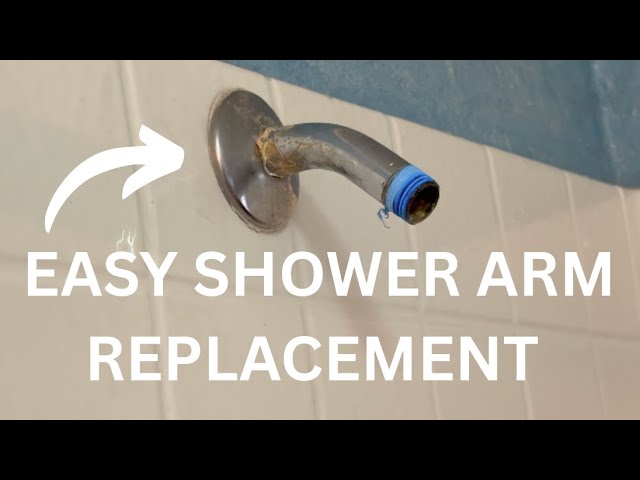
Removing The Shower Head
Removing the shower head is the first step before you take off the shower arm. This task is simple and requires minimal tools. With the right approach, you can avoid damage to your plumbing and fixtures.
Begin by preparing your workspace. Lay down a cloth or towel to catch any drips or small parts. This keeps the area clean and protects surfaces.
Gather The Necessary Tools
- Adjustable wrench or pliers
- Cloth or masking tape
- Old toothbrush or soft brush
- WD-40 or penetrating oil (optional)
Protect The Shower Head Finish
Wrap the jaws of your wrench or pliers with a cloth or masking tape. This prevents scratching the shower head surface. Handle the fixture gently during removal.
Loosen The Shower Head
Turn the shower head counterclockwise by hand. If it’s tight, use the wrench or pliers for extra grip. Apply steady pressure without forcing it.
Remove Stubborn Shower Heads
Spray a small amount of penetrating oil at the connection point. Let it sit for 10 minutes to loosen rust or mineral buildup. Try turning the shower head again after waiting.
Clean The Threads
Use a toothbrush or soft brush to clean the threads on the pipe and shower head. Removing debris helps with smooth reinstallation or replacement.
Detaching The Shower Arm
Detaching the shower arm might seem tricky at first, but with the right approach, it’s quite manageable. You need to take care to avoid damaging the wall or plumbing behind it. A steady hand and a few simple tools will make the job easier than you expect.
Gathering The Right Tools
Before you start, make sure you have a wrench or adjustable pliers, some plumber’s tape, and a cloth or rag. The cloth helps protect the finish on the shower arm from scratches when you grip it with tools. Having these ready ensures you won’t have to stop midway to look for something important.
Protecting The Shower Arm
Wrap the cloth around the shower arm where you plan to grip it. This step prevents dents or marks caused by the wrench. It might feel like extra work, but protecting your fixtures saves you from costly replacements later.
Loosening The Shower Arm
Grip the shower arm firmly with your wrench or pliers. Turn it counterclockwise to loosen. If it’s stuck, try applying a little penetrating oil and wait 10 minutes before trying again. Have you noticed how a small pause can make stubborn parts easier to move?
Removing The Shower Arm
Once loosened, you can usually unscrew the shower arm by hand. Pull it straight out carefully to avoid damaging the plumbing behind the wall. If it feels stuck, gently wiggle it while pulling. This prevents unnecessary force that could cause leaks or breaks.
Inspecting The Area After Removal
Check the threads on both the shower arm and the wall pipe for any damage or old plumber’s tape. Cleaning these surfaces helps ensure a tight seal when you install a new arm. Have you ever overlooked this and ended up with a leaky shower? Taking a moment here saves you frustration later.

Credit: www.reddit.com
Cleaning Threaded Connections
Cleaning the threaded connections is important before removing the shower head arm. Dirt, rust, and old plumber’s tape can block the threads. This makes unscrewing difficult and may damage the pipes.
Proper cleaning helps the threads work smoothly. It also prevents leaks when you reattach the shower arm. Use simple tools and materials to clear the threads carefully.
Gathering Tools For Cleaning Threads
- Adjustable wrench or pliers
- Wire brush or old toothbrush
- Rag or cloth
- White vinegar or mild cleaning solution
- Plumber’s tape (Teflon tape)
Removing Debris From Threads
Start by wiping the threads with a dry cloth. Remove loose dirt and dust. Use the wire brush to scrub the threads gently. This removes rust and stuck debris.
Dip the brush in white vinegar for better cleaning. Vinegar helps dissolve mineral buildup. Do not use harsh chemicals that damage metal.
Drying And Inspecting The Threads
After cleaning, dry the threads with a clean rag. Check for any damage or cracks. Damaged threads may need replacement to avoid leaks.
Clean threads make the shower arm easier to remove and reinstall. They also ensure a tight and leak-free fit.
Installing The New Shower Arm
Installing the new shower arm is a straightforward task that requires careful handling. The new arm must fit tightly to avoid leaks. Proper installation ensures a strong connection and smooth water flow.
Prepare The Shower Pipe
Clean the pipe threads using a cloth or brush. Remove old plumber’s tape or sealant. Check the pipe for damage or rust. A clean surface helps the new arm seal well.
Apply Plumber’s Tape
Wrap plumber’s tape around the pipe threads. Wrap in the direction of the threads to prevent unraveling. Apply two to three layers for a secure seal. This prevents water leaks around the joint.
Attach The New Shower Arm
Align the new shower arm with the pipe threads. Turn the arm clockwise by hand to start threading. Tighten the arm firmly but avoid over-tightening. Use a wrench with a cloth to protect the finish.
Check For Proper Alignment
Make sure the shower arm points in the right direction. Adjust before final tightening if needed. Proper alignment ensures the showerhead will sit correctly.
Test For Leaks
- Turn on the water supply slowly.
- Check around the connection for drips.
- Tighten slightly if you find leaks.
- Replace plumber’s tape if leaks persist.
Reattaching The Shower Head
Reattaching the shower head is the final step after removing or replacing the shower arm. It ensures a secure fit and prevents leaks. Proper reattachment helps maintain water pressure and extends the life of your shower setup.
Before reattaching, clean the threads on both the shower arm and the shower head. This removes old tape or debris that can cause leaks. Use a cloth or a soft brush for cleaning.
Apply Plumber’s Tape
Wrap plumber’s tape around the threads of the shower arm. This tape seals the connection and stops water from leaking. Wrap it clockwise, covering the threads evenly with two to three layers.
Attach The Shower Head
Align the shower head with the shower arm threads. Turn the shower head clockwise by hand until it is snug. Avoid cross-threading by ensuring it turns smoothly.
Tighten With A Wrench
Use an adjustable wrench or pliers to tighten the shower head. Place a cloth between the tool and the shower head to avoid scratches. Tighten it firmly, but do not over-tighten to prevent damage.
Check For Leaks
Turn on the water and inspect the connection. Look for drips around the shower head and arm. If leaking occurs, tighten the shower head slightly more or reapply plumber’s tape.
Testing For Leaks
Testing for leaks is crucial after removing and reinstalling a shower head arm. Even a small leak can waste water and cause damage. Check all connections carefully to ensure a tight seal. Doing this before finishing the job saves time and effort later.
Turn On The Water Slowly
Start by turning on the water slowly. This prevents sudden pressure that might hide leaks. Watch the connection point closely as water flows. Look for any drops or wet spots forming.
Use A Dry Tissue Or Paper Towel
Place a dry tissue or paper towel around the joint. If the tissue gets wet, it shows a leak. This method helps spot small leaks that are hard to see with the naked eye.
Check For Drips And Moisture
Look carefully for drips hanging from the arm or threads. Also, check for moisture buildup on nearby surfaces. Even slow leaks can cause damage over time.
Tighten Connections If Needed
If you find leaks, turn off the water and tighten the arm. Use a wrench but avoid over-tightening. Test again to confirm the leak is fixed before finishing.
Maintenance Tips
Maintaining your shower head arm can save you time and money in the long run. Regular care prevents rust, buildup, and leaks that make removal tricky. Simple maintenance habits keep your bathroom running smoothly and your shower enjoyable.
Clean The Threads Regularly
Dirt and mineral deposits can build up on the threads where the shower head arm connects. Use a soft brush or an old toothbrush to gently scrub these areas every few months. This prevents corrosion and ensures the arm twists off easily when needed.
Use Vinegar Soaks To Remove Mineral Deposits
Hard water leaves stubborn mineral deposits that can seize the arm in place. Soaking a cloth in white vinegar and wrapping it around the joint loosens the buildup. Try this for 30 minutes before attempting removal to avoid forcing the arm and causing damage.
Apply Plumber’s Tape Before Reinstallation
Plumber’s tape creates a tight seal and prevents leaks after you reinstall the arm. Wrap the tape clockwise around the threads in two or three layers before screwing the arm back in. This small step can save you from water drips and future repairs.
Check For Signs Of Wear And Rust
Inspect the arm regularly for cracks, rust, or worn-out parts. Rust weakens the metal and makes removal risky, potentially breaking the arm inside the wall. If you spot damage early, replacing the arm is safer and easier than dealing with a stuck or broken fixture.
Keep Tools Handy And Use The Right Size
Having an adjustable wrench or a pipe wrench nearby makes maintenance less frustrating. Use the correct size to avoid stripping the metal or damaging the finish. If your wrench slips, adding a cloth between the tool and the arm improves grip and protects surfaces.
Credit: www.tiktok.com
Frequently Asked Questions
How Do I Safely Remove A Shower Head Arm?
Turn off the water supply first. Use an adjustable wrench to loosen the arm. Wrap the arm with a cloth to prevent scratches. Turn counterclockwise until the arm detaches from the pipe. Be gentle to avoid damaging plumbing.
What Tools Are Needed To Remove A Shower Head Arm?
You need an adjustable wrench, plumber’s tape, and a cloth. The wrench helps loosen the arm. The cloth protects the finish. Plumber’s tape seals threads when reinstalling. These basic tools ensure a smooth removal process.
Can I Remove A Shower Head Arm Without Professional Help?
Yes, you can. Most shower arm removals are simple DIY tasks. Just turn off water, use the right tools, and proceed carefully. If you face resistance or leaks, consult a plumber to avoid damage.
Why Is The Shower Head Arm Stuck When Removing?
Mineral buildup or rust often causes sticking. Use a penetrating lubricant and let it sit for 10 minutes. Then try loosening the arm with a wrench. Avoid excessive force to prevent pipe damage.
Conclusion
Removing a shower head arm is easier than it seems. With a few simple tools, anyone can do it. Turn off the water first to avoid mess. Use a wrench to loosen the arm carefully. Clean the threads before installing a new part.
Take your time and work slowly to avoid damage. This small task can improve your shower’s function quickly. Trying it yourself saves money and builds confidence. Give it a try—you might surprise yourself with success.


