Are you ready to upgrade your door but unsure how to start? Knowing how to drill a hole for a door knob is a simple skill that can save you time and money.
Imagine the satisfaction of installing your door knob perfectly on your own, without waiting for a professional. In this guide, you’ll discover easy steps and helpful tips to get the job done right the first time. Keep reading, and by the end, you’ll feel confident tackling this task like a pro.
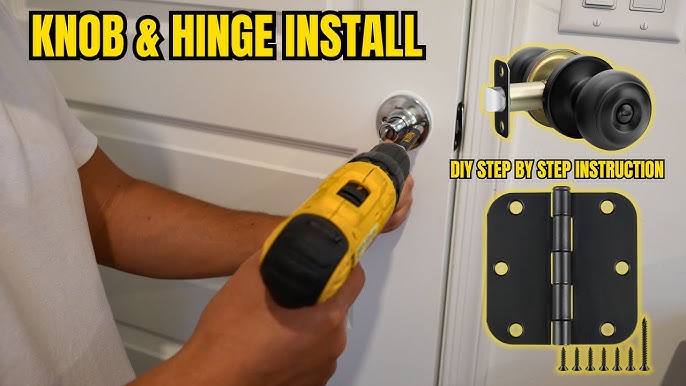
Credit: www.tiktok.com
Tools And Materials Needed
Drilling a hole for a door knob requires specific tools and materials. Having the right items ensures a smooth and accurate installation. This section lists what you need before starting the project.
Power Drill
A power drill is essential for making clean, precise holes. Choose a drill with adjustable speed settings. This helps control the drilling process and avoid damage.
Hole Saw Bit
A hole saw bit matches the size of the door knob hole. Typically, a 2-1/8 inch bit fits most knobs. The bit cuts a round hole quickly and evenly.
Spade Bit
A spade bit is useful for drilling the latch hole on the door edge. Common sizes range from 7/8 inch to 1 inch. It makes straight, clean holes for the latch mechanism.
Measuring Tape And Pencil
Measure carefully before drilling. Use a tape measure to find the right height and position. Mark the spot clearly with a pencil for accuracy.
Chisel And Hammer
A chisel and hammer help create space for the latch plate. They clean edges and allow the latch to sit flush with the door surface.
Safety Gear
Wear safety goggles to protect your eyes from dust and debris. Use ear protection if the drill is loud. Gloves add extra grip and hand safety.
Preparing The Door
Preparing the door properly is key to a smooth and accurate installation of your door knob. This phase sets the foundation for drilling the perfect hole without damaging the door or misaligning the hardware.
Marking The Spot
Start by identifying exactly where the hole should go. Use a pencil to make a clear, visible mark on the door’s edge and face where the knob will sit.
Don’t guess the placement—measure carefully from the edge and the top or bottom of the door. A misplaced mark can cause the knob to sit awkwardly or even prevent the latch from working.
Take your time here. If you mark it wrong, you might end up with an ugly patch or a door that doesn’t close properly.
Checking Measurements
Double-check your measurements using a tape measure or ruler. Verify the distance from the door edge to the mark and ensure it matches the specifications of your door knob kit.
Check the backset—the distance from the edge of the door to the center of the hole. Most residential doors use a 2 3/8” or 2 3/4” backset, but your hardware might differ.
Have you ever drilled a hole only to realize the latch doesn’t fit? It’s frustrating and avoidable. Taking the time to confirm your measurements reduces costly mistakes and saves you effort later.
Drilling The Hole
Drilling the hole for a door knob is a critical step that demands precision and care. You want the hole to be perfectly aligned and clean to ensure the knob fits snugly and operates smoothly. Taking your time here can save you from frustrating adjustments later on.
Choosing The Right Drill Bit
Selecting the correct drill bit is key. Typically, a hole saw bit is used for the main hole, usually 2 1/8 inches in diameter, to fit the door knob. For the latch hole on the edge of the door, a spade bit around 1 inch works best.
Think about the door material too. If you’re drilling into hardwood, a high-quality, sharp bit designed for tough materials will make the job easier and prevent splintering. Have you ever struggled with a dull bit that just wouldn’t cut through? Avoid that frustration by preparing your tools beforehand.
Safety Precautions
Safety should never be overlooked. Always wear safety goggles to protect your eyes from wood chips and dust. Gloves can help protect your hands, but ensure they don’t get caught in the drill.
Secure the door firmly before drilling to avoid slips. If the door is loose, the drill can slip and ruin your work or cause injury. Do you have a stable workspace ready? Setting up properly reduces accidents and improves accuracy.
Installing The Door Knob
Installing the door knob completes the hole drilling process. This step requires careful fitting and secure attachment. A well-installed knob ensures smooth operation and safety. Follow these clear instructions to install your door knob correctly.
Fitting The Knob
Begin by aligning the two halves of the door knob on each side of the door. Make sure the spindle fits through the hole smoothly. The latch mechanism should sit flush inside the door edge. Check that the knob turns without resistance. Adjust if the parts do not line up perfectly.
Securing The Knob
Secure the door knob by tightening the screws on the interior side. Use a screwdriver to avoid over-tightening and damaging the door. Confirm the knob is firmly attached and does not wobble. Test the latch by turning the knob and pushing the door open and closed. Tighten screws further if needed for a secure fit.
Troubleshooting Common Issues
Drilling a hole for a door knob can sometimes lead to common problems. These issues can affect how the knob fits or works. Fixing these problems quickly can save time and avoid frustration. Below are simple ways to solve frequent door knob drilling issues.
Fixing Misaligned Holes
Misaligned holes make it hard to install the knob correctly. Check the placement of the holes before drilling. Use a measuring tape and pencil to mark the exact spot.
If the holes are off, try these fixes:
- Fill the wrong hole with wood filler and let it dry.
- Sand the filled area smooth for a clean surface.
- Re-mark the correct position carefully with a template.
- Drill the new hole slowly and steadily to keep it straight.
Take your time. A properly aligned hole ensures the knob works smoothly.
Adjusting Loose Knobs
A loose door knob feels unstable and may not turn properly. This usually happens if screws are not tight enough or the hole is too big.
Try these tips to fix a loose knob:
- Use a screwdriver to tighten all knob screws firmly.
- Insert small wooden shims inside the hole to fill extra space.
- Replace worn screws with longer, thicker ones for a better grip.
- Make sure the latch fits snugly and the knob aligns well.
These steps help keep your door knob secure and easy to use.

Credit: www.suffolklatchcompany.com
Maintenance Tips
Maintaining the hole you drilled for your door knob is crucial to ensure smooth operation and long-lasting performance. Neglecting this small detail can lead to misalignment, sticking knobs, or even damage to the door itself. Taking a few simple steps regularly can save you from costly repairs and frustrating door issues.
Keep The Hole Clean And Free Of Debris
After drilling, sawdust and wood chips can remain inside the hole. These tiny particles may cause the knob to stick or prevent the latch from working properly. Use a vacuum or a small brush to clear out any debris you find inside the hole before installing the knob.
Apply Lubricant To Moving Parts
Lubrication reduces friction between the door knob components and helps them move smoothly. Use a silicone-based spray or graphite powder rather than oil, which can attract dust and dirt. A light application every few months keeps your door knob working quietly and efficiently.
Check Alignment Regularly
Even a perfectly drilled hole can shift over time due to door movement or changes in humidity. Test your door knob regularly by turning it and checking the latch’s response. If you notice resistance or misalignment, adjust the strike plate or tighten the screws to keep everything in place.
Inspect For Wear And Damage
Look closely at the edges of the hole and the knob mechanism for signs of wear or cracks. Small damages can worsen quickly if left unattended. Catching these early means you can fix or replace parts before the problem spreads.
Use The Right Tools For Adjustments
When making adjustments, use screwdrivers that fit the screws well to avoid stripping them. Avoid forcing parts that don’t move easily; this can cause permanent damage. Gentle, precise adjustments extend the life of your door knob and keep it functioning smoothly.

Credit: www.suffolklatchcompany.com
Frequently Asked Questions
How Do I Measure The Hole Size For A Door Knob?
Measure the door knob’s diameter to determine the hole size. Most standard knobs need a 2 1/8-inch hole. Use a hole saw drill bit matching this size for an accurate cut.
What Tools Are Needed To Drill A Door Knob Hole?
You need a power drill, hole saw bit, tape measure, pencil, and a level. These tools ensure precise measurement and a clean hole for the door knob installation.
How Far From The Door Edge Should I Drill?
Drill the hole 2 3/8 to 2 3/4 inches from the door edge. This spacing fits most door knob latch assemblies and ensures proper door knob function.
Can I Drill A Hole In A Metal Door For A Knob?
Yes, use a carbide-tipped hole saw bit for metal doors. Drill slowly to avoid damage and use cutting oil to reduce heat and extend bit life.
Conclusion
Drilling a hole for a door knob is simple with the right steps. Measure carefully and mark the spot clearly. Use the correct drill bit size to avoid mistakes. Take your time and drill straight to keep the hole clean.
Always wear safety gear to protect yourself. Following these easy tips helps you finish the job quickly and correctly. Now, you can install your door knob with confidence and ease.


