Are you ready to give your home a fresh, new look? Painting your home interior is one of the easiest and most affordable ways to transform any space.
But where do you start? Choosing the right colors, tools, and techniques can feel overwhelming. Don’t worry—this guide will walk you through every step, helping you avoid common mistakes and get professional-looking results. By the end, you’ll feel confident to pick up that brush and create a space you truly love.
Let’s dive in and make your home shine!

Credit: www.designcafe.com
Choosing The Right Paint
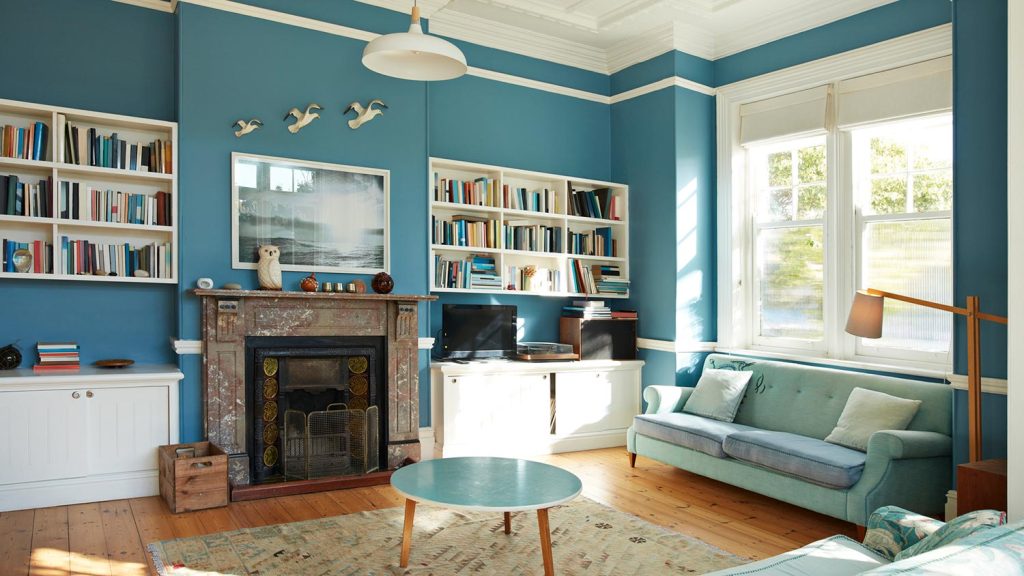
Choosing the right paint affects your room’s look and feel. Pick a finish that suits the space, like matte for walls or satin for trim. Consider paint quality for durability and easy cleaning.
Choosing the right paint for your home interior can be a delightful experience. The right choice transforms a space, creating the desired mood and enhancing aesthetics. Several factors influence the decision, including types of paint, color selection, and finish options. Let’s explore these crucial elements to ensure your interior painting project is a success.Types Of Interior Paint
Selecting the ideal paint starts with understanding different types. Latex paint is popular for its durability and ease of cleaning. Oil-based paint offers a smoother finish but takes longer to dry. Consider your needs and the specific room when choosing between these options.Selecting Colors
Choosing colors involves more than picking favorites. Consider the room’s purpose and mood. Soft blues and greens promote relaxation. Bold reds and yellows energize spaces. Test samples on walls to see how they look in different lighting.Considering Finish Options
Finish impacts both appearance and functionality. Flat finishes hide imperfections but are less washable. Glossy finishes are easy to clean, perfect for kitchens and bathrooms. Satin and eggshell offer a balance, suitable for most rooms. Evaluate the room’s needs before deciding.Gathering Supplies
Before you start painting your home interior, gathering the right supplies is crucial. Having everything at hand saves time and prevents frustration during the project. It also helps you achieve a cleaner, more professional finish.
Essential Tools
Make sure you have all the basic painting tools before you begin. These include:
- Quality paintbrushes in various sizes for corners and large surfaces
- Rollers with appropriate nap length for your wall texture
- Paint trays and liners for easy cleanup
- Painter’s tape to protect edges and create sharp lines
- Extension poles to reach high areas without a ladder
Choosing the right tools can change your painting experience. Have you ever tried using a worn-out brush and ended up with streaks? Investing in good brushes makes a big difference.
Safety Gear
Your safety should never be overlooked during painting. Simple gear can protect you from fumes, splashes, and accidents.
- Wear safety goggles to shield your eyes from paint splatter
- Use gloves to keep your hands clean and safe from harsh chemicals
- Consider a mask or respirator, especially in poorly ventilated rooms or when using oil-based paints
- Wear old clothes or a protective apron to avoid ruining your favorite outfit
Have you noticed how much safer and comfortable painting feels when you’re properly equipped? It’s easy to skip safety gear, but it often leads to unnecessary discomfort or injury.
Preparation Materials
Preparing your walls properly is as important as the paint you choose. These materials help you get a smooth, long-lasting finish.
- Drop cloths or plastic sheeting to protect floors and furniture
- Sandpaper or sanding blocks to smooth rough spots and remove old paint flakes
- Spackle or putty to fill holes, cracks, and dents
- Putty knife for applying spackle cleanly
- Cleaning supplies like mild detergent and sponges to remove dust and grease
Skipping preparation can cost you time and money in the long run. Do you want to spend hours fixing peeling paint or uneven surfaces later? Taking time to prep makes the painting process smoother and the results more satisfying.
Preparing Walls And Surfaces
Preparing your walls and surfaces is a crucial step before you start painting. It sets the foundation for a smooth, long-lasting finish. Skipping this step can cause uneven paint, peeling, or bubbles that ruin your hard work.
Cleaning And Repairing
Start by cleaning the walls thoroughly. Dust, grease, and stains prevent paint from sticking properly. Use a mild detergent mixed with water and a sponge to wipe down the surfaces.
Check for cracks, holes, or dents. Fill these with spackling paste or a suitable filler. After it dries, smooth the patched areas with a putty knife to make them flush with the wall.
Sanding And Priming
Sanding helps to smooth out rough spots and remove old paint flakes. Use fine-grit sandpaper and lightly sand the entire surface. This step creates a texture that helps the new paint adhere better.
Priming is essential, especially on repaired spots or bare drywall. It seals the surface, blocks stains, and prevents paint from soaking unevenly. Choose a primer that matches your paint type and wall material.
Protecting Floors And Furniture
Protect your floors and furniture with drop cloths or plastic sheeting. Painter’s tape is perfect for covering edges, trim, and switches. This simple step saves you from costly cleanup and accidental stains.
Have you ever started painting only to realize your furniture is covered in paint splatters? Taking the time to protect your space can make the entire process less stressful and more enjoyable.
Painting Techniques
Painting your home’s interior can transform the entire space, but the right techniques make all the difference. Mastering a few key painting skills helps you achieve smooth, professional results. Let’s break down essential painting techniques that will give your walls a flawless finish.
Cutting In Edges
Cutting in is the process of painting the edges where the walls meet ceilings, corners, and trim. Use a high-quality angled brush to maintain control and create clean lines. Take your time and steady your hand by resting it against the wall; this prevents paint from spilling onto ceilings or trim.
Try painting a few inches along the edge before rolling the larger wall area. This technique saves you from tedious touch-ups later. Have you noticed how sharp, crisp edges instantly make a room feel more polished?
Rolling Walls
Rolling paint onto walls covers large areas quickly and evenly. Use a roller with the right nap length depending on your wall texture—short nap for smooth walls and longer nap for textured surfaces. Apply paint in a “W” or “M” pattern to spread the paint evenly without leaving streaks.
Don’t press too hard; let the roller do the work to avoid uneven patches. Keep a wet edge to prevent lap marks by working in small sections. Have you ever tried rolling vertically versus horizontally? Vertical strokes often blend better with natural wall lines.
Applying Multiple Coats
One coat of paint rarely provides full coverage. Applying multiple coats ensures a richer, more consistent color and better durability. Allow the first coat to dry completely before adding the next; this usually takes a few hours but varies by paint type and humidity.
Lightly sanding between coats can help smooth out imperfections and create a better surface for the next layer. How many coats does your favorite paint brand recommend for the best finish? Following those guidelines can save you time and frustration.
Dealing With Common Challenges
Painting your home’s interior brings fresh life to your space. Yet, challenges often arise during the process. Knowing how to handle these problems can save time and effort. Common issues include drips, streaks, mistakes, and hard-to-reach spots.
Understanding how to avoid and fix these issues ensures a smooth painting experience. It also helps achieve a polished, professional look. The tips below cover key challenges and ways to manage them effectively.
Avoiding Drips And Streaks
Use a good quality brush or roller for smooth application. Apply paint in thin, even layers to prevent drips. Avoid pressing too hard on the brush or roller. Maintain a wet edge by painting in small sections. Check for drips often and smooth them out immediately. Let each coat dry fully before adding another layer.
Fixing Mistakes
Small mistakes are easy to fix with quick action. Use a damp cloth to wipe fresh paint spills gently. For dried paint marks, sand lightly with fine-grit sandpaper. Touch up with matching paint and a small brush. Allow touch-ups to dry fully and blend with the surrounding area. Keep extra paint handy for these fixes.
Handling Difficult Areas
Corners, edges, and trim need special care. Use painter’s tape to protect surfaces and create clean lines. A small angled brush helps reach tight spots. Paint around outlets and switches carefully after turning off power. For textured walls, use a roller with a thicker nap. Work slowly and check your work from different angles.
Finishing Touches
Finishing touches give your room a neat, polished look. This stage makes a big difference in the final result. Small details matter now. You want clean edges, smooth walls, and a fresh feel throughout. Take your time here. It shows in the quality of your work.
Removing Tape And Cleaning Up
Remove painter’s tape carefully while paint is still slightly wet. Pull the tape back slowly at an angle. This prevents peeling or jagged edges. Use a damp cloth to wipe off any paint drips. Clean brushes and rollers with water or the right solvent. Dispose of used materials properly to keep your space tidy.
Touching Up Imperfections
Check walls for missed spots or uneven paint. Use a small brush to fix these areas gently. Lightly sand rough patches once dry. Avoid heavy layers of paint in touch-ups. Blend the new paint into the old for a smooth finish. This step improves the overall look and feel.
Allowing Proper Drying Time
Let paint dry completely before moving furniture back. Drying times vary by paint type and room conditions. Avoid touching walls or hanging items too soon. Proper drying prevents smudges and damage. Keep windows open or use fans to speed drying. Patience now ensures a long-lasting, beautiful paint job.
Maintaining Painted Surfaces
Keeping your painted walls looking fresh and vibrant takes more than just a good initial paint job. Maintaining painted surfaces requires regular care, timely touch-ups, and smart protection strategies. This ensures your walls stay beautiful longer and saves you from costly repainting sooner than necessary.
Cleaning Tips
Dust and dirt can dull your walls quickly. Use a soft cloth or microfiber duster to gently remove dust weekly. For stains or marks, a mixture of mild soap and water works well—avoid harsh chemicals that can strip paint.
Test your cleaning solution on a small, hidden area before tackling the whole wall. Gently scrub with a sponge or soft brush, then wipe dry. Regular cleaning prevents buildup and keeps colors bright.
When To Repaint
How do you know it’s time to repaint? Look for signs like peeling, cracking, or fading paint. If your walls look dull or have noticeable scuffs, repainting can restore their charm.
High-traffic areas may need repainting every 3-5 years, while less-used rooms might last longer. Don’t wait for damage to worsen—address small issues early to avoid bigger repairs.
Protecting Your Walls
Protect your freshly painted walls from damage by using furniture pads and avoiding sharp objects nearby. Consider applying a clear sealant on high-traffic walls to add an extra layer of defense.
Be mindful of humidity and temperature changes that can affect paint adhesion. Using exhaust fans in kitchens and bathrooms helps prevent moisture buildup that can cause peeling or mold.
:max_bytes(150000):strip_icc()/paint-tricks-GettyImages-1297039583-c88173c934ed4893acbad24d918c19f5.jpg)
Credit: www.realsimple.com

Credit: www.designcafe.com
Frequently Asked Questions
What Tools Are Essential For Interior House Painting?
Essential tools include brushes, rollers, painter’s tape, drop cloths, and paint trays. These help ensure clean, even coverage and protect surfaces during painting.
How Do I Prepare Walls Before Painting?
Clean walls, patch holes, sand rough areas, and apply primer. Proper preparation improves paint adhesion and results in a smooth finish.
What Type Of Paint Is Best For Interior Walls?
Latex paint is ideal for most interior walls. It dries quickly, is easy to clean, and offers good durability and coverage.
How Many Coats Of Paint Do I Need Inside?
Usually, two coats provide even color and coverage. The first coat may not fully hide previous colors or wall imperfections.
Conclusion
Painting your home interior can change its whole look. Choose colors that make you feel happy and calm. Prepare your walls well for smooth, long-lasting paint. Take your time and work carefully for the best results. Clean your tools after use to keep them ready.
Enjoy the fresh, new atmosphere you create inside. Small efforts bring big changes. Start painting and see your home shine!


