Are you ready to transform your living space with a fresh coat of paint? Painting an interior wall might seem tricky, but with the right steps, you can achieve a professional look without hiring a pro.
Imagine the satisfaction of seeing your room come alive with color you chose, done by your own hands. In this guide, you’ll discover simple, clear instructions that make painting easy and even enjoyable. Keep reading, and by the end, you’ll have the confidence and know-how to paint your walls like a seasoned expert.

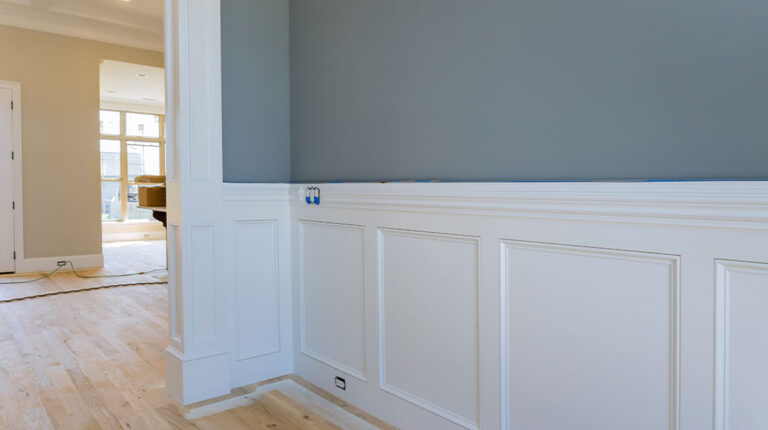
Credit: www.madebybarb.com
Choosing The Right Paint
Choosing paint with the right finish affects the wall’s look and feel. Consider paint type, color, and durability for a smooth, lasting result.
Choosing the right paint is crucial for a successful interior wall project. The paint type, color, and finish can dramatically impact the room’s look and feel. Understanding these elements helps create a space that reflects your style and meets your practical needs.Selecting Paint Types
Different paints serve different purposes. Latex paint is popular for its ease of use and quick drying time. It cleans up easily with soap and water. Oil-based paint offers durability and a smooth finish, ideal for high-traffic areas. Consider your room’s needs when selecting a type.Picking The Perfect Color
Color sets the mood in a room. Light colors make a room feel larger and more open. Dark shades add warmth and coziness. Use color swatches to visualize how different hues will look. Natural light impacts how colors appear throughout the day. Test small patches on your walls.Understanding Finish Options
Finish affects the final look and practicality of your paint job. Matte finish hides wall imperfections but is less washable. Satin finish offers slight sheen and is easier to clean. Glossy finish is durable and reflects light, making walls stand out. Choose based on your room’s activity level and desired aesthetic.
Credit: www.youtube.com
Gathering Supplies
Before you pick up a brush, gathering the right supplies can make all the difference in how smoothly your painting project goes. Having everything at hand saves time and helps you avoid frustrating interruptions. What if you had to stop midway because you realized you didn’t have a key tool? Let’s make sure that doesn’t happen.
Essential Tools
Start with the basics: brushes and rollers in various sizes. A 3-inch angled brush works great for corners and edges, while a roller with a medium nap covers larger wall areas efficiently.
Don’t forget a paint tray and liners to keep things tidy. Sandpaper or a sanding block helps smooth rough patches before you paint.
Other essentials include a putty knife for filling holes, painter’s tape to protect trim, and a ladder or step stool for reaching high spots.
Protective Gear
Protect your skin and eyes by wearing gloves and safety glasses. Paint splatters are unpredictable, and it’s better to be safe than sorry.
Consider a mask if you’re sensitive to paint fumes or working in a poorly ventilated room. Old clothes or a dedicated painting apron will keep your wardrobe safe from stains.
Preparing Drop Cloths
Drop cloths protect your floors and furniture from paint spills. Canvas drop cloths are durable and reusable, but plastic ones work well for quick jobs.
Make sure to cover all areas where you don’t want paint, taping the edges if needed to prevent slipping.
Have you noticed how a well-protected space changes your confidence while painting? It lets you focus on your work, not the mess.
Preparing The Wall
Preparing the wall is a vital part of painting an interior space. This step helps the paint stick better and last longer. A well-prepared surface gives a smooth and clean finish. Neglecting this can cause peeling and uneven color. Follow these key tasks to get your wall ready for paint.
Cleaning The Surface
Start by removing dust, dirt, and grease from the wall. Use a mild soap mixed with water and a sponge or cloth. Wipe gently to avoid damage. Rinse with clean water and let the wall dry fully. Clean walls help paint adhere well and look smooth.
Repairing Imperfections
Check the wall for holes, cracks, or dents. Use a putty knife to fill these spots with spackling paste or wall filler. Press the filler firmly into the damaged areas. Let it dry according to the product instructions. Smooth the surface by scraping off excess filler.
Sanding And Priming
Sand the patched areas with fine-grit sandpaper until smooth. Lightly sand the entire wall to help the primer stick. Remove dust with a dry cloth or vacuum. Apply a coat of primer to seal the surface and improve paint coverage. Allow the primer to dry completely before painting.
Setting Up Your Workspace
Setting up your workspace is a crucial step before you dip your brush into the paint. A well-prepared area not only protects your belongings but also makes the painting process smoother and more enjoyable. Let’s look at how you can get your room ready for a fresh coat of paint.
Moving Furniture
Start by clearing the room as much as possible. Move furniture to the center or, better yet, out of the room entirely if you can. This gives you full access to the walls and prevents accidental paint splatters on your belongings.
If some pieces are too heavy to move alone, use sliders or ask for help. Cover the remaining items with plastic sheets or old sheets to shield them from dust and paint drips. Have you ever tried painting with furniture in the way? It slows you down and increases stress.
Taping Edges
Use painter’s tape to mask off baseboards, window frames, door trims, and any other surfaces you don’t want painted. Apply the tape carefully to avoid paint bleeding underneath.
Press the tape down firmly with a putty knife or your fingernail to ensure a tight seal. This step might feel tedious, but it saves you hours of cleanup later. Think about how sharp and clean your edges will look with good taping—it’s worth the effort.
Ensuring Proper Ventilation
Open windows and doors to create airflow while painting. Paint fumes can be strong and may cause headaches or dizziness if your room is stuffy.
If your space doesn’t have enough natural ventilation, consider using fans to circulate the air. Prioritize your health by making sure fresh air keeps moving throughout the painting process. How often do you pause to think about air quality when working indoors?
Painting Techniques
Mastering painting techniques can make a huge difference in how your interior wall looks when finished. The right approach helps you achieve clean lines, smooth coverage, and a professional result. Let’s dive into some key painting techniques that you can easily apply, even if it’s your first time.
Cutting In Edges
Cutting in means painting the edges of the wall where rollers can’t reach, like corners, trim, and ceilings. Use a high-quality angled brush for better control and to avoid paint bleeding onto unwanted areas.
Start by loading your brush with a moderate amount of paint—too much causes drips. Slowly move the brush along the edge in steady strokes, keeping a wet border so the roller can blend seamlessly.
Have you noticed how rushing this step leads to messy edges? Taking your time here sets a clean foundation for the rest of the wall.
Using Rollers Effectively
Rollers cover large wall areas quickly but using them right is key to avoid streaks or uneven paint. Begin by dipping the roller into the tray and rolling it back and forth to load it evenly, not dripping.
Apply paint in a “W” or “M” pattern, then fill in the gaps without lifting the roller. This technique spreads paint evenly and prevents lines.
Keep a light touch and consistent pressure. Overworking the paint while it’s drying can cause texture issues.
Applying Multiple Coats
One coat rarely gives you the smooth, vibrant finish you want. Applying multiple coats ensures even color and hides imperfections.
Wait for each coat to dry fully before adding the next—usually a few hours. Lightly sanding between coats can help remove bumps and improve adhesion.
Ask yourself: does the color look dull or patchy? If yes, adding another coat can make a surprising difference in the final look.
Drying And Touch-ups
After you’ve applied paint to your interior wall, the job isn’t quite finished. The drying process and touch-ups are crucial steps to ensure a flawless finish. Taking the time to let the paint dry properly and carefully fixing any small mistakes can make your room look professionally painted.
Allowing Proper Drying Time
Patience is key when drying paint. Depending on the type of paint and room conditions, drying can take anywhere from a few hours to a full day.
Don’t rush this step. Touching or adding extra coats too soon can cause smudges or uneven texture.
Think about your room’s humidity and temperature. High humidity slows drying, so using a fan or opening windows helps speed things up.
Fixing Paint Mistakes
Even with care, paint runs or missed spots happen. The good news? Most mistakes are easy to fix once the paint is dry.
Use a small brush to carefully cover any thin or patchy areas. For drips, gently sand the spot with fine sandpaper before repainting.
Have you noticed uneven edges around trim or corners? Clean those up with a steady hand and a detail brush.
Removing Tape Neatly
Painter’s tape protects your trim and edges, but removing it incorrectly can ruin your clean lines.
Pull the tape off slowly and at a 45-degree angle. If the paint is still wet, removing tape can peel paint off the wall.
Sometimes waiting until the paint is just slightly tacky—not fully dry—helps get the sharpest line without damage. Have you tried scoring the tape edge with a utility knife before pulling it off? It prevents paint from lifting.
Cleaning Up
Cleaning up after painting an interior wall is just as important as the painting itself. It ensures your tools stay in good condition for future projects and keeps your space safe and tidy. Taking a few extra minutes to clean properly can save you time and money down the road.
Washing Brushes And Rollers
Start by removing as much paint as possible from your brushes and rollers. Use a scraper or the edge of the paint can to get off excess paint before rinsing.
For water-based paints, rinse your tools under warm running water until the water runs clear. With oil-based paints, use mineral spirits or paint thinner to clean them thoroughly, then wash with soap and water.
Have you ever left paint to dry on your brush? It’s frustrating and often means you need a new brush. Clean your brushes promptly to avoid this hassle.
Storing Leftover Paint
Don’t throw away leftover paint just yet. Store it in its original container and seal it tightly to prevent air from drying it out.
Label the can with the paint color and the room you used it in. This makes touch-ups much easier and avoids confusion later.
Keep your paint cans in a cool, dry place away from direct sunlight. Have you found your paint turning thick and unusable after a few months? Proper storage is the key to avoiding that.
Disposing Of Materials Safely
Paint and cleaning solvents can be hazardous to the environment if not disposed of properly. Never pour leftover paint or solvents down the drain or onto the ground.
Check local regulations for hazardous waste disposal sites or community collection events. Many areas have special days where you can safely drop off paint and related materials.
Think about how you can reduce waste on your next project by buying only what you need or using leftover paint creatively. How much paint have you thrown away that could have been avoided?

Credit: www.youtube.com
Frequently Asked Questions
How Do I Prepare A Wall For Painting?
Clean the wall to remove dust and grease. Fill holes with spackle and sand smooth. Use painter’s tape to protect edges and trim.
What Type Of Paint Is Best For Interior Walls?
Use latex or acrylic paint for interior walls. These paints dry quickly, clean easily, and offer durability and good coverage.
How Many Coats Of Paint Do I Need?
Typically, two coats are recommended for even coverage. The first coat seals the wall, and the second provides full color depth.
How Long Should I Wait Between Paint Coats?
Wait about 2 to 4 hours between coats. This allows the paint to dry properly and prevents smudging or peeling.
Conclusion
Painting an interior wall can change a room’s look quickly. With the right tools and steps, you can do it yourself. Take your time to prepare the wall well before painting. Use even strokes and let the paint dry fully between coats.
Clean up your tools after finishing. Enjoy your fresh, new space that feels bright and clean. Painting is a simple way to refresh your home without much cost. Try it yourself and see how much difference a new wall color makes.


