Have you ever faced the challenge of drilling a hole in a rock and wondered how to do it safely and effectively? Whether you’re working on a DIY project, setting up outdoor fixtures, or just curious about the process, knowing the right steps can save you time and frustration.
In this guide, you’ll discover simple, practical tips that make drilling into rock easier than you might think. Keep reading, and you’ll learn exactly how to get the job done right—without damaging your tools or the rock itself.

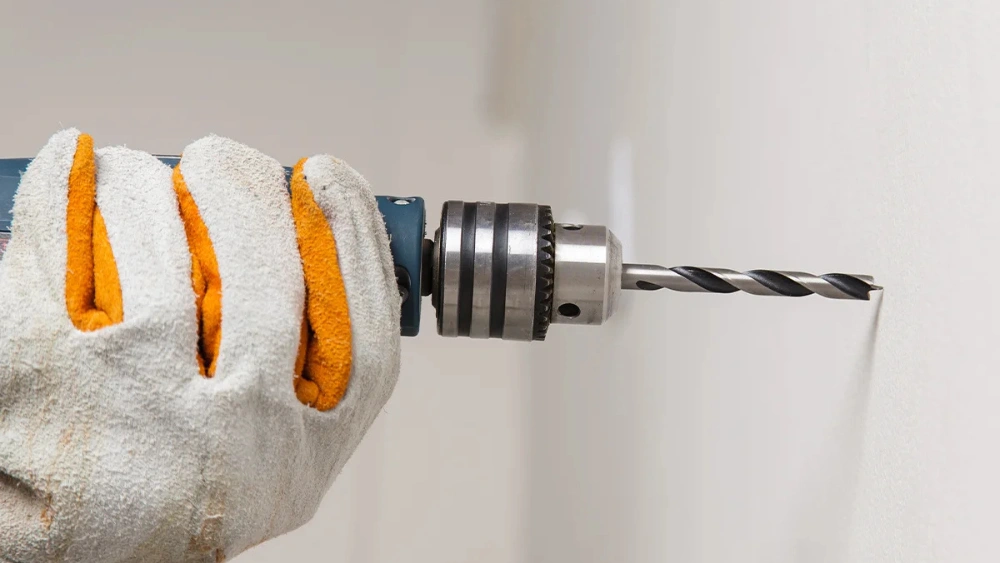
Credit: www.mindat.org
Choosing The Right Tools
Choosing the right tools is crucial for drilling a hole in a rock. The proper equipment makes the task easier and safer. It also helps create a clean, precise hole without damaging the rock.
Understanding the types of drill bits, the differences between power and manual tools, and essential safety gear will prepare you for the job. Each factor plays a key role in success.
Types Of Drill Bits
Drill bits come in various types designed for different materials. For rocks, use masonry or diamond-tipped drill bits. Masonry bits have a carbide tip and work well on softer rocks. Diamond bits are stronger and ideal for hard stones like granite.
Choose bits with the right size for your hole. Smaller bits make pilot holes, while larger bits create wider openings. Using the correct drill bit ensures efficiency and prevents bit damage.
Power Tools Vs. Manual Tools
Power tools make drilling faster and require less effort. Corded or cordless drills with hammer functions work best. The hammer action helps chip away rock as the bit rotates.
Manual tools include hand drills and manual augers. They are slower and need more strength but work well for small holes or delicate work. Manual tools offer more control in tight spaces.
Choose power tools for big projects or hard rock. Use manual tools for precision or light tasks.
Safety Gear Essentials
Protect yourself with proper safety gear. Always wear safety glasses to shield your eyes from flying debris. Use gloves to protect your hands from sharp edges and vibrations.
Wear a dust mask to avoid inhaling fine rock dust. Ear protection helps reduce noise from power drills. Sturdy boots and long sleeves add extra protection.
Safety gear keeps you safe and comfortable during drilling.

Credit: www.youtube.com
Preparing The Rock Surface
Preparing the rock surface is a key step before drilling a hole. A clean and stable surface helps the drill bit work better and prevents damage. Taking time to prepare ensures a safer and smoother drilling process.
Cleaning The Rock
Start by removing dirt, dust, and loose debris from the rock. Use a stiff brush or cloth to clean the surface. Water can help wash away stubborn dirt. A clean surface lets the drill bit grip the rock firmly.
Marking The Drill Spot
Use a pencil or chalk to mark the exact spot for drilling. Make the mark clear and visible. Double-check the spot to avoid mistakes. This step guides the drill and keeps the hole accurate.
Securing The Rock For Stability
Place the rock on a stable surface before drilling. Use clamps or a vise to hold the rock tightly. Stability prevents the rock from moving or slipping. It also protects your hands and helps control the drill.
Drilling Techniques
Drilling a hole in rock requires careful techniques to avoid damaging tools and to ensure a clean hole. Different strategies help make the process smoother and more efficient. Proper drilling techniques reduce wear on drill bits and improve accuracy. Below are key techniques that improve drilling performance.
Using A Pilot Hole
Start by drilling a small pilot hole before the final size. This guides the larger bit and reduces stress on the drill. The pilot hole helps keep the drill bit steady and prevents slipping. It also makes the main drilling faster and easier.
Managing Drill Pressure
Apply steady, moderate pressure on the drill. Too much force can break the bit or cause uneven holes. Too little pressure slows down drilling. Let the drill do the work and keep the pressure consistent for better results.
Cooling The Drill Bit
Drilling rock creates heat that can damage the bit. Use water or a cooling fluid to keep the bit cool. Cooling prevents overheating and extends the tool’s life. Regularly stop to cool the drill bit during long drilling sessions.
Safety Precautions
Drilling a hole in a rock requires careful attention to safety. The process involves sharp tools and hard materials that can cause injury. Taking safety precautions helps protect you and others nearby. Proper preparation reduces risks and makes the work smoother. Below are key safety points to follow.
Handling Equipment Safely
Always check your drill and bits before starting. Use tools designed for drilling rock. Wear safety goggles to protect your eyes from flying debris. Gloves prevent cuts and improve grip. Secure the rock firmly to avoid movement. Hold the drill with both hands for better control. Avoid loose clothing and tie back long hair. Keep your workspace clean and well-lit.
Avoiding Common Mistakes
Do not rush the drilling process. Applying too much force can break the bit or rock. Let the drill do the work. Avoid drilling at odd angles; keep the drill straight. Do not ignore unusual noises or vibrations. Stop immediately if the drill bit overheats. Use water or a cooling agent to reduce heat. Check the drill bit often for wear or damage.
Emergency Protocols
Know the location of the nearest first aid kit. Have a phone nearby for emergency calls. If an injury occurs, stop drilling immediately. Clean minor wounds and apply bandages. Seek medical help for serious cuts or eye injuries. Keep a fire extinguisher close in case of sparks. Inform someone nearby about your work schedule. Never work alone in remote areas.
Troubleshooting Common Issues
Drilling into rock isn’t always straightforward. You might face issues that slow you down or damage your tools. Understanding common problems helps you stay prepared and keep the drilling smooth and efficient.
Dealing With Bit Slippage
Bit slippage happens when the drill bit spins without cutting into the rock. This usually occurs if the bit isn’t sharp enough or the surface is too smooth.
Try pressing the drill firmly but avoid excessive force that could break the bit. Also, check if your bit matches the rock type—diamond-tipped bits work best on hard stones.
Have you noticed your bit slipping even with good pressure? Sometimes, adding a small indent or starting with a pilot hole gives the bit a better grip and stops slipping.
Managing Overheating
Drilling generates heat, and too much of it can wear out your drill bit fast. Overheating often causes the bit to dull or even break.
Use water or a cooling lubricant regularly to keep temperatures down. If you don’t have water handy, pause frequently to let the bit cool before continuing.
Think about how long you’ve been drilling continuously. Short, controlled bursts of work often prevent heat buildup better than one long session.
Handling Rock Fractures
Rock fractures can cause your hole to crack or pieces to break off unexpectedly. This disrupts your drilling and might ruin the entire rock piece.
Look closely at the rock’s surface before drilling. If you spot cracks, adjust your drilling angle or reduce pressure to avoid spreading the fractures.
Have you tried using a smaller drill bit first? Creating a pilot hole can reduce stress on the rock and help prevent unwanted breaks.
Maintenance Of Equipment
Proper maintenance of your drilling equipment extends its life and ensures better performance. Caring for your tools reduces wear and prevents damage. Regular attention helps avoid costly repairs and safety issues. Here are key tips to maintain your drill bits and power tools effectively.
Cleaning Drill Bits
Remove dust and debris from drill bits after each use. Use a stiff brush or cloth to clean the bits well. Avoid using water, which can cause rust. Apply a light coat of oil to protect metal surfaces. Check for any damage or dullness before using again.
Checking Power Tools
Inspect power tools regularly for loose parts or frayed cords. Test the drill to ensure it runs smoothly without unusual noises. Replace worn-out brushes and batteries to keep tools working well. Tighten screws and bolts to avoid accidents during use. Keep ventilation slots clear of dust and dirt.
Storing Equipment Properly
Store drill bits and power tools in a dry, cool place. Use a toolbox or case to keep everything organized and safe. Avoid stacking heavy items on top of your equipment. Keep tools away from moisture to prevent rust and damage. Label storage containers for easy access and identification.
Applications Of Drilled Rocks
Drilling holes in rocks opens up a world of possibilities across various fields. Whether for artistic, practical, or scientific purposes, the ability to create precise holes in stone lets you transform raw materials into useful or beautiful objects. Let’s look at some key ways drilled rocks make a difference in everyday life and specialized areas.
Craft And Jewelry Making
Drilled rocks are the heart of many craft and jewelry projects. You can turn stones into beads, pendants, or charms by carefully drilling holes. This technique lets you string together unique, natural pieces that add personality to your accessories.
Have you ever noticed how some handmade necklaces have that special touch? It’s often because the creator drilled the stones themselves, ensuring each piece fits perfectly. You can try this too, using simple tools and safety gear to start crafting your own stone jewelry.
Construction And Landscaping
In construction, drilled holes in rocks help anchor structures like retaining walls or fences. These holes allow for the insertion of bolts or rods, increasing stability and safety. Landscaping also benefits by using drilled stones for decorative features or water drainage solutions.
Imagine creating a garden path with rocks that fit together because you drilled holes to connect them. It’s not just about looks; drilled rocks can improve the function and durability of outdoor spaces. Could your next DIY project use this technique to add both style and strength?
Scientific Research
Scientists drill rocks to study their composition and history. By extracting core samples, researchers learn about Earth’s past climates, volcanic activity, and mineral content. This data helps predict natural events and understand geological processes.
Have you ever wondered what secrets lie inside a rock? Drilling lets experts unlock those mysteries without destroying the whole specimen. Even if you’re not a scientist, understanding this process can deepen your appreciation for the natural world around you.
Credit: www.tiktok.com
Frequently Asked Questions
What Tools Are Best For Drilling Holes In Rock?
For drilling holes in rock, use a hammer drill with a carbide-tipped masonry bit. These tools provide power and durability to penetrate tough rock surfaces efficiently and safely.
How Do I Prevent Rock From Cracking While Drilling?
To avoid cracking, drill slowly and apply steady pressure. Use water to cool the drill bit and reduce heat, which helps prevent fractures in the rock.
Can I Drill A Hole In Rock Without Power Tools?
Yes, you can use hand tools like a hammer and chisel. However, this method is slower and requires more effort compared to power drills.
What Safety Gear Is Needed When Drilling Rock?
Wear safety goggles, gloves, ear protection, and a dust mask. These protect you from flying debris, dust, and loud noise during drilling.
Conclusion
Drilling a hole in a rock takes patience and the right tools. Start with a strong drill and a suitable bit. Keep the drill steady and cool the bit often with water. Take your time and avoid rushing. Small steps lead to better results.
Practice helps build skill and confidence. With care, you can drill through even hard rock. Remember, safety comes first. Wear protective gear and work in a safe place. Now, you have the basics to try drilling a hole in rock yourself.


