Looking to stay cool without the hassle of a permanent air conditioner? Installing your Hisense portable air conditioner can be easier than you think.
You don’t need to be a tech expert or spend hours figuring it out. With the right steps, you can have your unit up and running quickly, cooling your space efficiently. Keep reading to discover simple, clear instructions that will save you time and frustration.
Your perfect, cool comfort is just a few easy steps away.

Credit: www.lowes.com
Choosing The Right Location
Choosing the right location for your Hisense portable air conditioner is key to its performance. The spot affects cooling efficiency and ease of use. Consider room size, power availability, and ventilation needs carefully. This ensures the unit works well and lasts longer.
Assessing Room Size
Measure the room before placing the air conditioner. Small rooms need less cooling power. Large rooms require a more powerful unit or multiple devices. Match the unit’s BTU rating to the room size. This helps the air conditioner cool the space effectively.
Identifying Power Sources
Place the unit near a grounded electrical outlet. Avoid using extension cords to reduce fire risk. Check the outlet’s voltage matches the unit’s requirement. The power source should be easy to reach but away from water or heat sources.
Considering Ventilation Needs
The air conditioner must vent hot air outside. Choose a location close to a window or sliding door. Use the included window kit for proper exhaust setup. Ensure the vent hose is straight and short for better airflow. Avoid blocking vents to maintain cooling efficiency.

Credit: www.youtube.com
Unboxing And Inspection
Unboxing your Hisense portable air conditioner is the first real step toward cooler days. This moment holds more than just excitement—it’s your chance to make sure everything is right before installation. Taking time here can save you from headaches later on.
Checking Package Contents
Start by opening the box carefully. Inside, you should find the main air conditioning unit along with essential accessories.
- Exhaust hose
- Window kit components
- Remote control
- User manual and warranty card
- Drainage hose (if included)
Missing any part? This is the time to notice. You don’t want to begin installation only to stop because a key piece isn’t there.
Inspecting Unit For Damage
Look over the air conditioner carefully. Check for dents, cracks, or any visible damage on the body and vents.
Make sure the exhaust hose isn’t bent or punctured. Even small damage can affect performance or cause leaks.
Ask yourself: would you feel confident installing this unit as it is, or does it look like something might go wrong? If you spot problems, contact the seller right away.
Preparing The Installation Area
Preparing the installation area is key to getting your Hisense portable air conditioner up and running smoothly. Taking time to organize the space helps avoid headaches later. It also improves the unit’s efficiency and your comfort.
Clearing Space For The Unit
Start by choosing a flat surface near a window and a power outlet. Make sure the area is clear of furniture, curtains, or any objects blocking airflow. Your Hisense unit needs at least 20 inches of free space around it to work properly.
Think about your daily routine. Does the chosen spot allow easy access for draining water or adjusting settings? A cramped corner might seem convenient, but it could limit air circulation and make maintenance harder.
Setting Up The Exhaust Hose
The exhaust hose removes hot air from your room, so proper setup is crucial. Attach it firmly to the unit’s exhaust port, then extend it to the window adapter without sharp bends or kinks. This prevents airflow restrictions and overheating.
Windows come in many styles. Have you checked if your window can accommodate the window kit provided? Sliding windows work best with the kit, but if you have a casement or awning window, you might need additional sealing materials to prevent hot air from leaking back inside.
Keep the hose as short as possible. Longer hoses reduce efficiency and increase noise. Positioning your AC close to the window helps maintain performance and keeps your room cooler faster.

Credit: www.youtube.com
Connecting The Exhaust Hose
Connecting the exhaust hose is a key step to make sure your Hisense portable air conditioner works efficiently. This hose carries hot air from the unit to the outside, preventing your room from heating up instead of cooling down. Proper attachment and sealing are essential to avoid leaks and maintain the unit’s performance.
Attaching Hose To Unit
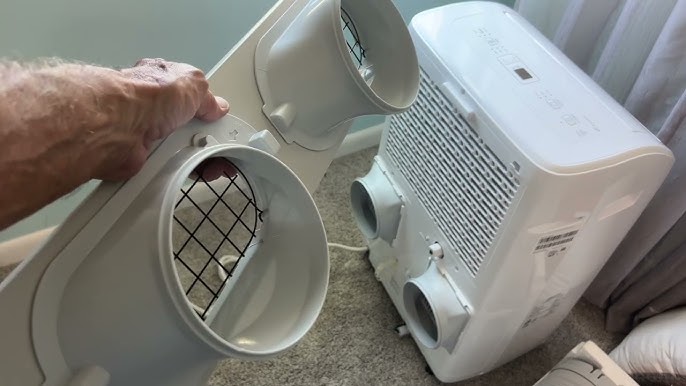
Start by locating the exhaust port on the back of your air conditioner. It usually has a round shape designed to fit the hose end perfectly.
Push the hose firmly onto the exhaust port until it clicks or fits snugly. Some models may have a locking ring—twist this to secure the hose in place.
If the hose feels loose, check for any debris or damage that might prevent a tight fit. A secure connection means hot air won’t escape back into your room, which keeps your space cool.
Securing Hose To Window Kit
Next, attach the other end of the exhaust hose to the window kit. The window kit is crucial because it seals the window opening, stopping warm air from coming back inside.
Slide the hose into the window kit’s exhaust port. Make sure it fits without gaps. Use the provided clamps or fasteners to lock the hose in place firmly.
Once connected, check the window seal. Does it close tightly around the kit without gaps? Use weatherstripping or foam if you notice any air leaks. This step can save you from wasting energy and higher bills.
Installing The Window Kit
Installing the window kit is a crucial step in setting up your Hisense portable air conditioner. It connects the unit’s exhaust hose to your window, allowing hot air to escape outside efficiently. Getting this part right ensures your room cools properly and keeps unwanted heat from sneaking back in.
Adjusting Kit To Fit Window Size
The window kit comes with adjustable panels designed to fit different window widths. Start by measuring the width of your window opening carefully. This helps you slide the panels to the exact size needed without leaving gaps.
Most kits have a simple slide mechanism—just extend or retract the panels to fit snugly inside your window frame. If you have a sash window, you can lower it to secure the panels in place. Double-check the fit by gently pressing on the panels to make sure they don’t move easily.
Ensuring A Tight Seal
A tight seal between the window kit and your window frame is essential. Without it, warm air can leak back into your room, reducing the cooling efficiency. Use the weather stripping included in the kit and apply it along the edges of the panels.
Press the weather stripping firmly to stick well and fill any small gaps. You might also want to use additional foam tape if your window frame is uneven. Once sealed, test by feeling for drafts or holding a piece of paper; if the paper stays in place when moved, your seal is solid.
Powering The Unit
Powering your Hisense portable air conditioner correctly is essential for safe and efficient operation. This section explains how to connect the unit to electricity and handle the power cord with care. Proper setup prevents electrical hazards and ensures your air conditioner runs smoothly.
Plugging Into Electrical Outlet
Use a standard electrical outlet rated for the air conditioner’s power needs. The unit requires a dedicated outlet to avoid overloads. Check that the outlet matches the plug type of your Hisense model. Avoid using extension cords or power strips, as they can cause voltage drops or short circuits.
Ensure the outlet voltage matches the unit’s specifications, usually 110-120V or 220-240V. Plug the power cord firmly into the outlet. Make sure the outlet is dry and clean to prevent electric shock.
Using Power Cord Safely
Handle the power cord gently to avoid damage. Do not bend, twist, or pinch the cord. Keep the cord away from heat sources and sharp edges. Avoid placing the cord under rugs or furniture where it can get crushed.
Inspect the cord regularly for cuts or frays. If damaged, replace it immediately. Unplug the unit by holding the plug, not the cord. Always turn off the air conditioner before unplugging.
Testing And Adjustments
Testing and adjustments are key after installing your Hisense portable air conditioner. This stage ensures the unit works properly and cools your space effectively. Proper testing helps avoid future issues and keeps the air conditioner running smoothly.
Turning On The Air Conditioner
Start by plugging the unit into a power outlet. Press the power button on the control panel or remote. Listen for the sound of the fan and compressor starting. Check if the display lights up. This confirms the unit is powered and ready to use.
Setting Desired Temperature
Use the control panel or remote to set your preferred temperature. Choose a setting that feels comfortable and cools the room efficiently. Avoid setting the temperature too low, as this wastes energy. A range between 72°F and 75°F usually works best for most rooms.
Checking For Proper Functionality
Watch for cool air coming out of the unit’s vent. Feel the airflow to confirm it is strong and steady. Look for any unusual noises or vibrations. Make sure the exhaust hose is securely connected and venting outside. Check for water leaks around the unit. These checks confirm the air conditioner is working well.
Maintenance Tips
Proper maintenance keeps your Hisense portable air conditioner working well. Regular care extends the unit’s life and improves air quality. Follow simple steps to maintain your AC and avoid common problems.
Cleaning The Filters
Dirty filters reduce cooling efficiency and air flow. Remove the filters gently from the unit. Use a vacuum cleaner or rinse with lukewarm water. Let the filters dry completely before placing them back. Clean filters every two weeks or more often in dusty areas.
Storing The Unit After Use
Store the air conditioner properly to prevent damage. Turn off the unit and unplug it from the power source. Drain all water from the tank and hose. Clean the exterior with a soft cloth. Cover the unit with a breathable cloth to keep dust away. Store in a dry, cool place during the off-season.
Troubleshooting Common Issues
Check these quick fixes for common problems:
- Unit not cooling: Clean filters and check the hose for blockages.
- Water leaking: Empty the water tank and ensure the hose is connected properly.
- Unit won’t start: Confirm the power supply and reset the circuit breaker.
- Strange noises: Inspect for loose parts or debris inside the unit.
Regular checks prevent most issues and keep your AC running smoothly.
Frequently Asked Questions
How Do I Install A Hisense Portable Ac Window Kit?
First, attach the window kit to the window opening. Next, connect the exhaust hose from the AC to the kit. Ensure a tight seal to prevent air leaks. Finally, plug in the AC and turn it on.
What Tools Are Needed For Hisense Portable Ac Installation?
You typically need a screwdriver, measuring tape, and a utility knife. These tools help secure the window kit and adjust the exhaust hose properly.
Can I Install Hisense Portable Ac Without Professional Help?
Yes, Hisense portable AC units are designed for easy DIY installation. Follow the user manual carefully, and you can set it up within 30 minutes.
How Do I Properly Vent A Hisense Portable Air Conditioner?
Connect the exhaust hose to the window kit and secure it tightly. Ensure the window kit is well sealed to prevent hot air from entering your room.
Conclusion
Installing a Hisense portable air conditioner is simple and quick. Follow the steps carefully for best results. Make sure the unit is stable and the exhaust hose is secure. Check the window kit fits well to avoid air leaks. Regular cleaning helps keep the air conditioner working well.
Enjoy cool air during hot days with ease. Now, your space feels more comfortable and fresh. A well-installed unit saves energy and improves cooling. Ready to beat the heat?


