Your kitchen faucet spray head works hard every day, but over time, it can get clogged with mineral deposits and grime. When your spray head starts to drip, splatter, or lose water pressure, it’s more than just annoying—it can slow you down in the kitchen.
You might think cleaning it is a hassle, but what if you could fix it quickly with simple steps? Keep reading, and you’ll learn easy, effective ways to restore your spray head to like-new condition. Say goodbye to frustration and hello to smooth, powerful water flow every time you use it.

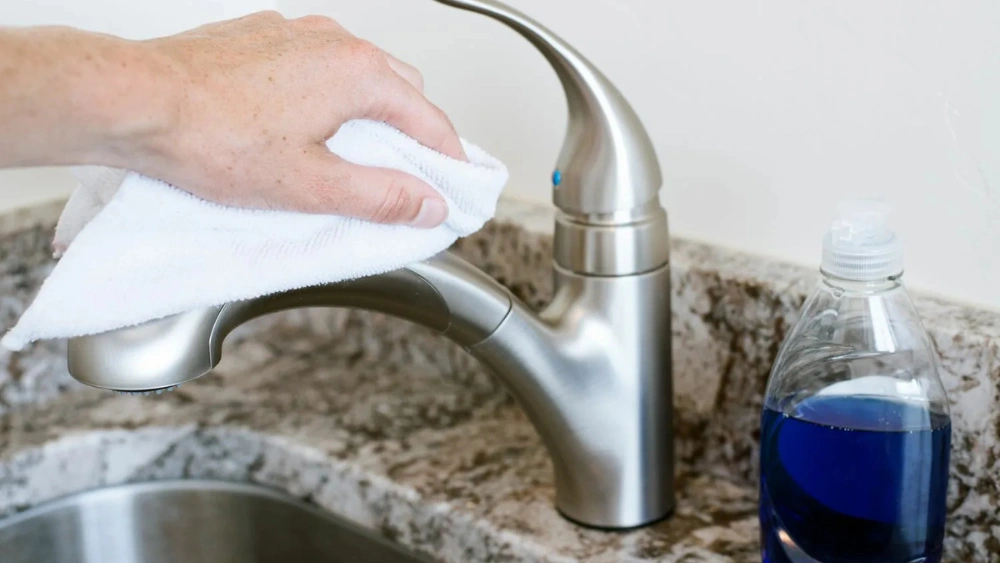
Credit: www.youtube.com
Tools And Materials Needed
Cleaning your kitchen faucet spray head is simple with the right tools and materials. Having these items ready saves time and makes the process smooth. Most of these tools are common household items or easy to find at any store.
Basic Cleaning Tools
- Sponge or soft cloth to wipe dirt away
- Old toothbrush for scrubbing small parts
- Small bowl to soak the spray head
- Rubber gloves to protect your hands
Cleaning Solutions
- White vinegar to dissolve mineral buildup
- Dish soap for gentle cleaning
- Baking soda to scrub stubborn stains
- Water for rinsing
Additional Items For Deep Cleaning
- Needle or pin to clear clogged holes
- Wrench or pliers to remove the spray head
- Paper towels for drying
Preparation Steps
Cleaning your kitchen faucet spray head starts with proper preparation. Taking time to prepare ensures a smooth and safe cleaning process. It helps prevent water spills and protects your faucet parts. Follow these key preparation steps to get ready for cleaning.
Turn Off Water Supply
Begin by turning off the water supply to the faucet. This stops water flow and avoids leaks during cleaning. Locate the shut-off valves under the sink. Turn each valve clockwise until it stops. Test the faucet to confirm no water comes out. This step keeps your workspace dry and safe.
Gather Supplies
Collect all materials before starting the cleaning. Having everything ready saves time and effort. You will need:
- A small bowl or bucket
- White vinegar or a mild cleaning solution
- A soft cloth or sponge
- An old toothbrush or small brush
- A wrench or pliers (if needed to remove the spray head)
- A towel to dry parts
Arrange supplies near the sink for easy access. Proper tools make cleaning easier and more effective.
Removing The Spray Head
Removing the spray head from your kitchen faucet is a simple task that can make cleaning much easier. Taking it off allows you to reach hidden buildup and check for any issues that might affect water flow. Before you start, gather a cloth and some basic tools to protect your faucet’s finish and make the process smoother.
Detach The Spray Head
First, locate where the spray head connects to the hose. Usually, you can unscrew it by hand, but if it’s tight, wrap a cloth around the connection to avoid scratches and use adjustable pliers gently. Make sure to turn counterclockwise to loosen it.
Sometimes, spray heads have a button or clip that locks them in place. Check for this before pulling or twisting hard—it prevents damage. Once detached, set the spray head down on a soft surface to avoid dents or scratches during cleaning.
Inspect For Damage
After removal, look over the spray head carefully. Check for cracks, worn-out rubber washers, or mineral buildup that could block water flow. Even small damage can cause leaks or reduce water pressure, so don’t overlook these details.
If you spot any hard water deposits, soaking the spray head in vinegar can help dissolve them. But if the spray head is cracked or the rubber parts are broken, it might be time to replace it. Have you ever ignored a small leak only to find it caused bigger problems later? Catching damage early saves you time and money.
Credit: www.rd.com
Cleaning Methods
Cleaning your kitchen faucet spray head keeps it working well and looking good. Dirt, mineral deposits, and grime can block the spray holes. Using simple household items can remove buildup effectively. These cleaning methods are safe and easy for regular use.
Soaking In Vinegar Solution
Vinegar breaks down mineral deposits and loosens dirt. Start by mixing equal parts of white vinegar and water in a bowl. Remove the spray head from the faucet if possible. Soak it in the vinegar solution for 30 minutes to an hour.
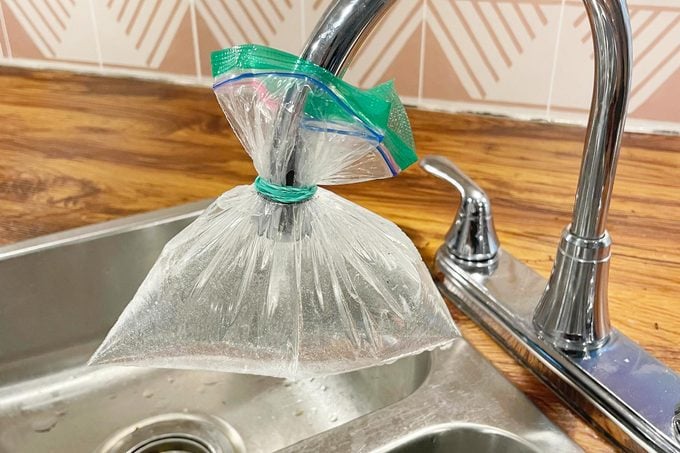
For spray heads you cannot remove, fill a plastic bag with the vinegar solution. Secure the bag over the spray head using a rubber band. Let it soak. After soaking, rinse the spray head with warm water. This removes loosened deposits and leaves the spray holes clear.
Scrubbing With Baking Soda
Baking soda acts as a gentle abrasive cleaner. Make a thick paste by mixing baking soda with a little water. Apply the paste to the spray head and focus on clogged areas.
Use an old toothbrush or soft brush to scrub the surface and spray holes. This removes stubborn grime without scratching. Rinse thoroughly with warm water after scrubbing. Repeat if needed for heavily clogged spray heads.
Rinsing And Reassembling
After soaking and scrubbing your kitchen faucet spray head, the next crucial step is rinsing and reassembling it properly. Rinsing removes leftover debris and cleaning agents that could affect water flow or taste. Taking time here ensures your spray head works like new and lasts longer.
Rinse Thoroughly
Use warm water to rinse the spray head completely. Hold it under a steady stream to flush out any loosened dirt or mineral deposits. Pay attention to the tiny holes and crevices where residue might hide.
Don’t rush this part. If you notice cloudy water or particles still coming out, keep rinsing until the water runs clear. A clean rinse means your cleaning was effective and nothing will clog the spray later.
Reattach Spray Head
Once rinsed, carefully screw the spray head back onto the hose. Make sure it fits snugly but avoid overtightening, which can damage the threads or cause leaks. You want a secure connection to prevent water from spraying where it shouldn’t.
Test the spray by turning on the water slowly. Check for leaks and ensure the spray pattern is even. If something feels off, unscrew and inspect the washer or gasket before trying again.
Have you ever encountered a stubborn leak after reassembling? Sometimes a tiny worn-out washer is the culprit, and replacing it can save you from frustration and water waste.

Credit: www.yahoo.com
Final Checks
After cleaning the kitchen faucet spray head, performing final checks is important. These checks confirm the cleaning was effective and the faucet works properly. Small issues can cause leaks or poor water flow. Take a few moments to inspect and test the spray head carefully.
Test Water Flow
Turn on the faucet and activate the spray head. Watch the water stream closely. It should flow smoothly without splashing or sputtering. Check both the spray and regular stream settings. The water should come out evenly and with good pressure. If the flow looks weak or uneven, the spray head may need more cleaning or reassembly.
Ensure No Leaks
Look around the base of the spray head and connection points. Use a dry cloth to spot any water drops or moisture. Run the faucet for a minute and watch for leaks. Tighten any loose fittings if needed. Leaks waste water and can damage your sink area over time. Fixing leaks early keeps your faucet working well longer.
Maintenance Tips
Maintaining your kitchen faucet spray head keeps it working well and extends its life. Simple care prevents buildup and damage. Small habits make a big difference in daily use and water flow. Clean and check the spray head regularly to avoid clogs and leaks.
Regular Cleaning Schedule
Set a routine to clean the spray head every two weeks. Use warm water and mild soap to remove dirt and grease. Soak the spray head in vinegar once a month to dissolve mineral deposits. Rinse well to keep water flowing smoothly. Wipe with a soft cloth to avoid scratches. Regular cleaning stops buildup that reduces pressure.
Preventive Measures
Avoid harsh chemicals that can damage the spray head. Use a gentle brush to clean hard-to-reach areas. Check for leaks or cracks often and fix them early. Replace washers or parts if needed to prevent bigger problems. Turn off the spray head gently to avoid wear. These small steps keep the spray head in top shape longer.
Frequently Asked Questions
How Often Should I Clean My Kitchen Faucet Spray Head?
Clean your kitchen faucet spray head every 1 to 3 months. Frequent cleaning prevents mineral buildup and ensures smooth water flow. Regular maintenance extends the spray head’s lifespan and improves hygiene in your kitchen.
What Materials Do I Need To Clean The Spray Head?
You need white vinegar, a plastic bag, a rubber band, and a soft brush. These materials effectively remove mineral deposits without damaging the spray head. Vinegar dissolves buildup, while the brush cleans small crevices.
Can I Remove The Spray Head For Cleaning?
Yes, most spray heads can be unscrewed for deep cleaning. Removing it allows you to soak the head in vinegar. Always check your faucet’s manual for specific removal instructions to avoid damage.
How Do I Remove Hard Water Stains From The Spray Head?
Soak the spray head in white vinegar for 30 minutes. Vinegar breaks down hard water deposits safely and naturally. After soaking, scrub gently with a soft brush and rinse with water.
Conclusion
Cleaning your kitchen faucet spray head keeps water flow steady and fresh. Simple steps help remove dirt and mineral build-up easily. Regular cleaning prevents clogs and extends the spray head’s life. Use common household items like vinegar for safe, effective cleaning.
A clean spray head makes kitchen tasks smoother every day. Try these tips often to keep your faucet working well. Small efforts bring big results in kitchen hygiene.


