If your Moen shower head is clogged, leaking, or just not working right, you might feel stuck. But don’t worry—you can fix it yourself by taking it apart.
Knowing how to take apart your Moen shower head saves you time and money, and gives you control over your bathroom repairs. In this guide, you’ll find simple, step-by-step instructions to help you easily disassemble your shower head without causing damage.
Keep reading, and you’ll soon master a skill that makes maintaining your shower hassle-free.
Tools Needed
Before you start taking apart your Moen shower head, gathering the right tools will make the process smoother and prevent damage. Having everything ready saves you frustration and helps you work efficiently. You might be surprised how a few simple tools can make the task feel much easier than expected.
Adjustable Wrench
An adjustable wrench is often the key tool for loosening the shower head from the pipe. It fits various sizes, so you won’t need multiple wrenches. If you don’t have one, a pair of slip-joint pliers can sometimes work as a substitute, but be careful not to scratch the finish.
Rubber Strap Wrench
A rubber strap wrench is gentle on surfaces and great for gripping without causing damage. This tool is especially handy if your shower head is stuck or if you want to avoid leaving marks. Have you ever struggled with stubborn fittings? This wrench can save you from that hassle.
Plumber’s Tape (teflon Tape)
Plumber’s tape is essential for resealing the threads when you reassemble the shower head. It prevents leaks and ensures a tight fit. Even if you don’t plan to replace parts right away, having this tape on hand is a good idea to avoid future drips.
Soft Cloth Or Rag
Using a soft cloth or rag protects your shower head’s finish when you apply the wrench. Wrapping it around the fitting before gripping can prevent scratches or dents. This small step shows attention to detail and keeps your fixtures looking new.
Small Screwdriver
Some Moen shower heads have screws securing parts or covers. A small flathead or Phillips screwdriver will help you remove these without stripping the screws. Always choose the right size to avoid damaging the screw heads.
Credit: www.tiktok.com
Safety Precautions
Taking apart your Moen shower head can be a straightforward task, but it requires careful attention to safety. Ignoring precautions can lead to injury or damage to your plumbing. Before you start, make sure you understand the risks and prepare accordingly.
Turn Off The Water Supply
Always shut off the water supply to the shower before you begin. This prevents sudden bursts of water that could cause injury or make a mess. If you’re unsure where the main valve is, check behind the bathroom door or under the sink.
Protect Your Hands And Eyes
Wear gloves to avoid cuts from sharp edges or corrosion on the shower head. Safety goggles are also a good idea to protect your eyes from debris or cleaning chemicals. I once skipped gloves and ended up with a small cut that took days to heal—don’t make the same mistake.
Use The Right Tools
Using improper tools can strip screws or damage the fixture. Have an adjustable wrench, pliers, and a cloth ready before you start. Wrapping the wrench jaws with a cloth helps prevent scratches on the shower head’s finish.
Be Careful With Old Or Stuck Fixtures
Older shower heads can be corroded and difficult to remove. Apply penetrating oil and give it time to work before forcing anything. Forcing a stuck piece can break pipes or fittings, causing costly repairs.
Check For Electrical Components
Some modern shower systems include electronic controls or lighting. Make sure these are disconnected or powered off to avoid electric shocks. If you aren’t sure, it’s safer to consult a professional before proceeding.
Preparation Steps
Before you start taking apart your Moen shower head, some preparation is necessary to avoid any damage or unwanted water mess. Preparing well not only protects your plumbing but also saves time and frustration. Let’s look at what you need to do before loosening any parts.
Turning Off The Water Supply
First, stop the water flow to your shower. This step is crucial to prevent water from spraying everywhere once you start unscrewing the shower head.
If you have a dedicated valve for your shower, turn it off. Otherwise, shut off the main water supply to your home. Have you ever tried dismantling plumbing without turning off the water? The cleanup is a hassle you don’t want.
Gathering Materials
Having the right tools on hand makes the job smoother and quicker. You don’t want to be halfway through and realize you need a wrench or some plumber’s tape.
- Adjustable wrench or pliers
- Soft cloth or rag (to protect the finish of the shower head)
- Plumber’s tape (Teflon tape) for reassembly
- Bucket or towel to catch drips
Gather these items before you start. Trust me, working with the right tools saves frustration and prevents accidental damage to your Moen shower head’s finish.

Credit: www.youtube.com
Removing The Shower Head
Removing the shower head is the first step in fixing or upgrading your Moen shower setup. It might seem straightforward, but it requires some care to avoid damaging the fixture or your plumbing. Before you start, make sure you have the right tools and understand the importance of protecting the shower head’s finish.
Loosening With A Wrench
Start by turning off the water supply to avoid any unexpected sprays. Use an adjustable wrench to grip the base of the shower head firmly. If the shower head feels stuck, apply gentle pressure and wiggle it slightly to loosen the connection.
Remember, forcing it too hard can strip the threads. If you hit resistance, try spraying some penetrating oil around the joint and wait a few minutes. This often helps break down any mineral deposits holding it tight.
Protecting The Finish
Protecting the finish on your Moen shower head is crucial to keep it looking new. Before using a wrench, wrap the metal jaws with a soft cloth or use a rubber strap wrench. This prevents scratches and dents that can happen when metal scrapes against the fixture.
Have you ever noticed your shiny shower head looking dull after removal? That’s usually due to tool marks. Taking this small step preserves your fixture’s appearance and saves you from replacing it prematurely.
Disassembling The Shower Head
Disassembling the shower head is a key step to maintain or fix it properly. It lets you clean inside parts and check for damage. Handle the parts carefully to avoid breaking them. Keep a soft cloth nearby to protect surfaces from scratches.
Unscrewing Components
Start by turning off the water supply. Grip the shower head firmly and twist it counterclockwise. Use a wrench if the connection is tight. Wrap the jaws with a cloth to prevent marks. Unscrew the faceplate gently to avoid damaging the nozzles. Remove the internal parts carefully and set them aside in order.
Cleaning Parts
Soak the removed parts in a vinegar solution to remove buildup. Use a soft brush to scrub away mineral deposits. Rinse all components with warm water. Check for worn-out washers or seals and replace if needed. Dry each part thoroughly before reassembling to avoid rust or leaks.
Inspecting For Wear
Inspecting for wear is a crucial part of taking apart your Moen shower head. It helps you identify issues that might be causing leaks or poor water flow. Paying close attention to specific components ensures you address the right problem before reassembling or replacing parts.
Checking Seals
The seals in your shower head prevent water from leaking out where parts connect. Over time, these seals can crack, harden, or get worn down. You should carefully remove the rubber or silicone seals and look for any signs of damage.
If you notice any cracks, brittleness, or flattening, it’s a clear sign they need replacement. Sometimes, simply cleaning the seals can improve performance, but damaged ones must be swapped out to avoid leaks. Have you ever experienced a drip that just wouldn’t stop? It’s often these tiny seals failing.
Assessing Nozzles
The nozzles control how water sprays out of the shower head. Mineral buildup or debris can clog them, causing uneven water flow. Take a close look at each nozzle opening and feel for rough spots or blockages.
If you see white or green deposits, soak the nozzle part in vinegar to dissolve mineral deposits. You can also gently poke the nozzles with a toothpick to clear stubborn clogs. Regularly checking nozzles can prevent reduced water pressure and improve your shower experience.
Reassembling The Shower Head
Reassembling the shower head is a crucial step that requires attention to detail. Taking your time will help avoid leaks and ensure smooth water flow. Think of it as putting together a small puzzle where each piece must fit perfectly to work well.
Reattaching Components
Start by aligning all the parts in the order you removed them. If you kept track of washers, screws, and nozzles separately, now is the time to place them back carefully.
- Place the rubber washers inside the connector to prevent leaks.
- Attach the spray face and tighten it gently but firmly.
- Ensure any internal filters or screens are correctly positioned before closing.
Remember, forcing parts can cause damage. If something doesn’t fit easily, double-check its orientation or look for debris that might block assembly. Have you ever tried fitting a part only to realize it was upside down?
Ensuring Tight Seals
Seals are what keep your shower head from dripping. Use plumber’s tape on threaded connections to boost the seal’s effectiveness. Wrap the tape clockwise around the threads two or three times.
Hand-tighten the connections first, then give them a slight turn with a wrench. Avoid overtightening as it can crack plastic parts or damage threads. After reassembly, turn on the water slowly and check for leaks.
Leaks can be a sign you missed a washer or need to reapply tape. Fixing this now saves you from water damage and frustration later. How confident do you feel about spotting a faulty seal before it causes problems?

Credit: www.youtube.com
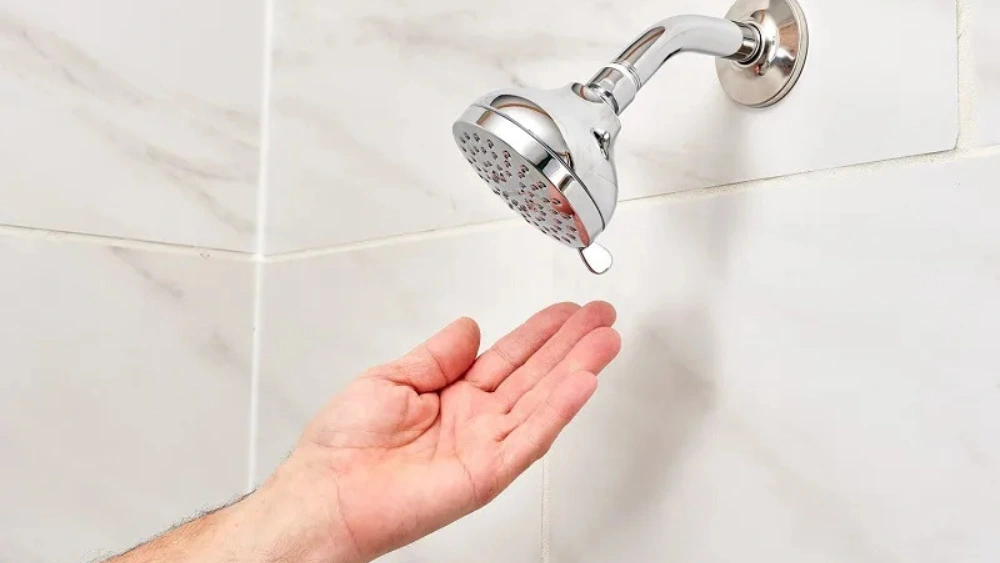
Testing Functionality
Testing the functionality of your Moen shower head after taking it apart is crucial. It confirms whether your cleaning or repair efforts were successful. This step helps you catch any issues before you fully reassemble everything.
Restoring Water Supply
Once the shower head is back in place, turn the water supply on slowly. This prevents sudden pressure that could cause damage. Listen carefully to how the water flows through the shower head.
If the water pressure feels low or uneven, there might still be a blockage or improper reattachment. Double-check the washers and connections to ensure they are seated correctly. Sometimes, small debris can remain trapped, affecting flow.
Checking For Leaks
Leaks are a common issue after reassembling plumbing fixtures. Use a dry cloth or tissue around the joints and connections. If you see any wet spots or drips, you need to tighten the connections or replace worn-out washers.
Have you ever noticed a tiny drip that turned into a big leak later? Catching leaks early saves you from water damage and higher bills. Don’t ignore even the smallest sign of moisture around your shower head.
Maintenance Tips
Keeping your Moen shower head in top shape goes beyond just taking it apart. Regular maintenance helps avoid buildup and keeps water flowing smoothly. Simple habits can save you from costly replacements and frustrating clogs.
Regular Cleaning
Cleaning your shower head regularly prevents mineral deposits from blocking water flow. Soak it in a mixture of equal parts white vinegar and water for about 30 minutes to dissolve buildup. If you notice stubborn spots, gently scrub with an old toothbrush to avoid scratching the surface.
Don’t forget to rinse thoroughly after cleaning to remove any vinegar residue. Dry the shower head with a soft cloth to prevent water spots. How often you clean depends on your water hardness; if you see reduced water pressure, it’s a sign to clean it sooner.
Preventive Measures
Prevention is better than constant cleaning. Installing a water softener can reduce mineral deposits that clog your shower head over time. You might also consider using a shower head filter to catch impurities before they reach the nozzle.
After each use, quickly wipe down the shower head to remove soap scum and water droplets. This simple habit slows down buildup and keeps your shower head looking new. Have you tried changing your shower head’s position occasionally? It can help water flow evenly and reduce wear on any single area.
Frequently Asked Questions
How Do I Safely Remove A Moen Shower Head?
To safely remove a Moen shower head, turn off the water supply first. Use a wrench to gently loosen the nut connecting the shower head to the arm. Wrap a cloth around the nut to avoid scratches. Then, twist the shower head counterclockwise to detach it.
What Tools Are Needed To Take Apart Moen Shower Heads?
You mainly need an adjustable wrench or pliers, a cloth, and sometimes a screwdriver. The cloth protects the finish while loosening nuts. Some models may require removing screws to access internal parts. Always check your specific Moen model for exact tools needed.
Can I Disassemble A Moen Shower Head For Cleaning?
Yes, most Moen shower heads can be disassembled for cleaning. Remove the shower head and unscrew the faceplate or spray plate carefully. Clean internal parts with vinegar or a mild solution. Reassemble the parts after drying to restore water flow and remove buildup.
How Do I Avoid Damaging My Moen Shower Head?
Avoid using excessive force or harsh tools when removing or disassembling the shower head. Always wrap tools with a cloth to protect the finish. Use gentle cleaning agents, and follow manufacturer guidelines to prevent cracking or stripping threads.
Conclusion
Taking apart a Moen shower head is simple with the right steps. Use basic tools and stay gentle to avoid damage. Clean or replace parts as needed to keep water flow steady. Regular care helps your shower work well longer.
Now, you can handle this task confidently and save money on repairs. Try it yourself and enjoy a better shower experience.


