
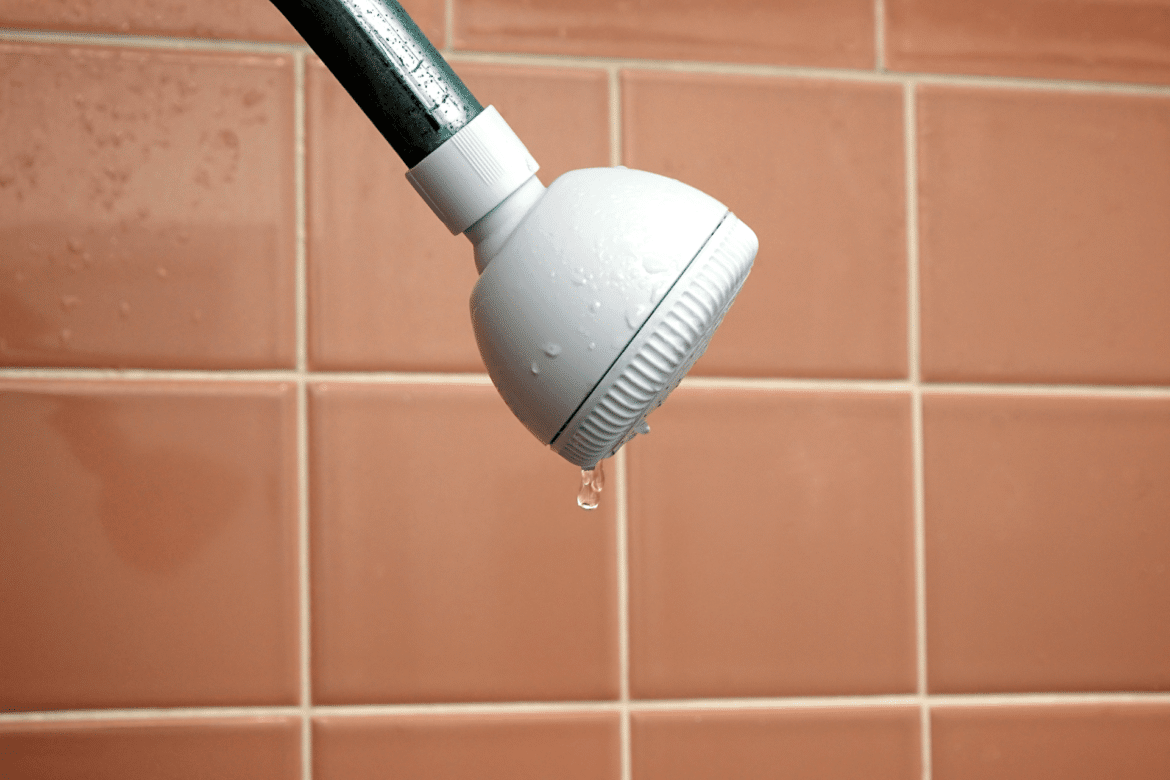
Is your shower head constantly dripping, wasting water and driving you crazy? A leaking shower head isn’t just annoying—it can also raise your water bill and cause damage over time.
The good news is, you don’t need to call a plumber or spend a fortune to fix it. You’ll learn simple, step-by-step methods to stop your shower head from leaking. By the end, you’ll have the skills to save water, protect your bathroom, and enjoy a peaceful, drip-free shower every day.
Keep reading—you’re closer to solving this problem than you think!
Credit: www.bluefrogplumbingnorthdallas.com
Identify The Source Of Leakage
Finding where a shower head leak starts is key to fixing it. Small drips can waste water and raise bills. Pinpointing the source saves time and effort. This section helps identify where leaks come from and how to find them quickly.
Common Causes Of Leaks
- Worn-out washers or O-rings inside the shower head
- Loose connections between the shower arm and the head
- Cracks or damage in the shower head itself
- Corroded or damaged shower arm threads
- Build-up of mineral deposits blocking seals
Leaks often come from worn parts or poor fitting. Over time, washers dry out and crack. Mineral deposits can also cause seals to fail. Understanding these causes helps target the problem faster.
Locating The Leak
Turn off the water first. Dry the shower head and arm with a towel. Turn water on slowly and watch closely. Look for drips at the base and joints.
Use tissue paper or a dry cloth to detect tiny drips. Wrap it around the connection points. If it gets wet, you found the leak.
Check the shower head itself for cracks or holes. Sometimes leaks appear when water pressure increases. Test at different water pressure levels.
Tools And Materials Needed
Fixing a leaking shower head is easier when you have the right tools and materials at hand. Gathering everything before you start saves time and frustration. Plus, it helps you avoid those last-minute trips to the hardware store.
Essential Tools
- Adjustable Wrench:This tool helps you loosen and tighten the shower head without damaging it.
- Slip-Joint Pliers:Useful for gripping and turning parts that are hard to reach.
- Flathead Screwdriver:Needed to remove any screws holding parts in place.
- Rag or Cloth:Protects the finish of your shower head when using tools.
Have you ever tried to fix a leak without a rag and ended up scratching the metal? Protecting the surface is key to keeping your shower looking new.
Recommended Materials
- Plumber’s Tape (Teflon Tape):This is critical to seal threaded connections and prevent leaks.
- Replacement Washer or O-Ring:These small parts often wear out and cause leaks.
- Silicone Grease:Helps lubricate washers and O-rings, making installation smoother and extending their life.
- Cleaning Brush or Old Toothbrush:To clean mineral deposits from the shower head and pipe threads.
Did you know that sometimes a worn-out washer is the main culprit behind a drip that’s been annoying you for weeks? Having these materials ready means you can fix it in one go.
Fixing Loose Connections
Loose connections are a common cause of shower head leaks. Often, tightening these connections can stop the drip without needing new parts. Identifying and fixing loose fittings saves time and money while preventing water waste.
Tightening The Shower Head
Start by turning off the water supply to avoid a sudden splash. Grip the shower head firmly and try twisting it clockwise. If it feels loose or wobbly, tightening it by hand might be enough.
Sometimes, you may need a wrench for a better grip. Wrap a cloth around the shower head to avoid scratching it, then gently tighten with the wrench. Be careful not to overtighten; this could damage the threads or the fixture itself.
Securing Pipe Connections
Leaks can also come from the pipe connecting the shower head to the wall. Inspect the joint where the shower arm meets the plumbing pipe. If it moves or leaks, you’ll need to secure it properly.
- Turn off the water supply.
- Use a wrench to loosen the shower arm.
- Apply plumber’s tape (Teflon tape) around the threads to create a tight seal.
- Reattach and tighten the shower arm back into place.
Have you checked the type of tape you use? Plumber’s tape is thin and flexible, perfect for filling gaps and preventing leaks. Using the wrong tape can cause more problems, so choose wisely.
Replacing Worn Washers Or Seals
Replacing worn washers or seals is often the key to stopping a leaking shower head. These small parts handle a lot of pressure and water flow, so they wear out over time. Fixing them yourself can save you money and prevent water waste.
Identifying Worn Components
Look for signs like constant dripping or water pooling around the shower head connection. Remove the shower head and inspect the washer or seal inside. If it looks cracked, flattened, or brittle, it’s time for a replacement.
Sometimes mineral buildup can disguise the damage, so clean the parts before deciding. A worn washer won’t sit tightly and causes leaks even when the shower is off. Do you notice water leaking only when the water is on, or even after it’s turned off? That’s a strong hint the washer or seal is failing.
Steps To Replace Washers
- Turn off the water supply:Avoid a mess by shutting off water to the shower or the whole house.
- Remove the shower head:Use a wrench or pliers carefully to unscrew it from the pipe.
- Take out the old washer or seal:It usually sits inside the shower head or the connecting nut.
- Match the new washer:Bring the old one to the store to find an exact replacement.
- Install the new washer:Place it firmly in the right spot, ensuring it sits flat without twisting.
- Reattach the shower head:Screw it back onto the pipe by hand, then tighten gently with a wrench.
- Turn on the water and check for leaks:Watch closely as water flows. If it still drips, the washer might not be seated correctly or the seal might need replacement.
Have you ever ignored a small leak only to find your water bill soaring later? Fixing worn washers early can prevent bigger problems and help you conserve water effortlessly.
Cleaning Mineral Deposits
Mineral deposits often cause shower heads to leak or clog. These deposits build up over time, blocking water flow. Cleaning them regularly keeps the shower head working well. This section explains how mineral deposits affect your shower and simple cleaning methods to fix leaks.
Effects Of Hard Water
Hard water contains minerals like calcium and magnesium. These minerals leave white or chalky deposits on surfaces. Shower heads get clogged with these mineral buildups. This reduces water pressure and causes leaks around joints. Over time, mineral deposits can damage the shower head parts. Removing these deposits helps restore proper water flow and stops leaks.
Cleaning Techniques
Use vinegar to dissolve mineral deposits. Soak the shower head in white vinegar for several hours. This softens the deposits and makes them easy to remove. A toothbrush or soft brush helps scrub away loosened deposits. Rinse the shower head well with water after cleaning.
For stubborn buildup, try this:
- Fill a plastic bag with vinegar
- Attach the bag over the shower head with a rubber band
- Let it soak for 4-6 hours
- Remove the bag and scrub gently
- Rinse thoroughly
Regular cleaning prevents leaks and keeps your shower head working smoothly. Avoid harsh chemicals that can damage the finish. Simple vinegar and brushing often do the trick effectively.

Credit: www.reddit.com
Using Teflon Tape For Sealing
Using Teflon tape is a simple and effective way to stop a shower head from leaking. This tape creates a tight seal between the shower arm and the shower head. It prevents water from escaping through the threaded connection. Teflon tape is easy to apply and inexpensive. Many DIYers rely on it to fix leaks quickly.
Benefits Of Teflon Tape
- Prevents leaks by sealing threaded connections.
- Resists water, heat, and pressure well.
- Easy to wrap around pipes or fittings.
- Does not harden or crack over time.
- Inexpensive and widely available.
- Helps tighten loose connections.
- Works on metal and plastic threads.
Application Process
Start by removing the shower head from the arm. Clean the threads on both parts to remove old tape or debris. Take the Teflon tape and hold it at the end of the shower arm’s threads.
Wrap the tape clockwise around the threads. Overlap the tape slightly as you wrap. Cover the threads with two to three layers of tape. Avoid wrapping too much tape as it can cause difficulty screwing the parts back together.
Press the tape gently into the threads to ensure it sticks. Screw the shower head back onto the arm by hand. Tighten it firmly but avoid over-tightening. Turn on the water to check for leaks.
Checking For Cracks Or Damage
Checking for cracks or damage is a crucial step to stop your shower head from leaking. Even a small crack or worn-out part can cause water to drip constantly, wasting water and increasing your utility bills. Taking a close look at your shower head can help you spot issues before they get worse.
Inspecting Shower Head
Start by turning off the water and removing the shower head. Use a flashlight if needed to see clearly inside and outside the fixture. Look carefully for any visible cracks, chips, or discoloration on the surface and around the connection points.
Pay special attention to the rubber washers and seals. These often wear out and cause leaks, even if the metal parts look fine. If you spot mineral buildup, clean it off gently with vinegar to avoid missing hidden cracks.
Repairing Or Replacing Damaged Parts
If you find a cracked or broken part, decide whether it can be repaired or needs replacement. Small cracks in rubber washers can sometimes be fixed by swapping out the washer for a new one available at any hardware store.
For metal or plastic cracks, replacement is usually the better option to prevent leaks. Keep in mind, replacing a worn part often costs less and saves more water than letting the leak continue.
Have you checked your shower head lately? Taking a few minutes to inspect and fix it could save you money and headaches down the line.

Credit: parzivalplumbing.com
Regular Maintenance Tips
Regular maintenance keeps your shower head working well and stops leaks early. Small actions can prevent big problems. Checking and caring for your shower head often saves water and money. Follow simple tips to keep your shower leak-free and efficient.
Routine Checks
- Look for drips around the shower head after use.
- Feel for loose parts or wobbling when you touch it.
- Examine the shower arm and connections for rust or buildup.
- Test water flow to spot any sudden changes in pressure.
- Clean the shower head holes to remove mineral deposits.
Preventive Measures
- Use a water softener to reduce mineral buildup.
- Replace worn washers and seals before leaks start.
- Tighten fittings gently without overdoing to avoid damage.
- Clean the shower head regularly with vinegar or mild cleaner.
- Check plumbing for hidden leaks that can affect the shower.
Frequently Asked Questions
How Can I Fix A Leaking Shower Head Quickly?
To fix a leaking shower head quickly, turn off the water supply. Remove the shower head, clean the threads, and replace the washer or O-ring. Reattach it tightly, then turn on the water to check for leaks. This simple fix stops drips effectively.
What Causes A Shower Head To Leak Continuously?
A shower head leaks due to worn washers, damaged O-rings, or mineral buildup. Loose connections and corrosion can also cause leaks. Identifying the cause helps target the right repair method and prevent water waste.
Is It Necessary To Replace The Shower Head To Stop Leaks?
Replacing the shower head is not always necessary. Many leaks fix by replacing washers or cleaning debris. However, if the shower head is old or damaged, replacement is the best long-term solution.
Can Mineral Deposits Cause Shower Head Leaks?
Yes, mineral deposits can clog and damage shower heads. Hard water leaves buildup that prevents proper sealing, causing leaks. Regular cleaning with vinegar or descaling solutions helps maintain a leak-free shower head.
Conclusion
Fixing a leaking shower head saves water and money. Small leaks cause big waste over time. Tighten connections or replace worn parts to stop drips. Regular checks keep your shower working well. A quick fix prevents bigger problems later. Everyone can do this with simple tools.
Enjoy a steady, strong water flow again. No need to call a plumber right away. Save effort and protect your home from damage. Keep your bathroom dry and comfortable every day.


