Setting up your D9 Smart Doorbell doesn’t have to be confusing or time-consuming. Imagine knowing exactly who’s at your door, anytime, from anywhere.
With the right steps, you can get your doorbell working smoothly and start enjoying its smart features today. In this guide, you’ll find simple, clear instructions that make the setup quick and hassle-free. Ready to take control of your home’s security?
Let’s dive in and get your D9 Smart Doorbell up and running in no time.
Credit: www.temu.com
Unboxing The D9 Smart Doorbell
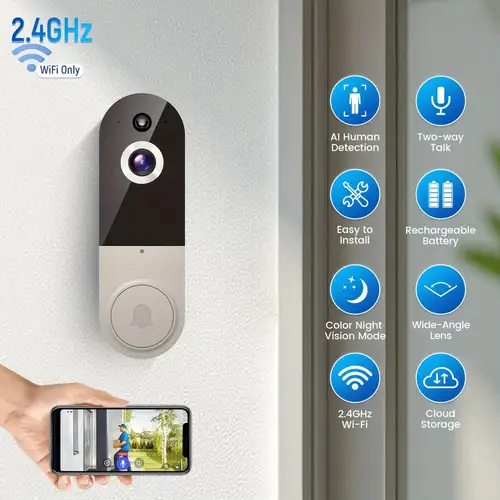
Opening the D9 Smart Doorbell box reveals all parts needed for quick setup. Connect the device to Wi-Fi and follow simple app instructions. Within minutes, the doorbell will be ready to use and monitor your entrance.
Unboxing the D9 Smart Doorbell is the first exciting step towards enhancing your home security. The anticipation of opening the box and discovering all the innovative components is palpable. As you peel back the packaging, you are greeted with the promise of a smarter, safer home.What’s Inside The Box
Opening the box reveals a neatly arranged set of components. The main attraction, of course, is the sleek D9 Smart Doorbell itself, with its modern design and intuitive functionality. You’ll also find a compact instruction manual, which is your guide to setting up and maximizing the doorbell’s features. Alongside these, there are small boxes containing accessories like screws and mounting brackets, which are crucial for installation. Are you ready to dive into this tech treasure trove?Checking For Essential Components
Before you get too carried away, it’s crucial to check that all the essential components are present. Here’s a simple checklist: – D9 Smart Doorbell: Ensure the doorbell is secure and undamaged. – Mounting Kit: Look for screws, anchors, and brackets necessary for installation. – Instruction Manual: This booklet is your roadmap for setup and troubleshooting. – Charging Cable: Verify the presence of a USB cable for charging the device. Taking a few minutes to verify these parts will save you time and frustration later. Missing anything? Reach out to customer service promptly. Have you ever unboxed a new gadget only to find a crucial piece missing? That moment of realization can be daunting. But when everything is accounted for, the setup becomes a breeze. Are you ready to move forward and install your doorbell? Let’s make sure you’ve got everything you need right from the start.
Credit: www.temu.com
Preparing For Installation
Preparing for the installation of your D9 Smart Doorbell is key to a smooth setup. Proper planning helps avoid mistakes and saves time. This section covers choosing the best location and gathering all necessary tools.
Choosing The Right Location
Select a spot near your front door with a clear view of visitors. The doorbell should be easy to reach for installation and maintenance. Avoid areas exposed to heavy rain or direct sunlight. A stable Wi-Fi signal is important for the doorbell to work well. Consider the height—about 4 to 5 feet above the ground is ideal for capturing faces clearly.
Gathering Required Tools
Having the right tools ready makes installation faster and easier. Prepare the following items before you start:
- Electric drill with bits
- Screwdriver (Phillips and flathead)
- Measuring tape
- Level tool
- Pencil or marker for marking holes
- Wire stripper (if connecting to existing doorbell wiring)
- Safety gloves
Check the D9 Smart Doorbell package for included screws and anchors. Ensure your tools are in good condition and ready to use.
Mounting The Doorbell
Mounting your D9 Smart Doorbell correctly is key to ensuring it works flawlessly and looks great on your doorframe. A secure mount keeps the camera steady and the motion sensors accurate. Let’s break down the process into clear, manageable tasks so you can get it up and running without any hassle.
Marking The Mounting Points
Start by holding the mounting bracket against the wall where you want the doorbell to sit. Make sure it’s at eye level—usually about 48 inches from the ground—so the camera captures visitors’ faces clearly. Use a pencil to mark the screw holes through the bracket onto the wall.
Double-check your marks before drilling to avoid any misalignment. Have you considered the angle of the doorbell? Adjusting it slightly can improve the field of view, especially if your porch is wide or your door is recessed.
Attaching The Bracket
Next, drill holes where you made your pencil marks. Use a drill bit size that matches the wall anchors included with your doorbell kit. Insert the anchors firmly into the holes to provide a solid grip for the screws.
Now, align the bracket with the anchors and screw it into place. Tighten the screws until the bracket feels stable but be careful not to overtighten and crack the bracket or wall surface.
Securing The Doorbell
Once the bracket is firmly attached, snap the D9 Smart Doorbell onto it. You should hear a click indicating it’s locked in place. Tug gently to ensure it won’t come loose with everyday use.
Some models come with an additional security screw at the bottom of the doorbell to prevent theft. If yours does, use the provided screwdriver to secure this screw. Does your doorbell feel solid enough to handle a sudden bump or a strong wind? If not, check the bracket attachment again.
Credit: www.temu.com
Connecting To Power
Connecting your D9 Smart Doorbell to power is crucial for its proper function. This device offers two main power options: wired connection and battery operation. Both methods ensure continuous operation but suit different installation needs.
Wired Power Setup
Wired power setup uses your home’s existing doorbell wiring. This provides constant power, avoiding battery changes. Locate the doorbell wires behind your old doorbell. Turn off power at the circuit breaker before touching wires.
Connect the wires to the D9’s terminals. Usually, the wires are color-coded for easy matching. Secure the connection with screws or clips. Turn the power back on and check if the doorbell powers up.
This setup suits homes with existing doorbell wiring. It offers reliable power without frequent maintenance.
Battery Installation And Charging
The D9 doorbell can run on a rechargeable battery. This option is great for homes without doorbell wiring. To install, open the battery compartment on the back of the device. Insert the battery, aligning the terminals correctly.
Charge the battery fully before first use. Use the included USB cable for charging. A full charge usually takes a few hours. The battery lasts several weeks on a single charge, depending on usage.
Battery power allows flexible placement of your doorbell. Check the battery level regularly to keep it active.
Setting Up The App
Setting up the app is the first step to use your D9 Smart Doorbell. The app lets you control the doorbell and see who is at your door. It also sends alerts directly to your phone. Follow these simple steps to get started with the app and connect it to your doorbell.
Downloading The D9 App
Search for the “D9 Smart Doorbell” app in your phone’s app store. It is available on both Android and iOS. The app is free and easy to install. Make sure your phone has a stable internet connection before downloading.
Creating An Account
Open the app after installation. Tap on “Sign Up” to create a new account. Use a valid email address and a strong password. Verify your email by clicking the link sent to your inbox. This account will keep your doorbell settings safe and secure.
Pairing The Doorbell
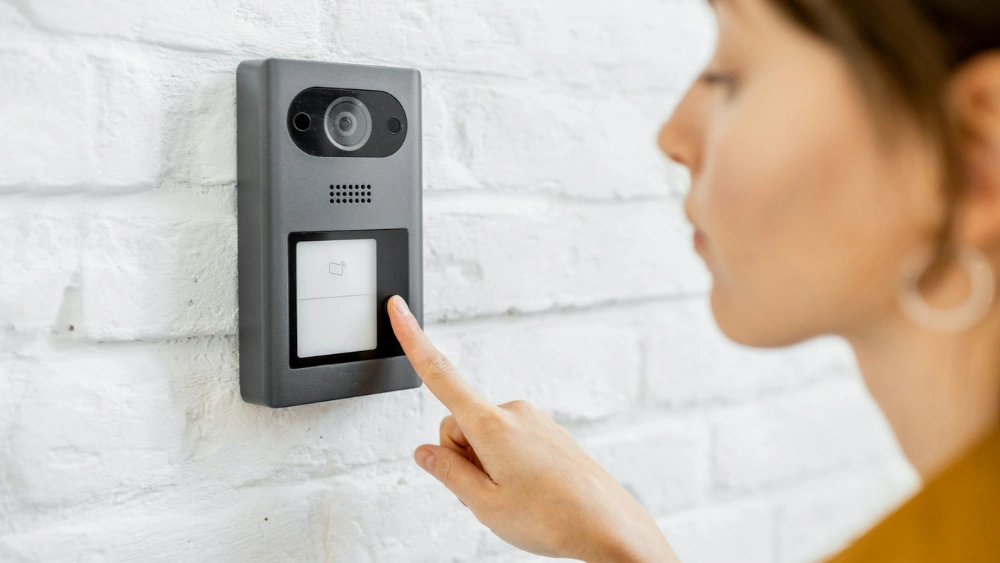
Turn on your D9 Smart Doorbell by pressing the power button. Open the app and select “Add Device.” Follow the on-screen instructions to connect the doorbell to your Wi-Fi network. Wait for the app to detect the doorbell. Once found, confirm pairing by tapping “Connect.” Your doorbell is now ready to use.
Configuring Settings
Configuring the settings of your D9 Smart Doorbell enhances its performance and user experience. Adjusting these options helps the device match your preferences and security needs. You can tailor motion detection, notifications, and sounds easily through the app.
Adjusting Motion Detection
Open the D9 app and go to the motion settings. Set the detection sensitivity to low, medium, or high. High sensitivity catches small movements but may cause false alerts. Low sensitivity reduces alerts but might miss some activity. You can also select specific detection zones. This focuses motion alerts on key areas like your doorstep or walkway. Custom zones reduce unnecessary alerts from passing cars or trees.
Setting Notifications
Choose how you want to receive alerts from your doorbell. Enable push notifications to get instant updates on your phone. You can turn on email alerts if preferred. Set quiet hours to pause notifications during sleep or meetings. The app lets you customize notification tones and vibration patterns. These settings help you avoid missing important alerts while limiting disturbances.
Customizing Doorbell Sounds
The D9 app offers various chime sounds for your doorbell. Select a tone that suits your home environment and personal taste. Adjust the volume level to ensure you hear the doorbell clearly. You can assign different sounds for visitors and motion alerts. This distinction helps you identify the type of alert quickly. Choose a sound that is pleasant but attention-grabbing to improve your response time.
Testing The Doorbell
Testing the D9 Smart Doorbell ensures it works perfectly after installation. This step is key to secure your home and avoid future issues. Check both video and audio functions to confirm clear communication. Also, verify notifications to stay alert when visitors arrive.
Video And Audio Check
Start by looking at the live video feed on your app. Make sure the picture is clear and colors look natural. Test the doorbell’s speaker by speaking into the app. Listen for clear sound without delays or echoes. Confirm the doorbell’s microphone picks up your voice well. Adjust settings if the video or audio seems weak.
Notification Test
Press the doorbell button to trigger an alert on your phone. Check if the notification arrives quickly and without errors. Test notifications on multiple devices if connected. Make sure sound alerts and vibration work as expected. Confirm you can open the live feed directly from the notification. Fix any delay or missing alerts before finishing setup.
Troubleshooting Tips
Troubleshooting your D9 Smart Doorbell can solve most common problems quickly. Understanding key issues helps keep your device running smoothly. Below are simple tips to fix typical problems.
Connectivity Issues
Check your Wi-Fi signal strength near the doorbell. A weak signal causes delays or disconnections. Move your router closer or use a Wi-Fi extender if needed.
Restart your router and the doorbell to refresh connections. Ensure the doorbell is connected to the correct network.
- Verify Wi-Fi password accuracy.
- Confirm the doorbell supports your network type (2.4 GHz often works best).
- Reduce interference from other devices.
Power Problems
Ensure the doorbell battery is charged or the wired connection is secure. A low battery stops the doorbell from working properly.
Test the power source using a multimeter or replace batteries if needed. Check wiring for loose or damaged connections.
- Use only recommended batteries or power adapters.
- Avoid overcharging the battery to extend its life.
- Replace old or faulty wiring promptly.
App Malfunctions
Update the app to the latest version for better performance. Outdated apps may cause glitches or crashes.
Clear the app cache or reinstall the app if problems persist. Restart your phone to refresh system resources.
- Check app permissions for camera and notifications.
- Ensure your phone’s operating system is up to date.
- Log out and log back into the app to reset settings.
Frequently Asked Questions
How Do I Install The D9 Smart Doorbell?
To install the D9 Smart Doorbell, mount the device near your door using the included screws. Connect it to your home Wi-Fi via the app and follow the on-screen setup instructions for full functionality.
What Power Options Does D9 Smart Doorbell Support?
The D9 Smart Doorbell supports both wired and battery-powered options. You can connect it to your existing doorbell wiring or use the rechargeable battery for flexible installation.
How To Connect D9 Smart Doorbell To Wi-fi?
Open the D9 app and select “Add Device. ” Follow prompts to enter your Wi-Fi credentials. Ensure your network is 2. 4 GHz for seamless connection.
Can I Receive Alerts On My Phone From D9 Doorbell?
Yes, the D9 Smart Doorbell sends instant notifications to your smartphone. You’ll get alerts when someone rings or motion is detected, allowing remote monitoring.
Conclusion
Setting up the D9 Smart Doorbell is simple and quick. Follow each step carefully for the best results. Test the device to make sure it works well. Enjoy the convenience and safety it brings to your home. Stay connected with visitors anytime, anywhere.
A smart doorbell adds comfort and peace of mind. Keep your home secure with easy technology. You can do this yourself without extra help. Start using your D9 doorbell today and feel safer.


