
Your outdoor Christmas lights should sparkle brightly, not flicker or stay dark. When those festive bulbs go out, it can feel frustrating—and you might worry you need to buy a whole new set.
But what if you could fix your lights yourself, save money, and get your home shining again in no time? This guide will show you simple, step-by-step ways to repair your outdoor Christmas lights safely and effectively. Keep reading, and you’ll discover tips that make troubleshooting easy, so your holiday decorations look perfect all season long.

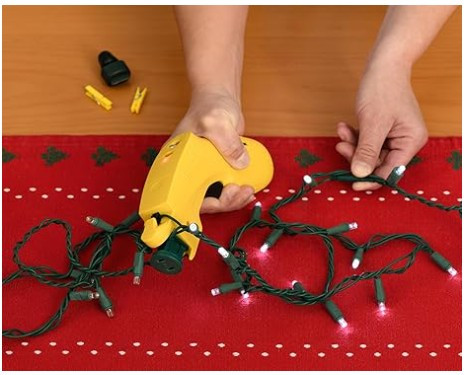
Credit: thechristmaslightemporium.com
Common Issues With Outdoor Christmas Lights
Outdoor Christmas lights bring a magical glow to your home during the holidays, but they often face challenges that can dim their sparkle. Understanding the common issues can save you time and frustration. Let’s look closely at the typical problems you might encounter and how to spot them quickly.
Burnt Out Bulbs
Burnt out bulbs are the most frequent culprit behind dark spots in your light strands. Each burnt bulb can cause a section of lights to go out, especially in older sets where bulbs are wired in series. Check each bulb carefully; sometimes replacing a single bulb restores the entire strand’s glow.
Have you noticed some bulbs looking discolored or blackened? That’s a clear sign they need replacement. Keep extra bulbs handy so you can swap them out without delay.
Frayed Or Damaged Wires
Exposure to weather can wear down the wires, causing frays or breaks that interrupt the electrical flow. Damaged wires are not only a reason for lights to fail but also a safety hazard. Always inspect your cords for cracks, cuts, or exposed copper before plugging them in.
If you find a damaged section, avoid using tape as a permanent fix. Instead, replace the entire strand or use a professional-grade wire repair kit to ensure safety and performance.
Blown Fuses
Many outdoor light strings have small fuses in the plug to protect against electrical surges. If your entire set suddenly stops working, a blown fuse is often the cause. Check the fuse compartment in the plug and replace any blown fuses with ones that match the original rating exactly.
Do you keep spare fuses with your Christmas decorations? Having them ready can save you from scrambling at the last minute.
Loose Connections
Loose bulbs or connectors can disrupt the flow of electricity, causing intermittent lighting or sections to go dark. Connections can loosen during storage or when exposed to wind and movement outside. Firmly press each bulb into its socket and ensure all plugs are tightly connected.
Sometimes, gently twisting a bulb can restore the connection. Don’t overlook this simple fix before assuming a bulb or wire is faulty.
Credit: www.treetime.com
Tools And Materials Needed
Before you dive into fixing your outdoor Christmas lights, gather the right tools and materials. Having everything at hand saves time and keeps frustration away. It also makes the repair process smoother and safer.
Basic Repair Kit
A basic repair kit is your first essential. It should include a wire cutter, a pair of pliers, and electrical tape. These tools help you strip wires, twist connections, and secure repairs quickly.
Don’t forget a multimeter to check for electrical continuity. This device can save you hours by pinpointing exactly where the break or short is in the light strand.
Replacement Bulbs And Fuses
Having spare bulbs matching your light set is a must. Different light sets use different bulbs, so check the packaging or manual to buy the right ones. Missing bulbs can cause entire sections to go dark, so replacements keep your display glowing.
Also, keep extra fuses handy. Many light strings have built-in fuse compartments that protect the circuit. Blown fuses are a common cause of outages and replacing them often restores power immediately.
Safety Gear
Safety should never be an afterthought. Use insulated gloves to protect your hands from electrical shocks and sharp wire ends. Safety glasses are wise too, especially if you are cutting wires or working in windy conditions.
Make sure your work area is dry to avoid slipping or electrical hazards. Would you risk a fall or shock just to save a few minutes? Taking these precautions ensures you finish your repairs without injury.
Safety Tips Before Repairing
Repairing outdoor Christmas lights can brighten your holiday season. Safety is the top priority before starting any repair work. Taking simple precautions protects you from electric shocks and injuries. It also prevents damage to your light set and home.
Follow these safety tips to ensure a safe and successful repair process. Preparation reduces risks and makes the task easier.
Power Off And Unplug
Always turn off the power before handling Christmas lights. Unplug the light string from the outlet. This prevents electric shock while you work. Never repair lights while they are plugged in. Double-check the power is off before touching any wires.
Check Weather Conditions
Work on your lights only when the weather is dry. Avoid repairing lights in rain, snow, or wet conditions. Wet environments increase the risk of electric shock. Choose a clear day with no strong winds. This keeps you safe and your lights dry.
Use Insulated Tools
Use tools with insulated handles to protect against electric shock. Insulated tools reduce the chance of current passing through your body. Keep these tools in good condition without cracks or damage. Avoid using metal tools without insulation near wires or plugs.

Credit: thechristmaslightemporium.com
Step-by-step Repair Guide
Repairing outdoor Christmas lights can seem tricky. With a simple guide, it becomes easy. This step-by-step repair guide helps fix common issues. You’ll bring back the sparkle in no time. Let’s dive into identifying and repairing faults.
Identifying The Faulty Bulb
Start by checking each bulb. Look for broken or dim bulbs. Use a bulb tester if available. This tool helps find non-working bulbs quickly. Replace faulty ones to restore the light set.
Replacing Burnt Out Bulbs
Once identified, remove the burnt bulb carefully. Twist or pull gently to avoid damage. Insert a new bulb of the same type and wattage. Ensure it fits snugly into the socket. Test the lights to see if they work.
Fixing Wire Damage
Inspect wires for cuts or breaks. Look for exposed metal or frayed sections. Use electrical tape to cover minor damage. For severe issues, consider replacing the damaged wire completely. This prevents short circuits.
Changing Blown Fuses
Locate the fuse compartment on the plug. Open it gently with a screwdriver. Remove the blown fuse and replace it with a new one. Ensure the replacement matches the original fuse type. This step often restores power.
Securing Loose Connections
Check connections between bulbs and sockets. Loose contacts can cause flickering. Tighten the bulb in the socket. Ensure the plug fits firmly in the outlet. Secure connections restore consistent lighting.
Preventive Measures For Longevity
Taking care of outdoor Christmas lights extends their life and keeps them bright. Small efforts prevent damage and costly repairs. Following simple tips helps enjoy beautiful lights every holiday season.
Proper Storage Tips
Store lights carefully to avoid tangles and breaks. Use a spool or wrap lights around a piece of cardboard. Keep them dry and in a cool place. Avoid storing lights in damp basements or hot attics. Label boxes for easy finding next year.
Regular Maintenance
Check lights before hanging them outside. Look for broken bulbs, frayed wires, or loose connections. Replace damaged bulbs with the correct type. Clean lights gently with a soft cloth. Test sets by plugging them in indoors to find problems early.
Using Weatherproof Lights
Choose lights made for outdoor use to resist rain and snow. Look for labels like “weatherproof” or “water-resistant.” Use outdoor-rated extension cords and plugs. Protect connections with electrical tape or covers. This stops moisture from causing shorts or rust.
When To Replace Your Lights
Knowing when to replace your outdoor Christmas lights saves time and keeps your display safe. Lights exposed to weather can wear out or break. Repairing works for small issues, but some damage needs replacement. Replacing old lights ensures your holiday decorations stay bright and secure.
Signs Of Irreparable Damage
Check bulbs and wires carefully. Here are signs that mean replacement is needed:
- Many bulbs are burned out or broken.
- Wires are frayed, cracked, or show exposed metal.
- The plug or socket is melted or damaged.
- Lights flicker constantly or do not light up.
- Water damage inside bulbs or connectors.
These issues can cause electrical hazards. Repairs may not fix deep wire damage. Replacing lights is safer and more reliable.
Upgrading To Newer Models
Newer lights use less energy and last longer. LED lights save electricity and stay cool. They also have brighter colors and more styles.
Consider upgrading if your current lights are old or inefficient. New models often have better weather resistance. This means less chance of damage from rain or snow.
Upgrading can improve your holiday display’s look and safety. It reduces the need for frequent repairs. Modern lights can be a smart investment.
Frequently Asked Questions
How Do I Identify Faulty Outdoor Christmas Lights?
Check each bulb by visually inspecting for breaks or discoloration. Use a bulb tester or multimeter to find electrical faults. Replace any damaged bulbs or fuses to restore proper function.
What Tools Do I Need To Repair Christmas Lights?
You need a bulb tester, replacement bulbs, electrical tape, wire cutters, and a multimeter. These tools help diagnose issues and safely fix broken connections or bulbs.
Can I Fix Damaged Wires On Christmas Lights?
Yes, carefully strip the damaged wire section and twist ends together. Cover the splice with electrical tape or heat shrink tubing. Ensure the repair is secure and waterproof before use.
How Do I Test Outdoor Christmas Lights Safely?
Unplug the lights before testing. Use a multimeter to check continuity. Replace any blown fuses or faulty bulbs. Always test in a dry area to avoid electric shocks.
Conclusion
Repairing outdoor Christmas lights saves money and time. Start by checking bulbs and connections carefully. Replace broken bulbs with the right type. Use a tester to find faulty wires quickly. Keep safety in mind during every step. Working methodically helps finish repairs faster.
Enjoy bright, festive lights all season long. Small fixes can bring big holiday cheer. Stay patient and follow simple steps well. Your decorations will shine beautifully once again.


