A tear in your vinyl flooring can be frustrating to see, especially when it spoils the look of your room. But before you think about replacing the whole floor, there’s good news—you can fix it yourself.
Imagine saving time and money by repairing that tear quickly and easily. In this guide, you’ll learn simple steps to restore your vinyl flooring so it looks almost as good as new. Keep reading, and you’ll discover how to tackle this common problem without stress or hassle.
Identify The Tear Type
Before you grab your repair kit, it’s crucial to understand what kind of tear you’re dealing with in your vinyl flooring. Identifying the tear type helps you choose the right repair method and materials. It also saves you time and money by preventing unnecessary fixes.
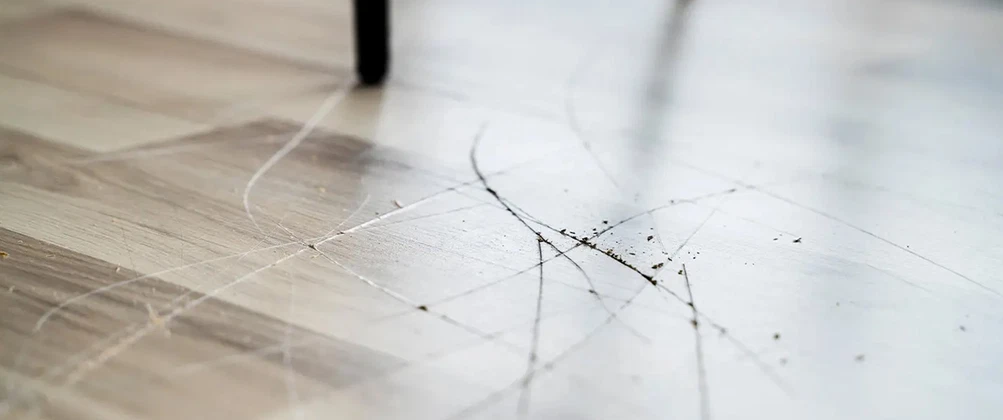
Surface Scratches
Surface scratches are the most common and least severe type of damage. They usually affect only the top layer and don’t penetrate deep into the vinyl. You might notice these scratches from moving furniture or dropping small objects.
Can these scratches be buffed out easily? Often, yes. A gentle cleaning followed by a vinyl polish or a scratch repair kit can restore the look without replacing any part of your floor.
Small Punctures
Small punctures happen when sharp objects pierce through the vinyl but don’t cause extensive damage. These holes can be caused by pet claws, dropped tools, or heavy heels. They are typically less than an inch in diameter.
You need to check if the backing layer is intact because that affects the repair method. If only the surface layer is damaged, patching with a vinyl repair compound works well. Have you checked if your flooring has a textured pattern? Matching that texture is key to a seamless repair.
Large Tears
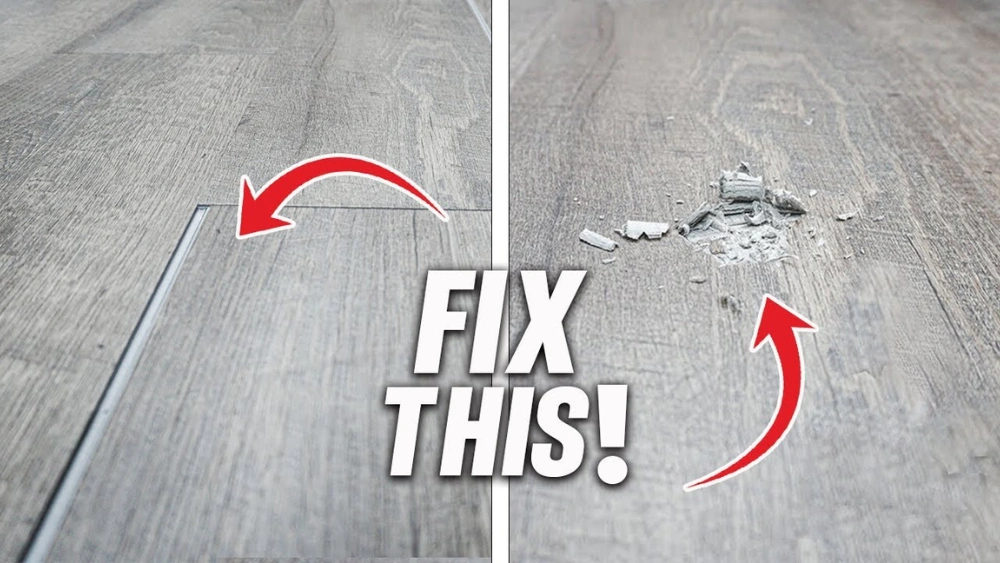
Large tears are more serious and often require more than just a quick patch. They can result from heavy furniture sliding, accidents, or natural wear and tear over time. These tears usually expose the subfloor beneath the vinyl.
Do you think a DIY fix will hold up? Sometimes yes, but often it needs professional tools or partial replacement of the damaged section. Measuring the tear accurately before buying repair materials is essential to avoid wasted supplies and effort.

Credit: www.reddit.com
Gather Essential Tools
Before you start fixing a tear in your vinyl flooring, it’s crucial to gather the right tools. Having everything at hand saves time and keeps the repair process smooth. Missing even one essential item can lead to frustration or a less effective repair.
Repair Kits
Vinyl repair kits are designed specifically for fixing tears and holes. They usually include patches, adhesive, and sometimes color compounds to match your floor. Choosing a kit that fits your floor’s texture and color makes the repair less noticeable.
Think about whether you want a quick fix or a long-lasting solution. Some kits offer heat-activated adhesives that create stronger bonds but require a heat gun or iron. Others come with simple glue and patches, which are easier to use but may not last as long.
Cleaning Supplies
Cleaning the damaged area before repair is vital. Dirt or debris under the patch can cause bubbles or poor adhesion. Use mild detergent, rubbing alcohol, or vinyl floor cleaner to ensure the surface is spotless.
Have lint-free cloths or paper towels ready to dry the area thoroughly. Avoid using water alone—it might leave moisture that weakens the glue. How often do you skip cleaning and regret it later?
Cutting Instruments
Sharp cutting tools help you trim patches precisely and shape the edges of the damaged area. A utility knife or an X-Acto knife with fresh blades works best. Dull blades can tear the vinyl further or create jagged edges.
Keep a small pair of scissors handy for detailed trimming. Cutting slowly and steadily is key to avoiding mistakes. Have you ever rushed this step and ended up with a patch that looks worse than the tear?
Prepare The Area
Preparing the area before repairing a tear in your vinyl flooring is crucial for a smooth and lasting fix. Taking time to properly get the surface ready ensures the adhesive sticks well and the repair blends seamlessly with the rest of your floor. Let’s break down the steps to make your repair job easier and more effective.
Clean The Floor
Start by giving the damaged area a thorough cleaning. Use a mild detergent mixed with warm water to remove any dirt, grease, or grime. Avoid harsh chemicals that might damage the vinyl further or interfere with the adhesive’s grip.
Have you noticed that even small amounts of dust can prevent glue from sticking properly? That’s why a clean surface is non-negotiable for a solid repair.
Dry The Surface
After cleaning, make sure the floor is completely dry. Moisture can weaken the adhesive and cause the repair to fail. Use a soft towel to pat the area dry, and let it air out for a few minutes if needed.
Remember, rushing this step might mean redoing the entire repair sooner than you want. Patience here pays off.
Remove Loose Debris
Check the tear for any loose pieces of vinyl or debris that might have come off. Carefully pick these out using tweezers or your fingers. Leaving loose bits behind can create bumps or gaps once you apply the patch or filler.
Have you ever tried fixing a floor only to find bumps after the repair? This step prevents that problem and keeps your floor smooth and safe.
Fix Small Tears And Punctures
Small tears and punctures in vinyl flooring can be fixed quickly using a vinyl repair kit. Clean the damaged area, apply the adhesive, and press a matching patch firmly in place. This method restores the floor’s look and prevents further damage.
Fixing small tears and punctures in vinyl flooring might seem daunting at first, but it’s surprisingly straightforward. Whether your vinyl floor is in the kitchen, bathroom, or hallway, you can make it look as good as new with just a few simple tools and techniques. Imagine walking into your room and feeling a sense of satisfaction knowing you repaired it with your own hands!Apply Vinyl Adhesive
Start by cleaning the area around the tear. Dust and debris can prevent the adhesive from sticking properly. Use a mild cleaner and a soft cloth. Once the surface is clean, apply vinyl adhesive using a small brush or a toothpick. Ensure the adhesive goes under the tear to secure it firmly. Press down gently with your fingers to bond the vinyl back together.Use Patch Kits
Patch kits are your best friend when dealing with punctures in vinyl flooring. They usually include everything you need: adhesive, a patch, and sometimes even a roller. Choose a patch that matches your floor’s color and texture. Trim the patch to size if necessary, and apply it over the puncture. Make sure to press it firmly to create a seamless appearance.Smooth Out Bubbles
Bubbles can appear if air is trapped under the vinyl during repair. Use a rolling pin or a specialized vinyl roller to smooth them out. Start from the center and roll towards the edges to push the air out. If the bubble persists, consider making a small incision to release the trapped air, then reapply adhesive and roll again. Have you ever tried repairing vinyl flooring yourself? What challenges did you face, and how did you overcome them? Sharing your experiences not only helps others but also enhances your own learning. Remember, every repair job is a chance to improve your skills and boost your home’s appearance.Repair Larger Tears
Repairing larger tears in vinyl flooring requires a careful approach to ensure the fix is both durable and visually seamless. Unlike small scratches or cuts, bigger damages need a patch that fits perfectly and sticks firmly. Let’s walk through the key steps to restore your floor’s look and strength.
Cut Out Damaged Section
Start by trimming out the torn or damaged part of the vinyl. Use a sharp utility knife to cut a clean square or rectangle around the tear. This makes it easier to fit a replacement patch and prevents the rip from spreading further.
Be precise with your cuts—ragged edges will make the repair obvious and less secure. Have you noticed how a clean cut can change the whole repair outcome?
Measure And Cut Patch
Next, measure the cut-out area carefully. Use these measurements to cut a matching patch from leftover vinyl or a scrap piece. Make sure the patch matches the pattern and thickness of your existing floor for a natural look.
Double-check the size by placing the patch over the cut-out before applying adhesive. A well-fitting patch is the secret to a near-invisible repair that lasts.
Secure Patch With Adhesive
Apply a strong vinyl adhesive to the back of the patch and the exposed floor area. Press the patch firmly into place, smoothing out any air bubbles or wrinkles. You might want to place a heavy object on top for a few hours to ensure a tight bond.
Clean up any excess glue quickly to avoid stains. Have you experienced how a little extra care in this step prevents the patch from peeling up later?

Credit: www.reddit.com
Blend Repair With Flooring
Blending the repair seamlessly with your vinyl flooring is key to making the tear barely noticeable. The goal is to match the color and texture so well that the patch looks like part of the original floor. Paying attention to details here saves you from having a glaring spot that catches everyone’s eye.
Color Matching Techniques
Start by closely examining your vinyl’s color under natural light. Vinyl floors often have subtle shades or patterns, so matching the repair piece exactly can be tricky.
Try using a scrap piece from a hidden area or leftover vinyl to test colors. If you don’t have spare material, small dabs of vinyl repair compound or paint can help you adjust the hue.
Mix colors gradually and compare frequently with the surrounding floor. Don’t rush this step; a few extra minutes can make a big difference in how invisible the repair looks.
Use Heat To Seal
Heat helps bond the repair patch securely and smooth out edges for a flush finish. Use a heat gun or iron on a low setting, carefully applying warmth to the patched area.
Be cautious not to overheat, as excessive heat can warp or discolor the vinyl. Move the heat source evenly and keep it in constant motion to avoid damage.
This technique also softens the vinyl slightly, allowing the patch to meld with the existing floor. You’ll notice the repair becoming less obvious as the edges blend in.
Apply Protective Finish
Once the patch is secure and color-matched, add a protective finish to safeguard the repair from wear and tear. Use a vinyl floor sealant or clear polyurethane recommended for vinyl surfaces.
Apply a thin, even coat with a brush or roller and allow it to dry completely. This step not only protects but also helps unify the texture and sheen of the patched area with the rest of your floor.
Would you rather have a repair that stands out or one that disappears? Taking the time to protect and finish the area properly ensures your vinyl floor looks great for years.
Prevent Future Damage
Protecting your vinyl flooring after a repair is just as important as fixing the tear itself. Small actions you take daily can significantly extend the life of your floor and keep it looking great. Are you ready to discover simple habits that prevent damage before it starts?
Use Floor Protectors
Placing floor protectors under furniture legs can save your vinyl from scratches and dents. These small pads act as cushions, reducing pressure on the floor when you move chairs or tables. I once ignored this and ended up with multiple scratches that took weeks to fix—don’t let that happen to you.
You can find adhesive felt pads or rubber caps at most hardware stores. Make it a habit to check and replace them regularly, especially under heavy furniture.
Maintain Regular Cleaning
Dust and grit can act like sandpaper on your vinyl floor, wearing down its surface over time. Sweeping or vacuuming frequently keeps these tiny particles at bay. I recommend using a vacuum without a beater bar to avoid scratching the surface.
Wipe spills immediately with a damp cloth to prevent stains or water damage. Consistent cleaning not only preserves the floor’s appearance but also helps you spot minor issues before they become major problems.
Avoid Sharp Objects
Sharp objects are the number one cause of tears and punctures in vinyl flooring. Think about the last time you dropped something sharp or dragged heavy equipment across your floor—did it leave a mark?
Keep knives, scissors, and tools away from the floor whenever possible. When moving heavy items, lift rather than drag them, or use a protective mat to shield the floor.
Taking these precautions helps you avoid costly repairs and keeps your vinyl flooring looking fresh for years. What small changes can you make today to protect your investment?
Credit: flooringking.co.uk
Frequently Asked Questions
How Do I Fix A Small Tear In Vinyl Flooring?
Clean the area thoroughly, then apply a vinyl repair kit adhesive. Press the patch firmly and let it dry completely for best results.
What Tools Are Needed To Repair Vinyl Floor Tears?
You will need a vinyl repair kit, utility knife, adhesive, a clean cloth, and a roller or flat tool to smooth the patch.
Can I Repair Vinyl Flooring Tears Myself?
Yes, minor tears can be repaired by homeowners using repair kits and careful application, saving time and avoiding costly professional help.
How Long Does Vinyl Floor Tear Repair Take?
Most vinyl floor tear repairs take about 30 minutes to an hour, including drying time for the adhesive to set properly.
Conclusion
Repairing a tear in vinyl flooring is simple and saves money. Small tears do not need a full floor replacement. Use the right tools and materials for the best fix. Take your time and follow each step carefully. A well-done repair keeps your floor looking good longer.
Regular care can help prevent future damage. Now, you can fix vinyl tears confidently and quickly. Your floor will stay strong and neat for years.


