
Is your Delta kitchen faucet leaking, dripping, or not working like it used to? You don’t have to call a plumber or spend a lot of money to fix it.
With a few simple steps, you can repair your faucet yourself and save time and frustration. This guide will walk you through easy fixes that anyone can do, even if you’re not a DIY expert. Keep reading to discover how to bring your faucet back to perfect working order quickly and confidently.

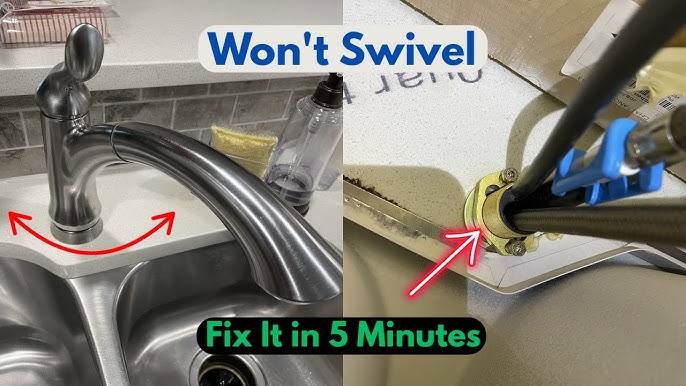
Credit: www.youtube.com
Tools And Materials Needed
Before you start repairing your Delta kitchen faucet, gathering the right tools and materials will save you time and frustration. Having everything within reach keeps the process smooth and helps you avoid unnecessary trips to the hardware store. It also ensures you won’t damage any parts by using improper tools.
Basic Tools Required
- Adjustable Wrench:Essential for loosening and tightening nuts without stripping them.
- Phillips and Flathead Screwdrivers:Different screws require different heads, so keep both handy.
- Allen Wrenches (Hex Keys):Many Delta faucet handles use hex screws that need these to remove.
- Pliers:Useful for gripping small parts or stubborn pieces that won’t budge.
Replacement Parts And Materials
- Delta Faucet Repair Kit:Includes cartridges, O-rings, and seals specific to your model.
- Plumber’s Grease:Helps lubricate moving parts for smoother operation and prevents leaks.
- Replacement Cartridge:If your faucet drips or leaks, swapping out the cartridge can fix the problem.
- Clean Cloth or Rag:To wipe away excess water and keep your workspace tidy.
Helpful Extras To Keep Handy
- Bucket or Bowl:Catch any water that drips when you disconnect the faucet.
- Towel or Mat:Protect your sink and countertop from scratches and water damage.
- Flashlight or Headlamp:Sometimes faucet parts are tucked away in tight spaces with poor lighting.
Do you have all these tools ready? Sometimes the most overlooked item, like plumber’s grease, makes the biggest difference in preventing future leaks. Think about what you already have at home before buying new items—you might be surprised what’s already sitting in your toolbox.
Identifying Common Issues
Before you dive into fixing your Delta kitchen faucet, it’s important to pinpoint what’s wrong. Identifying common issues helps you save time and avoid unnecessary repairs. Let’s look at typical problems that you might encounter with your faucet and how to recognize them quickly.
Leaking Faucet
A leaking faucet often starts as a small drip, but it can waste a surprising amount of water over time. Check around the base of the faucet and the spout for any constant dripping or pooling water. Sometimes, the leak comes from worn-out washers or O-rings inside the faucet.
Have you noticed water dripping even when the faucet is turned off? That’s a clear sign something inside needs attention. Catching leaks early can prevent bigger issues and save your water bill.
Low Water Pressure
If your water pressure feels weak or uneven, debris might be clogging the aerator or cartridge. Mineral buildup is a common culprit, especially if you live in an area with hard water. Remove the aerator and inspect it for blockages or damage.
Another cause could be a faulty cartridge inside the faucet, which controls water flow. Ask yourself if the pressure drop happens only in the kitchen faucet or throughout your home. This helps decide if the problem is with the faucet or your plumbing system.
Loose Handle
A loose handle can make it difficult to control the water temperature and flow accurately. This often happens when the handle’s set screw loosens or the internal parts wear out. You can usually tighten the handle with a simple screwdriver or Allen wrench.
Does your handle wiggle or feel unstable when you turn it? Fixing this early prevents further damage inside the faucet. A secure handle means better control and less frustration during daily use.
Step-by-step Repair Process
Repairing a Delta kitchen faucet can be simple with clear steps. Follow this guide to fix common faucet issues. Each part of the process is important to restore proper function.
Turning Off Water Supply
Start by shutting off the water supply. Locate the valves under the sink. Turn them clockwise to close. Test by opening the faucet to see if water stops. This prevents leaks and water damage during repair.
Disassembling The Faucet
Remove the faucet handle carefully. Use an Allen wrench or screwdriver as needed. Take off the decorative cap if present. Unscrew the handle and pull it away from the faucet body. Keep all small parts safe to avoid loss.
Replacing Damaged Parts
Inspect the faucet parts for damage. Common faulty pieces include cartridges, O-rings, or seals. Match replacements with the exact model number. Insert new parts securely in the correct position. This step ensures smooth faucet operation.
Reassembling The Faucet
Put the faucet back together by reversing disassembly steps. Attach the handle and tighten screws firmly. Replace the decorative cap if removed. Turn the water supply back on slowly. Check for leaks and proper water flow to confirm success.

Credit: www.youtube.com
Troubleshooting Tips
Troubleshooting your Delta kitchen faucet can save you time and money before calling a professional. Many common issues stem from simple problems that you can fix yourself with a careful check. Let’s look at some practical tips to identify and resolve these issues efficiently.
Checking For Blockages
Blockages often cause low water flow or irregular spray patterns. Start by removing the aerator at the faucet’s tip and inspect it for debris or mineral buildup. Soak the aerator in vinegar for 30 minutes to dissolve hard water deposits, then rinse thoroughly before reattaching.
If the problem continues, check the cartridge inside the faucet. Dirt or small particles can clog it and affect water flow. Take out the cartridge carefully and rinse it with clean water to clear any obstructions.
Ensuring Proper Installation
Incorrect installation can cause leaks, drips, or inconsistent water pressure. Double-check that all connections under the sink are tight but not over-tightened, which can damage seals. You might be surprised how often a loose connection is the main culprit.
Also, make sure the faucet is aligned properly on the sink. An uneven installation can put stress on parts and lead to premature wear or leaks. If you installed the faucet yourself, retrace your steps to verify everything matches the instructions exactly.
Maintenance And Prevention
Keeping your Delta kitchen faucet in top shape means more than just fixing issues when they arise. Regular maintenance and prevention save you time, money, and frustration down the line. Paying attention to small details today can prevent costly repairs tomorrow and keep your faucet working smoothly for years.
Regular Cleaning
Cleaning your faucet regularly stops mineral buildup and grime from causing damage. Use a soft cloth and mild soap to wipe down the faucet’s surface at least once a week. Avoid harsh chemicals that can wear away the finish or damage seals.
Focus on areas like the spout and handles where water and dirt tend to collect. Removing limescale deposits with a vinegar solution can keep water flowing freely and prevent clogs. Have you noticed any spots that are harder to clean? Target those more often to avoid stubborn buildup.
Inspecting For Wear And Tear
Look over your faucet for any signs of leaks, cracks, or loose parts once a month. Early detection of worn washers, O-rings, or cartridges can stop small leaks from turning into major water damage. Tighten any loose screws or connections you find to keep everything secure.
Check how smoothly the handles turn and listen for any unusual noises. These little clues can tell you if internal components need replacing before they fail completely. Don’t wait until water starts dripping to give your faucet a thorough inspection—catching issues early makes repairs easier and less expensive.
Credit: www.youtube.com
When To Call A Professional
Knowing when to call a professional can save time and prevent more damage. Some faucet problems need special tools or skills. Attempting complex repairs without experience might worsen the issue. Recognizing signs for professional help keeps your kitchen running smoothly.
Persistent Leaks Despite Basic Repairs
Small leaks may stop after simple fixes. If leaks continue after replacing washers or cartridges, a pro is needed. Persistent leaks can waste water and cause damage.
Damaged Or Broken Faucet Components
Cracked handles, broken spouts, or stripped parts need expert care. Professionals have the right tools to replace or fix these parts safely. DIY attempts might break parts further.
Water Pressure Problems
Low or uneven water pressure can signal hidden issues. Blocked pipes or internal faucet problems require special knowledge. Pros can diagnose and fix pressure problems properly.
Complex Valve Or Cartridge Issues
Replacing valves or cartridges can be tricky. Incorrect installation causes leaks or poor performance. A professional ensures correct part fit and function.
Unusual Noises Or Smells
Strange sounds or odors from the faucet might indicate plumbing troubles. These signs could mean bigger problems needing expert inspection. Professionals can identify and solve these safely.
When Water Supply Lines Are Involved
Fixing or replacing supply lines risks water damage if done wrong. Pros know how to handle plumbing connections securely. Calling a professional prevents leaks and flooding.
Frequently Asked Questions
How Do I Fix A Leaking Delta Kitchen Faucet?
First, turn off the water supply under the sink. Then, disassemble the faucet handle to check the cartridge. Replace worn-out O-rings or cartridges. Reassemble the faucet and turn on the water to test for leaks.
What Tools Are Needed To Repair A Delta Faucet?
You’ll need an adjustable wrench, Phillips and flathead screwdrivers, Allen wrench, plumber’s grease, and replacement parts. Having a towel and bucket handy helps catch water during repairs. These tools cover most common Delta faucet fixes.
How Can I Stop A Delta Faucet From Dripping?
Dripping usually means a worn cartridge or O-ring. Turn off the water supply, remove the handle, and inspect these parts. Replace damaged components with genuine Delta replacements to ensure a tight seal and stop the drip.
Is It Easy To Replace A Delta Faucet Cartridge?
Yes, it’s straightforward. Turn off water, remove the handle, and take out the cartridge. Insert a new cartridge, reassemble, and test. Following manufacturer instructions ensures a smooth cartridge replacement process.
Conclusion
Fixing a Delta kitchen faucet can save time and money. Small leaks or drips often have easy solutions. Follow the steps carefully and use the right tools. Take your time to avoid damage. Cleaning parts helps improve faucet performance. Regular maintenance keeps your faucet working well.
A working faucet makes your kitchen more comfortable. Try these repair tips before calling a plumber. Simple fixes make a big difference. Keep your kitchen running smoothly.


