
Are you ready to transform your space but stuck with old ceramic tiles glued to a cement floor? Removing ceramic tile might seem like a tough job, but with the right steps, you can do it yourself without breaking a sweat.
Imagine the satisfaction of peeling away those stubborn tiles and revealing a fresh, clean floor underneath—ready for your next big project. In this guide, you’ll discover simple, effective methods to remove ceramic tile from a cement floor safely and efficiently.
Keep reading, and you’ll gain the confidence and know-how to tackle this task like a pro.
Tools And Materials Needed
Removing ceramic tiles from a cement floor requires the right tools and materials. Using the correct equipment ensures safety and efficiency. This task may seem daunting, but with preparation, it becomes manageable. Below is a guide detailing the necessary tools and materials.
Essential Hand Tools
- Chisel:A flat chisel helps pry tiles from the cement.
- Hammer:Use a sturdy hammer to assist the chisel.
- Scraper:A scraper removes adhesive residue.
- Bucket:Collect debris in a bucket for easy disposal.
Safety Gear
- Gloves:Protect your hands from sharp edges.
- Goggles:Shield your eyes from flying debris.
- Dust Mask:Prevent inhalation of dust particles.
- Work Boots:Wear sturdy boots to protect your feet.
Optional Power Tools
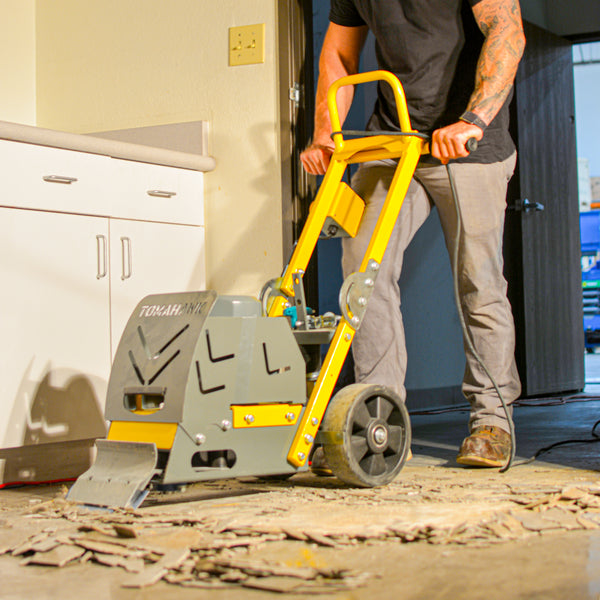
- Rotary Hammer:Speeds up tile removal.
- Tile Saw:Cuts through tough tile sections.
- Heat Gun:Softens adhesive for easier scraping.
- Power Scraper:Quickly clears adhesive residue.

Credit: www.youtube.com
Prepare The Work Area
Preparing the work area is essential before removing ceramic tile from a cement floor. A clean and organized space helps you work safely and efficiently. Taking time to prepare reduces mess and prevents damage to your home. Follow these key steps to get ready.
Clear The Space
Remove all furniture, rugs, and objects from the room. Clear the floor completely for easy access. This prevents accidents and gives you room to move tools around. Keep pets and children away during the project.
Protect Surrounding Surfaces
Cover nearby walls, cabinets, and baseboards with plastic sheets or drop cloths. Use painter’s tape to secure coverings firmly. Protect surfaces from dust, debris, and accidental chipping. This step saves time on cleanup later.
Ensure Proper Ventilation
Open windows and doors to allow fresh air inside. Dust and fumes can build up during tile removal. Use fans to improve airflow and keep the space comfortable. Good ventilation protects your lungs and reduces dust settling.
Loosen The Tiles
Loosening ceramic tiles from a cement floor is often the toughest part of the removal process. Tiles are glued down firmly, so patience and the right techniques are key. Getting this step right helps avoid damage to the underlying cement and speeds up the overall job.
Start With Grout Removal
Begin by removing the grout around the tiles using a grout saw or an oscillating tool. This loosens the bond between tiles and prevents them from cracking when pried up. Without clearing the grout first, you risk breaking tiles into smaller, harder-to-remove pieces.
Take your time and go around each tile. It’s a simple step that makes a huge difference in how easily tiles come off.
Use A Chisel And Hammer
Once the grout is gone, slide a chisel under the edge of a tile. Gently tap it with a hammer to lift the tile from the cement floor. Work slowly to avoid damaging the cement beneath.
If a tile resists, try rocking the chisel side to side. This leverage helps break the adhesive bond. You’ll feel the difference when the tile starts to loosen—keep at it until it pops free.
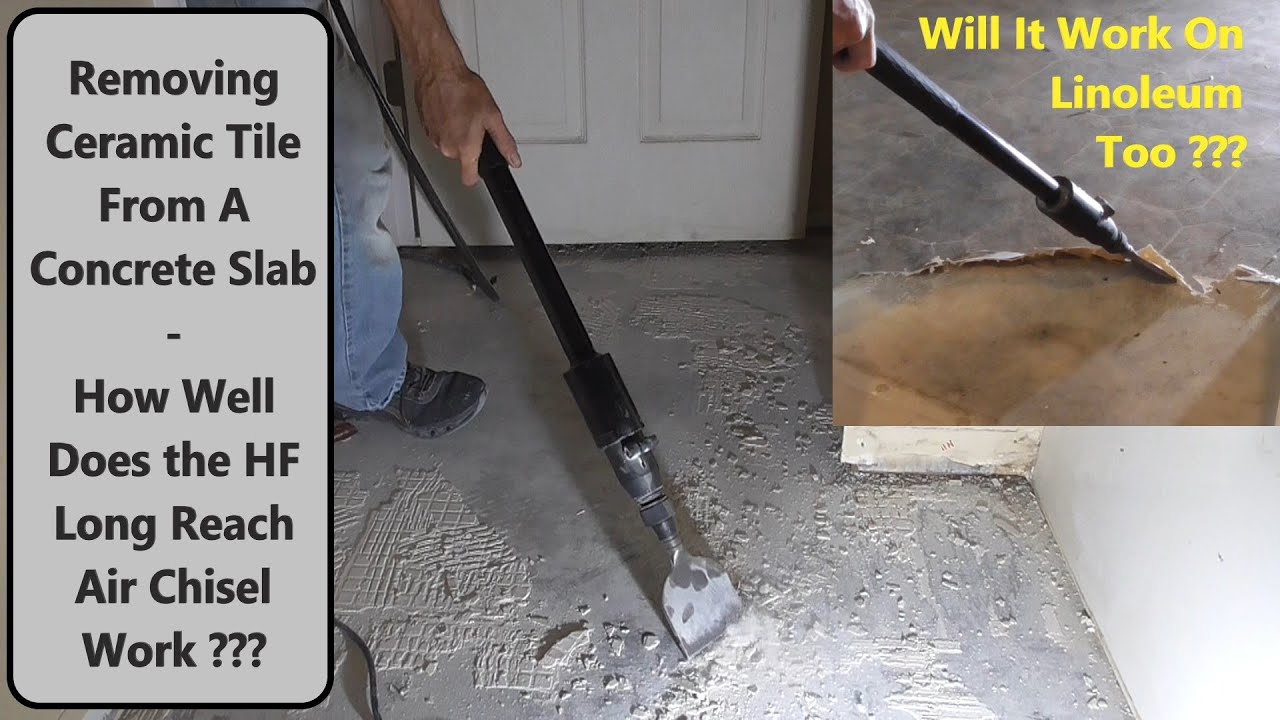
Apply Heat Or Chemicals If Needed
Stubborn tiles may need extra help. Applying heat with a heat gun softens the adhesive, making tiles easier to pry up. Be careful not to overheat, which can crack tiles or damage the floor.
Chemical adhesive removers also work well but require good ventilation and protective gear. If you choose this route, test a small area first to ensure it won’t harm your cement floor.
Credit: tomahawk-power.com
Remove Ceramic Tiles
Removing ceramic tiles from a cement floor requires patience and care. This task can be tough, but doing it right protects the floor underneath. Start by loosening the tiles gently to avoid breaking them into small pieces. Work slowly to keep the area clean and safe.
Pry Up Tiles Carefully
Use a flat pry bar or putty knife to lift the tiles. Slide the tool under the edge of a tile. Push gently to lift it without cracking. Work around the tile edges to loosen it evenly. Avoid forceful hits that may damage the floor beneath. Wear gloves to protect your hands from sharp edges.
Handle Stubborn Tiles
Some tiles stick firmly to the cement floor. Tap the pry bar lightly with a hammer to loosen these tiles. Heat the tiles with a heat gun to soften the adhesive. Use a chisel to break tough grout around the tiles. Take breaks to avoid tiring your hands and arms. Patience helps prevent damage and makes the job easier.
Dispose Of Removed Tiles
Place broken tiles into a sturdy container or bucket. Use thick gloves to avoid cuts from sharp tile pieces. Do not throw tiles in regular trash bins if local rules forbid it. Check local disposal laws for construction debris. Consider recycling options for ceramic materials. Clean the work area regularly to avoid accidents and mess.
Clean The Cement Floor
Cleaning the cement floor after removing ceramic tiles is essential for a smooth and even surface. Leftover residue and rough patches can affect the next flooring installation. Taking the time to thoroughly clean and prep the floor ensures durability and a professional finish.
Remove Residual Adhesive
After tile removal, sticky adhesive often remains glued to the cement. Use a strong adhesive remover or a mixture of warm water and a few drops of dish soap to soften the residue. Apply the solution, let it sit for a few minutes, then scrub with a stiff brush to lift the adhesive without damaging the cement.
Have you noticed how some adhesives peel off easily while others cling stubbornly? That’s usually due to the type of glue used, so testing a small area first helps you find the most effective removal method.
Scrape Off Thinset Mortar
Thinset mortar can be tough to remove, especially if it dried unevenly. Use a floor scraper or a chisel held at a low angle to carefully chip away the hardened mortar. Work slowly to avoid gouging the cement underneath.
If you don’t have a scraper handy, a putty knife can work for smaller patches. Remember, patience here saves you from costly repairs later.
Smooth The Surface
Once the adhesive and mortar are gone, check for uneven spots or rough textures. Use a concrete grinder or sanding block to smooth out any bumps or ridges. This step helps create a flat surface that’s perfect for new flooring.
Do you want a professional look without hiring someone? Renting a concrete grinder for a day can make a huge difference and is often more affordable than you think.
Credit: www.youtube.com
Repair And Prep For New Flooring
After removing ceramic tiles from your cement floor, the surface likely won’t be perfectly smooth or clean. Repairing and prepping the floor is essential before you install new flooring. Taking time with these steps ensures your new floor lasts longer and looks better.
Fill Cracks And Holes
Cracks and holes in the cement floor can cause unevenness and damage new flooring over time. Use a cement patching compound or floor filler to fill these imperfections. Apply the filler with a putty knife, pressing it firmly into the cracks, then smooth it out.
Let the filler dry completely, which might take several hours depending on the product. If the cracks are deep, you may need to apply multiple layers. How well you fill these gaps affects the stability of your new floor.
Level The Floor
Uneven floors can cause problems like tile cracking or gaps under your new flooring. Use a self-leveling compound to create a flat, smooth surface. Mix the compound according to the instructions and pour it over the floor, spreading evenly with a trowel.
This step requires patience. You have to wait for the compound to dry fully before moving on, which can take up to 24 hours. Skipping this can lead to costly repairs down the line—do you want your new floor to last or not?
Final Cleaning
Before installing new flooring, your cement surface must be clean and free of dust, dirt, and debris. Sweep the floor thoroughly, then mop it with a damp cloth or mild detergent. Avoid leaving puddles of water, as excessive moisture can affect the flooring adhesive.
Double-check for any remaining loose particles or dust. A clean floor helps the adhesive bond properly, improving the durability of your new floor. Are you ready to give your floor the clean start it needs?
Tips For Efficiency And Safety
Removing ceramic tile from a cement floor can be tough on both the surface and your patience. Efficiency and safety should guide every move you make. Paying attention to how you handle the cement, control dust, and choose your tools can save you time and prevent costly mistakes.
Avoiding Damage To The Cement
Protecting the cement beneath the tiles is crucial. Use a flat chisel or a floor scraper instead of a hammer alone to minimize gouging. Apply gentle, consistent pressure rather than forceful strikes to reduce the risk of cracking the cement.
Have you noticed how quickly a careless tap can chip the surface? Taking your time and working in small sections helps maintain the cement’s integrity. If you find stubborn tiles, soften the adhesive with a heat gun rather than prying aggressively.
Managing Dust And Debris
Tile removal creates a lot of dust and debris that can irritate your lungs and create a mess. Always wear a dust mask or respirator and goggles to protect your face and eyes. Open windows and use fans to keep the air moving and reduce dust buildup.
Gather debris regularly instead of letting it pile up—it keeps your work area safer and easier to navigate. A shop vacuum designed for fine dust can make cleanup faster and protect your lungs better than sweeping alone. How often are you pausing to clear your space?
Using The Right Tools
Your choice of tools can make the job smoother and less tiring. A power scraper or an electric chipping hammer can speed up tile removal dramatically compared to manual tools. However, balance power with control to avoid damaging the floor underneath.
Keep a variety of hand tools on hand—different sized chisels and scrapers let you tackle corners and edges more precisely. Check your tools frequently for wear and replace dull blades to maintain effectiveness. Have you invested in the right tools or are you making do with what’s available?
Frequently Asked Questions
How Do I Safely Remove Ceramic Tile From Cement Floors?
To safely remove ceramic tile from cement floors, use protective gear like gloves and goggles. Start by breaking the tiles with a hammer and chisel. Work carefully to avoid damaging the cement underneath. Clean debris regularly for a smooth process.
What Tools Are Needed To Remove Ceramic Tile From Cement?
Essential tools include a hammer, chisel, pry bar, safety gloves, goggles, and a dust mask. An electric hammer or rotary hammer with a chisel bit speeds up removal. A floor scraper helps clean leftover adhesive.
Can Ceramic Tile Removal Damage The Cement Floor?
Yes, improper removal can chip or crack the cement floor. Use gentle tapping with a chisel and avoid excessive force. Take your time to minimize damage and preserve the cement surface.
How Long Does It Take To Remove Ceramic Tiles?
Tile removal time depends on floor size and tile condition. Small areas may take a few hours, while large floors can take days. Using power tools can speed up the process significantly.
Conclusion
Removing ceramic tile from a cement floor takes patience and care. Use the right tools to protect the floor beneath. Work slowly to avoid damage and stay safe. Clean the floor well after removal for best results. This task may be hard, but the outcome is worth it.
Ready to start your project? Take one step at a time and you will succeed.


