Are you ready to tackle that stubborn Moen kitchen faucet and finally remove it from your sink? Whether you’re upgrading to a new model or fixing a leak, knowing the right steps can save you time, frustration, and money.
In this guide, you’ll discover simple, clear instructions that anyone can follow—even if you’re not a DIY expert. By the end, you’ll feel confident handling your faucet like a pro. Keep reading to learn how to make this task easier than you ever imagined.
Tools And Materials Needed
Removing a Moen kitchen faucet requires specific tools and materials. Having the right items ready makes the job smoother and faster. These tools help you disconnect the faucet safely without damage.
Gathering all necessary materials before starting prevents interruptions. Here is a list of tools and materials needed for this task.
Basic Hand Tools
- Adjustable wrench – for loosening nuts and bolts
- Basin wrench – designed to reach tight spaces under the sink
- Screwdrivers – both flathead and Phillips for screws
- Pliers – for gripping and twisting parts
Safety Equipment
- Work gloves – protect your hands from sharp edges
- Safety glasses – guard your eyes from debris
Additional Materials
- Bucket – to catch any water left in pipes
- Towels or rags – to clean spills and dry areas
- Plumber’s tape – to seal connections when reinstalling
Preparing The Work Area
Preparing the work area is crucial before removing a Moen kitchen faucet. A clean and protected space helps prevent damage and makes the process smoother. Taking time to set up properly saves effort and avoids accidents.
Clearing The Sink Space
Remove all items from the sink and surrounding countertop. Clear dishes, soap dispensers, and cleaning tools. This gives you room to work and keeps objects safe from water or debris.
Wipe down the sink and countertop to remove dirt. A clean surface helps you see connections and parts better. It also prevents slipping or dropping small pieces during removal.
Protecting Surrounding Surfaces
Use a soft cloth or towel to cover the countertop edges. This protects the finish from scratches or dents. Lay down a plastic sheet or drop cloth if needed to catch water or debris.
Place a bucket or bowl under the sink area. It collects any water left in the pipes. Have old towels ready to soak up spills quickly. Protecting surfaces keeps your kitchen clean and damage-free.
Shutting Off Water Supply
Shutting off the water supply is the first essential task before removing a Moen kitchen faucet. It stops water flow and prevents leaks or spills. Taking this step keeps your workspace dry and safe.
Locating The Shut-off Valves
Look under the sink for two shut-off valves. One controls hot water, the other cold water. They are usually small, round, or oval handles connected to pipes. If you cannot find them, check near the wall behind the sink or under the cabinet. Turn each valve clockwise to close it. This stops water from reaching the faucet.
Draining Excess Water
Open the faucet after closing the valves. This releases any water left in the pipes. Let the water run until it stops completely. Use a small bucket or towel to catch drips. Draining the water helps avoid spills when disconnecting the faucet parts.

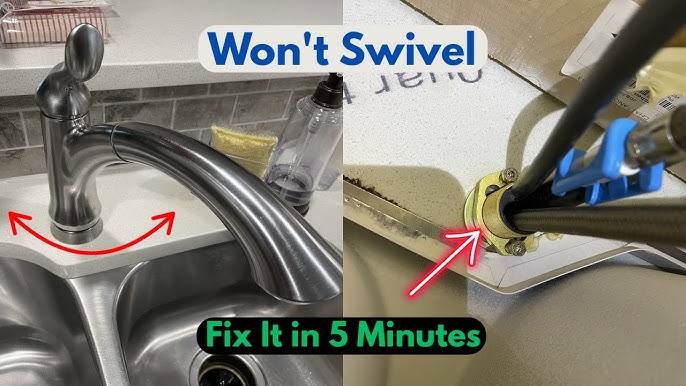
Credit: www.youtube.com
Disconnecting Water Lines
Disconnecting the water lines is a key part of removing a Moen kitchen faucet. It stops water flow and makes faucet removal safe. This task needs care to avoid leaks or damage. Use the right tools and follow these clear steps.
Loosening The Compression Nuts
Locate the compression nuts that connect water lines to the faucet. These are usually found under the sink. Use an adjustable wrench to turn the nuts counterclockwise. Do not force them to avoid stripping or breaking. If nuts are tight, apply gentle, steady pressure. Keep a towel nearby to catch any drips.
Removing Water Supply Tubes
After loosening the compression nuts, gently pull the water supply tubes away from the faucet. Tubes may have a little water inside, so be ready to catch drops. Check the ends for any debris or damage. Set tubes aside carefully to prevent bending or kinking. Keep parts organized for reinstallation or replacement.
Detaching The Faucet
Detaching the faucet is a crucial part of removing your Moen kitchen faucet from the sink. This step requires patience and the right tools to avoid damaging your sink or plumbing. Let’s break down how to carefully disconnect the faucet so you can move on to installing a new one or making repairs.
Unscrewing Mounting Nuts
Start by locating the mounting nuts under the sink that hold the faucet in place. These nuts are often tight and may require a basin wrench or adjustable pliers to loosen them.
Before you begin, check if the area is well-lit and clear of clutter. Trying to work blind or cramped can lead to frustration or stripped nuts.
Apply steady pressure to turn the nuts counterclockwise. If they’re stuck, a little penetrating oil can help loosen them after a few minutes of soaking.
Lifting The Faucet From The Sink
Once the mounting nuts are removed, gently lift the faucet upwards from the sink. Sometimes, it may feel stuck due to plumber’s putty or old sealant.
If it doesn’t come off easily, wiggle it slightly while pulling to break the seal. Avoid forcing it too hard to prevent damage to the sink surface.
Have a container ready to catch any remaining water in the faucet or supply lines. This simple step can save you from an unexpected mess later.
Cleaning The Sink Area
After removing your Moen kitchen faucet, the sink area often needs some attention before you install a new fixture or just to keep your kitchen looking fresh. Cleaning this space thoroughly not only improves the appearance but also helps you spot any hidden issues that could cause trouble later. Taking time here can save you from unexpected repairs down the road.
Removing Residue And Debris
Look closely around the faucet base and drain openings. Old caulk, mineral deposits, and soap scum tend to build up in these spots. Use a plastic scraper or an old credit card to gently lift away hardened residue without scratching the sink.
Next, apply a mild cleaner or a vinegar solution to break down mineral deposits. Let it sit for a few minutes before scrubbing with a soft brush or sponge. Rinse thoroughly with warm water to remove all loosened debris.
Have you noticed how much grime can hide under the faucet? Taking extra care here makes a big difference in your kitchen’s cleanliness and hygiene.
Checking For Leaks Or Damage
Once the area is clean, inspect the sink and surrounding countertop for any signs of water damage or leaks. Look for discoloration, soft spots, or cracks that might have developed over time.
Don’t forget to check the underside of the sink too. Moisture stains or mold can indicate a slow leak that needs fixing before installing a new faucet. Catching these issues early prevents costly repairs later.
Ask yourself: Is this sink area truly ready for a new faucet, or is there hidden damage waiting to cause problems? Your careful inspection can make all the difference.
Tips For Easy Removal
Removing a Moen kitchen faucet can feel tricky, especially if parts are stuck or corroded. Having a few practical tips can make the job smoother and save you from frustration. These insights will help you tackle common obstacles without needing to call a plumber right away.
Using Penetrating Oil For Stuck Parts
Sometimes, nuts and bolts under the sink get stuck due to dirt or mineral buildup. Applying penetrating oil can loosen these stubborn parts effectively. Spray a generous amount on the connections and let it sit for 10 to 15 minutes before trying to turn them.
Don’t rush the process. Giving the oil time to seep in can mean the difference between easily unscrewing a fitting and struggling for an hour. You might be surprised how a little patience and the right product make the task easier.
Handling Corrosion Issues
Corrosion is a common problem around kitchen faucets, especially in older installations. If you notice green or white deposits, these indicate mineral buildup that can cause parts to stick or break.
Try gently tapping the corroded area with a rubber mallet to break loose the deposits. If that doesn’t work, a mixture of vinegar and baking soda applied with a cloth can help dissolve corrosion without damaging metal parts. Avoid using harsh chemicals that might harm your faucet’s finish.
Credit: www.youtube.com
Credit: www.diychatroom.com
Frequently Asked Questions
How Do I Turn Off Water Before Removing A Moen Faucet?
Locate the shutoff valves under the sink and turn them clockwise. If absent, shut off the main water supply to prevent leaks during removal.
What Tools Are Needed To Remove A Moen Kitchen Faucet?
You typically need an adjustable wrench, basin wrench, and screwdriver. These help in loosening nuts and disconnecting water supply lines safely.
How To Disconnect Water Supply Lines From The Faucet?
Use an adjustable wrench to loosen the nuts connecting the supply lines. Turn counterclockwise carefully to avoid damaging the fittings or pipes.
Can I Remove A Moen Faucet Without Professional Help?
Yes, with basic tools and instructions, you can remove it yourself. Follow safety steps to avoid water damage and ensure proper disassembly.
Conclusion
Removing a Moen kitchen faucet from the sink is easier than it seems. Follow each step slowly and use the right tools. Take your time to avoid damage to the sink or faucet parts. Once removed, clean the area well before installing a new faucet.
This simple task saves money and gives you control over your kitchen repairs. Keep these tips in mind for a smooth and safe removal process. You can handle this project with confidence and care.


