Are you worried about who has access to your home? Changing the keys to your Kwikset Smart Lock can give you peace of mind and control over your security.
But how do you rekey it without calling a locksmith? This guide will walk you through simple, step-by-step instructions to rekey your Kwikset Smart Lock quickly and safely. By the end, you’ll feel confident in securing your home exactly the way you want.
Keep reading—you’re just minutes away from taking full control of your lock!

Credit: www.youtube.com
Kwikset Smart Lock Basics
Rekeying a Kwikset smart lock allows changing the lock’s key without replacing the entire lock. This process involves removing the lock cylinder and using a rekeying kit to reset the pins. It helps enhance security quickly and affordably.
Kwikset Smart Lock Basics Kwikset smart locks bring convenience to home security. They offer keyless entry and advanced features. These locks are designed to simplify access while ensuring safety. Understanding the basics helps in using them effectively.Key Features
Kwikset smart locks come with various features. They offer keypad entry for easy access. Some models have Bluetooth connectivity. This allows control through smartphones. Others integrate with smart home systems. Security is enhanced with advanced encryption. Many models offer auto-locking features. This ensures the door locks automatically after a set time. Battery indicators warn when power is low.Types Of Kwikset Smart Locks
Kwikset offers several smart lock types. The Kwikset Halo series is popular. It connects via Wi-Fi for remote access. The Kwikset Kevo series uses Bluetooth technology. This series is ideal for smartphone users. The Kwikset Premis series works with Apple HomeKit. It’s perfect for those using Apple devices. Some models have a traditional key option. Others are completely keyless. Each type offers unique benefits.When To Rekey Your Lock
Knowing when to rekey your Kwikset smart lock is essential for maintaining your home’s security. Rekeying isn’t just about lost keys; it’s about controlling who has access to your property. Understanding the right time to take action can save you stress and keep your home safe.
Signs You Need Rekeying
Have you ever misplaced your keys or lent them out to someone you no longer trust? These are clear signs that rekeying is necessary. If your lock feels sticky or the key turns with difficulty, it might be time to rekey before the lock fails entirely.
Other signs include moving into a new home or after a break-in attempt. You should also consider rekeying if you’ve had contractors, cleaners, or temporary guests who once had access but no longer should.
Benefits Of Rekeying
Rekeying your Kwikset smart lock is a cost-effective way to enhance security without replacing the entire lock. It lets you control who has access without the hassle of changing the whole system.
It also gives you peace of mind, knowing old keys won’t work anymore. Plus, rekeying can improve the smoothness of your lock’s operation, preventing jams or key breakage.
Tools Needed For Rekeying
Before you start rekeying your Kwikset smart lock, gathering the right tools is crucial. Having everything at hand prevents interruptions and helps you finish the job smoothly. Some tools are absolutely necessary, while others can make the process easier or more precise.
Essential Tools
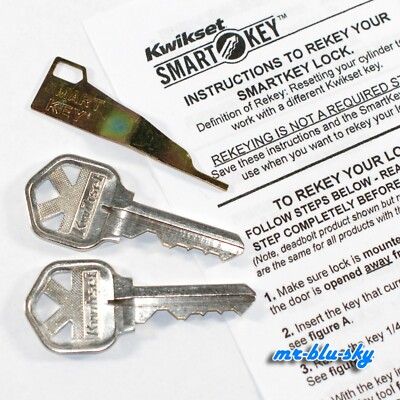
- Kwikset Rekeying Kit:This is a must-have. It contains the new keys and the special tool to remove the lock cylinder.
- Screwdriver:A Phillips-head screwdriver is typically needed to remove the lock from the door and access the cylinder.
- Pinning Kit:Includes the different pins required to match the new key’s pattern inside the lock cylinder.
- Tweezers or Needle-Nose Pliers:Precision tools to handle the tiny pins without dropping or mixing them up.
- Work Surface:A clean, flat area to keep all parts organized and prevent losing small components.
Without these tools, you’ll likely face delays or risk damaging your lock. Have you ever tried fixing something only to realize you were missing a critical tool halfway through? Don’t let that happen here.
Optional Accessories
- Magnifying Glass:Helps you see tiny pins clearly, especially if your lighting isn’t perfect.
- Flashlight or Headlamp:Extra light makes the process less frustrating, particularly in dim spaces.
- Pinning Chart:A reference guide to help you choose the correct pin sizes based on the new key cuts.
- Lock Lubricant:Applying a bit of graphite or silicone spray can keep your rekeyed lock working smoothly.
- Small Container or Tray:Keeps pins and screws from rolling away during the process.
These accessories aren’t required but can improve your accuracy and comfort. Do you find yourself working better with a little extra light or a magnifier? These small additions can save time and reduce frustration.
Step-by-step Rekeying Process
Rekeying your Kwikset Smart Lock may sound technical, but it’s a straightforward process you can handle with just a few tools. Changing the pins inside the lock cylinder ensures only your new key can open the door. This step-by-step guide breaks down the process into easy actions that anyone can follow.
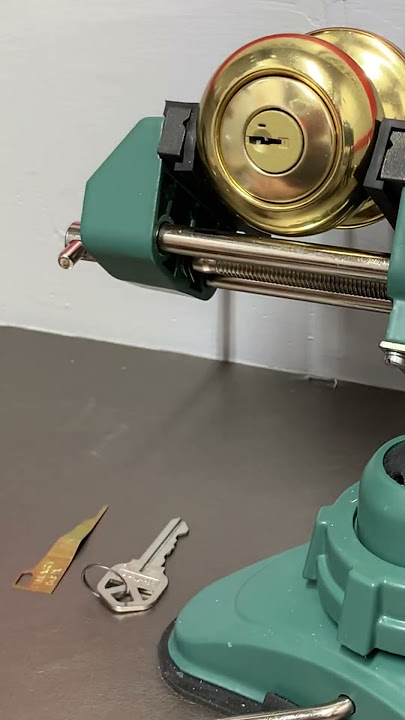
Removing The Lock Cylinder
Start by removing the lock from your door. Unscrew the mounting screws on the interior side of the lock to free the lock assembly.
Once detached, locate the cylinder retaining clip and carefully pull it off. This clip holds the cylinder in place.
Pull the lock cylinder straight out. Take your time here to avoid damaging any parts.
Replacing The Pins
With the cylinder out, insert your current key and turn it slightly to align the pins.
Remove the cylinder plug using a plug follower—a tool designed to push the plug out while keeping the pins in place.
Empty the old pins from the plug. Now, match new pins according to your new key’s cuts.
Use the pinning chart provided with your Kwikset kit or take the new key to a locksmith for precise pin sizes.
Reassembling The Lock
After placing the new pins into the plug, carefully slide the plug back into the cylinder with the plug follower still in place.
Replace the retaining clip to secure the cylinder. Make sure it snaps in firmly.
Put the lock back on the door and screw it tight. Test your new key several times before finishing to ensure smooth operation.
Have you ever tried rekeying a lock yourself? It’s a great way to save money and gain confidence in basic home security tasks.
Testing Your Rekeyed Lock
Testing your rekeyed Kwikset smart lock is crucial to ensure everything works smoothly and your home stays secure. This step confirms that the new key operates the lock correctly and that the locking mechanism responds as expected. Skipping this part can lead to frustrating lockouts or security risks.
Checking Key Functionality
Start by inserting the new key into the lock and turning it gently. It should turn smoothly without resistance or sticking. If the key doesn’t turn easily, don’t force it—this could damage the lock or key.
Try locking and unlocking from both the inside and outside. Make sure the thumb turn or keypad works as it did before. Testing multiple times helps catch any inconsistencies early.
Remember the first time I rekeyed my lock and didn’t test it immediately? I ended up locked out on a cold night. Testing right away saves you from surprises like that.
Troubleshooting Common Issues
If the key won’t turn or the lock feels jammed, check for these common problems:
- The key might not be cut correctly—compare it to the original key to spot differences.
- Debris or dirt inside the lock can block the pins; try spraying a little graphite lubricant.
- The pins inside the lock may not have aligned properly during rekeying; re-examining your steps might help.
If problems persist, remove the lock cylinder and inspect the pins carefully. Sometimes a single pin out of place causes the whole mechanism to fail. Patience and attention to detail make all the difference here.
Have you experienced a stubborn lock before? How did you fix it? Testing and troubleshooting your rekeyed lock ensures you won’t face those headaches again.
Credit: www.ebay.com
Maintaining Your Kwikset Smart Lock
Maintaining your Kwikset Smart Lock ensures it works smoothly and lasts longer. Regular upkeep helps avoid unexpected lockouts and keeps your home secure. Let’s look at simple ways to care for your lock and know when it’s best to get expert help.
Regular Maintenance Tips
Keep the battery fresh by checking it every few months. A low battery can cause your lock to respond slowly or not at all.
- Replace batteries with high-quality alkaline ones for better performance.
- Clean the lock’s exterior gently using a soft cloth to remove dirt and dust.
- Test the lock’s keypad or touchscreen regularly to ensure all buttons work properly.
- Lubricate the internal mechanism with a graphite-based lubricant once a year to prevent sticking.
Have you noticed your smart lock feeling sticky or slow? Simple cleaning and lubrication can often fix this without needing new parts.
When To Call A Professional
If your lock repeatedly fails to recognize your code or key, it might need more than just a battery change. Electrical issues or worn-out internal parts require professional attention.
Also, if you struggle to rekey or reset your lock, a locksmith can handle the process safely and quickly.
Ignoring these signs may lead to complete lock failure, risking your home’s security. Would you risk a faulty lock on your front door?

Credit: dornmusic.com
Frequently Asked Questions
How Do I Reset A Kwikset Smart Lock?
To reset a Kwikset Smart Lock, remove the battery cover and batteries. Press and hold the reset button for 10 seconds. Release the button once the lock beeps. This restores factory settings, allowing you to set new codes and configurations.
What Tools Are Needed To Rekey Kwikset Smart Lock?
You need a Kwikset Smart Lock rekey kit, including a new key, pinning tool, and plug follower. A screwdriver may be required to remove the lock. These tools help you change the lock’s internal pins to match a new key.
Can I Rekey Kwikset Smart Lock Myself?
Yes, you can rekey a Kwikset Smart Lock yourself with the proper kit and instructions. Follow the step-by-step guide carefully. Ensure you understand the process before starting to avoid damaging the lock or voiding the warranty.
How Long Does It Take To Rekey A Kwikset Smart Lock?
Rekeying a Kwikset Smart Lock typically takes 15 to 30 minutes. The time varies based on your experience and tools. Proper preparation and following instructions can speed up the process and ensure accuracy.
Conclusion
Rekeying your Kwikset smart lock keeps your home secure. It saves money and gives you control over who enters. Follow the steps carefully for best results. Take your time and double-check each part. This simple task helps protect your family and belongings.
Trust yourself to do it right. Stay safe and enjoy peace of mind.


