Are you ready to transform your walls quickly and easily? Painting with a paint roller is one of the best ways to get smooth, even coverage without the hassle.
Whether you’re a beginner or just want to improve your technique, this guide will show you exactly how to use a paint roller like a pro. By the time you finish reading, you’ll have the confidence to tackle your next painting project and achieve beautiful results.
Let’s dive in and make your space look fresh and vibrant!

Credit: www.youtube.com
Choosing The Right Roller
Choosing the right roller for your painting project is essential to achieve a smooth and even finish. The roller you select can significantly impact the quality of your work, whether you’re painting walls, ceilings, or furniture. Understanding the different types of roller covers, selecting the correct nap length, and knowing your roller frame options can make a world of difference in your painting results.
Types Of Roller Covers
Roller covers come in various materials, each suited for different surfaces and paint types.
- Synthetic Covers:Ideal for latex paints and smooth surfaces. They are durable and easy to clean.
- Natural Fiber Covers:Perfect for oil-based paints. They are excellent for textured surfaces.
- Foam Covers:Best for glossy finishes and smooth surfaces. They provide a finer finish.
Think about the surface you’re painting. A rough wall demands a different roller cover than a smooth door.
Selecting The Correct Nap Length
Nap length determines the thickness of the roller cover. It’s crucial for the type of surface you’re painting.
- Short Nap (3/16″ – 1/4″):Ideal for smooth surfaces like metal doors and cabinets.
- Medium Nap (3/8″ – 1/2″):Suitable for walls and ceilings with slight textures.
- Long Nap (3/4″ – 1″): Excellent for rough surfaces like stucco and concrete.
Choosing the right nap ensures paint is applied evenly, reducing the need for touch-ups.
Roller Frame Options
Roller frames come in different styles, impacting your comfort and efficiency.
- Standard Frames:Basic frames that fit most roller covers. They’re a solid choice for general use.
- Ergonomic Frames:Designed for comfort during prolonged use. Look for padded handles.
- Adjustable Frames:Offer flexibility in reach, perfect for high ceilings or hard-to-access areas.
Consider the length of your project. A comfortable frame can make painting less tiring and more enjoyable.
As you choose your roller, ask yourself: “How does each component affect my painting outcome?” Your choices can transform a simple paint job into a professional-looking masterpiece.

Credit: oohpaint.ca
Preparing The Surface
Preparing the surface is the foundation of a smooth and lasting paint job. Skipping this step can lead to peeling, uneven color, and frustration. Taking time to get your walls ready will save you effort and give your roller paint a perfect finish.
Cleaning And Repairing Walls
Start by removing dust, dirt, and grease from your walls. Use a mild detergent mixed with warm water and a sponge to scrub the surface gently.
Rinse with clean water and let it dry completely. Damaged areas need extra attention—fill holes and cracks with spackling paste or wall filler.
After the filler dries, sand the spots smooth so your paint roller glides over an even surface. Have you noticed how small bumps can ruin a wall’s look? Fixing them first makes all the difference.
Priming For Better Adhesion
Priming is key if your walls have stains, are freshly repaired, or have never been painted. Primer creates a uniform base that helps paint stick better and last longer.
Choose a primer that matches your wall type—latex for drywall, oil-based for wood or stained surfaces. Apply it evenly with a roller or brush and wait for it to dry completely before painting.
Skipping primer might save time now but can lead to uneven color and peeling later. Ask yourself: do you want your paint job to last or require touch-ups soon?
Setting Up Your Workspace
Setting up your workspace is a crucial first step before you start painting with a roller. It helps you avoid messes and keeps everything within easy reach. A well-prepared area lets you focus on the painting itself without unnecessary interruptions.
Protecting Floors And Furniture
Cover your floors with drop cloths or old sheets to catch any paint drips or splatters. Tape the edges of the cloth to the baseboards to prevent slipping. Don’t forget to move furniture out of the room or cover it tightly with plastic or fabric to shield it from accidental paint spots.
Think about high-traffic areas where you might bump into things. Placing temporary barriers or signs can remind you and others to be cautious. Have you ever accidentally knocked a paint tray over? Setting up a clean, safe zone can stop that from happening.
Organizing Paint And Tools
Arrange your paint cans, rollers, brushes, and trays within arm’s reach. Use a small table or sturdy box to keep everything at a comfortable height. This reduces unnecessary bending or stretching, saving your back and time.
Keep a damp cloth or paper towels nearby for quick cleanups. Preparing a bucket of water or paint thinner depending on your paint type can also speed up the process. How often do you find yourself searching for a tool mid-paint? Avoid that by having a dedicated spot for each item.

Credit: harrisbrushes.com
Loading The Roller Properly
Loading the roller properly is key to a smooth paint job. It helps spread paint evenly and avoids drips. Knowing how to load your roller right saves time and gives a clean finish.
Pouring Paint Into The Tray
Start with a clean paint tray. Pour paint into the deep end, filling it about one-third full. Avoid overfilling to prevent spills. The tray’s ridged area helps remove excess paint from the roller. Use only enough paint to cover the tray’s shallow end.
Evenly Coating The Roller
Dip the roller into the paint in the deep end. Roll it back and forth on the ridged area. This spreads paint evenly across the roller’s surface. Roll slowly to avoid splashing. The roller should feel damp but not dripping. Check for bare spots and cover them well.
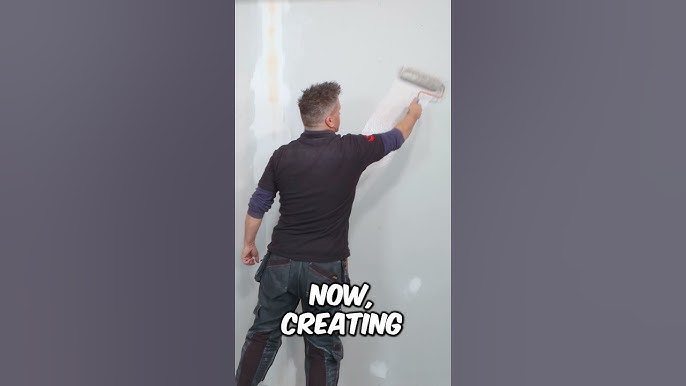
Applying Paint Techniques
Applying paint with a roller is more than just dipping and rolling. The right techniques can make your walls look smooth, even, and professional. Mastering these approaches saves you time and prevents common mistakes like streaks or uneven coverage.
Using The ‘w’ Or ‘m’ Pattern
Start by rolling paint onto the wall in a large ‘W’ or ‘M’ shape without lifting the roller. This pattern spreads the paint evenly and avoids heavy patches in one spot. After creating the shape, fill in the gaps with horizontal strokes to smooth out the paint.
This technique helps control the amount of paint on the surface and prevents roller lines. Have you noticed how walls look patchy when paint is applied randomly? Using these patterns keeps your coverage consistent from the first stroke.
Maintaining A Wet Edge
Always keep a wet edge while painting to avoid visible lines where one section dries before the next is applied. Work in small sections and overlap each new stroke slightly onto the wet paint. This approach blends the paint seamlessly across the wall.
Think about how paint dries quickly in warm rooms—working fast helps maintain that wet edge. If you pause too long, you risk having to repaint areas to fix the marks. How can you pace yourself to keep the paint wet without rushing?
Avoiding Roller Marks
Roller marks happen when paint is applied unevenly or the roller pressure varies. To avoid this, apply even pressure and don’t press too hard. Let the roller do the work, and keep a consistent speed as you move across the wall.
Using a high-quality roller cover suited for your paint type also makes a big difference. Have you ever seen a wall with streaks or bumps? This usually means the roller wasn’t loaded correctly or the technique was off. Smooth, even rolling creates a flawless finish you’ll want to show off.
Handling Corners And Edges
Handling corners and edges is where your painting skills truly get tested. These tricky spots require precision and patience to avoid messy lines and uneven coverage. Mastering this part can elevate your entire project from amateur to professional-looking.
Cutting In With A Brush
Cutting in means painting the edges and corners with a brush before using the roller. Use a high-quality angled brush to get clean, sharp lines along trim, ceilings, and corners. Holding the brush like a pencil gives you better control and helps you stay within the lines.
Start with a small amount of paint on the brush to avoid drips. Slowly pull the brush along the edge, maintaining a steady hand. If you’ve ever rushed this step, you know how hard it is to fix paint bleeding onto adjacent surfaces.
Tip: Practice cutting in on a scrap piece of wood or cardboard to build confidence before tackling your walls.
Blending Roller And Brush Strokes
After cutting in, use your roller to fill in the larger areas, but don’t stop right at the edge. Instead, lightly overlap the roller onto the brushed areas. This overlap helps blend the two paint applications, creating a seamless finish.
Roll in a “W” or “M” pattern and then fill in gaps with vertical strokes for even coverage. Avoid pressing too hard with the roller near edges to prevent pushing paint beyond where you want it.
Ask yourself: Have you noticed uneven texture where brush and roller meet? Next time, blend with gentle overlaps and consistent strokes. This small adjustment can make your walls look professionally painted.
Managing Drying Times
Managing drying times is a crucial part of painting with a roller. It affects the final finish and durability of your paint job. Paying attention to how long you wait between coats can save you from uneven textures and peeling later.
When To Apply Additional Coats
Knowing when to add another coat is key. If you apply the next layer too soon, the paint can bubble or peel. Wait until the first coat feels dry to the touch but not fully cured.
Typically, this means waiting about 1 to 2 hours, but check your paint can for exact recommendations. Touch the surface lightly—if it’s tacky or sticky, give it more time. Your patience here ensures smooth, even coverage.
Tips For Faster Drying
Want to speed up drying? Adjusting your environment helps a lot. Open windows and use fans to improve air circulation around your workspace.
Lower humidity also speeds things up, so avoid painting on rainy or overly humid days if possible. Thin coats dry faster, so avoid overloading your roller with paint.
Have you tried using a dehumidifier or a portable heater while painting? These tools can cut down drying time dramatically. Just be careful not to blow hot air directly on the wet paint, which can cause cracking.
Cleaning And Storing Tools
Cleaning and storing your painting tools properly can save you time and money on future projects. Neglecting this step often leads to hardened rollers and brushes that are difficult to use. Taking care of your tools right after painting ensures they stay in good shape and ready for your next creative burst.
Washing Rollers And Brushes
Start by removing excess paint from your roller or brush. Use a putty knife or a brush comb to scrape off as much paint as possible. This makes washing much easier and prevents paint from clogging the fibers.
Rinse your tools under warm water if you used latex paint. For oil-based paints, use the appropriate solvent like mineral spirits or paint thinner. Remember to work the water or solvent through the bristles or roller cover until the water runs clear.
Have you noticed how sometimes your brush bristles get stiff after washing? Try gently squeezing out the water without twisting. Twisting can damage bristles and reduce the tool’s lifespan.
Proper Tool Storage
After cleaning, shake off excess water and let your tools dry completely. Hang brushes by their handles or lay rollers flat to maintain their shape. Storing tools in a dry, dust-free area prevents damage and keeps them clean.
You might be tempted to leave a roller wrapped in plastic if you plan to paint the next day. While this can work short-term, it’s better to clean and dry tools properly to avoid unpleasant odors and dried paint buildup.
Think about where you keep your tools—do you have a designated spot? A simple container or rack can keep your brushes and rollers organized and easy to find. This small habit saves you from the frustration of searching for tools and helps you start your projects faster.
Common Mistakes To Avoid
Painting with a roller seems easy but has common pitfalls. Avoiding these mistakes helps achieve a smooth, even finish. Many beginners face issues that affect the paint job quality and waste materials. Knowing what to avoid saves time and effort.
Overloading The Roller
Too much paint on the roller causes drips and uneven layers. Paint pools on the surface, leading to streaks and bumps. Dip the roller lightly, then roll it on the tray’s grid to remove excess paint. This gives better control and a cleaner finish.
Ignoring Surface Prep
Skipping surface cleaning or sanding causes poor paint adhesion. Dirt, grease, and rough spots make paint peel or crack later. Clean walls thoroughly and fix holes or cracks before painting. A smooth surface helps the paint stick and look even.
Rushing The Process
Painting too fast leads to missed spots and uneven coats. Take time to roll paint slowly and evenly in sections. Allow each coat to dry fully before adding another layer. Patience results in a durable, neat, and professional look.
Frequently Asked Questions
How Do I Prepare A Wall For Paint Roller Use?
Clean the wall thoroughly to remove dust and grease. Fill holes and sand rough spots. Use painter’s tape to protect edges. A smooth surface ensures even paint application with a roller.
What Type Of Paint Roller Is Best For Beginners?
A medium nap roller (3/8 to 1/2 inch) is ideal. It works well on most walls and ceilings. It provides smooth coverage without too much splatter, making it beginner-friendly.
How Do I Avoid Roller Marks On Painted Walls?
Apply paint evenly without pressing too hard. Use a “W” or “M” motion and fill in gaps. Keep a wet edge to blend strokes. Proper technique prevents streaks and roller marks.
Can I Use A Paint Roller For Textured Walls?
Yes, use a thicker nap roller (3/4 inch or more) for textured surfaces. It reaches into crevices and covers uneven areas effectively. This ensures full coverage on textured walls.
Conclusion
Painting with a roller can save time and effort. Roll smoothly and use even pressure for best results. Clean your roller right after use to keep it good. Practice helps you get better and faster. Enjoy your fresh, new walls and the sense of accomplishment.
Simple tools and careful steps make painting easier than you think. Ready to try it yourself?


