Is your kitchen sink faucet dripping nonstop and driving you crazy? That constant leak not only wastes water but can also push your water bill higher and cause damage over time.
The good news is, you don’t have to call a plumber or spend a fortune to fix it. In this guide, you’ll discover simple, step-by-step solutions to stop that leak for good. By the end, you’ll feel confident tackling the problem yourself and saving both money and stress.
Ready to get started? Let’s fix your leaking kitchen sink faucet together!

Credit: www.youtube.com
Identifying The Leak Source
Before you grab your tools, knowing exactly where the leak is coming from saves time and frustration. Identifying the leak source allows you to target the right fix without replacing parts unnecessarily. Let’s look closer at where leaks often hide and what signs your faucet gives you.
Common Leak Areas
Leaks don’t always show up where you expect. Check these spots carefully:
- Spout Base:Water pooling around the base of the faucet spout often means worn-out O-rings or a loose connection.
- Handles:Dripping from the handles can indicate faulty cartridges or washers inside.
- Under the Sink:Leaks here usually involve supply lines or connections that have loosened or corroded.
- Sprayer Hose:Don’t forget to inspect the sprayer hose if your faucet has one; cracks or holes can cause leaks.
Have you noticed water where it shouldn’t be? Pinpointing these common areas helps focus your repair efforts.
Signs Of A Faulty Faucet
How do you know your faucet needs attention before it floods your kitchen? Watch for these red flags:
- Constant Dripping:Even a slow drip wastes water and hints at worn parts.
- Low Water Pressure:Clogs or leaks inside the faucet can reduce flow.
- Corrosion or Mineral Buildup:White or green deposits may weaken seals and cause leaks.
- Loose Handles or Spout:Movement where there shouldn’t be any can let water escape.
Have you ignored small drips thinking they’ll stop? Those minor leaks often get worse quickly. Catching these signs early can save you from a bigger headache.
Gathering Necessary Tools
Fixing a leaking kitchen sink faucet starts with gathering the right tools. Having everything ready saves time and avoids frustration. It makes the repair process smoother and faster.
Some tools are essential to complete the job. Others are optional but make the task easier and more comfortable. Knowing what to prepare helps you stay organized and focused.
Essential Tools For Repair
- Adjustable wrench – for loosening nuts and bolts
- Screwdriver set – both flathead and Phillips types
- Replacement washers or O-rings – often the cause of leaks
- Plumber’s tape – to seal threaded connections
- Bucket – to catch any dripping water
- Rags or towels – to clean spills and dry parts
Optional Tools For Convenience
- Pliers – for gripping small parts firmly
- Flashlight – to see in tight or dark spaces
- Pipe wrench – for tougher fittings
- Faucet grease – to lubricate moving parts
- Utility knife – to cut old tape or seals
- Small container – to hold tiny screws and parts
Preparing Your Workspace
Before you dive into fixing your leaking kitchen sink faucet, setting up your workspace properly can save you a lot of hassle. Preparing your area ensures you work efficiently and avoid any unnecessary mess or accidents. Let’s look at how to get your space ready for the job.
Safety Precautions
Start by turning off the water supply under your sink. This step prevents unexpected water sprays that could ruin your tools or create slippery floors.
Next, unplug any electrical appliances nearby. Water and electricity don’t mix well, so it’s best to keep your work zone safe from any shocks.
Wear safety gloves and glasses to protect your hands and eyes. Even small faucet parts can snap or slip, and sharp edges may be hidden inside the faucet assembly.
Clearing The Area
Remove everything from under the sink and clear the countertop around the faucet. You need easy access and enough space to place your tools and disassembled parts.
Lay down a towel or a shallow tray under the sink to catch any drips or small parts that might fall. This simple step helps keep your floor dry and stops tiny screws from disappearing forever.
Have a bucket or bowl ready to catch residual water when you disconnect the faucet. Being prepared for spills avoids sudden cleanup and keeps your workspace neat.
Credit: www.tiktok.com
Fixing A Leaking Handle
Fixing a leaking handle is often the key to stopping that annoying drip and saving water. A loose or worn-out handle can cause water to leak even when the faucet is turned off. Tackling this issue yourself can save you money and give you a satisfying sense of accomplishment.
Removing The Handle
Start by turning off the water supply under your sink to avoid any accidental spills. Most faucet handles have a small screw hidden under a decorative cap—carefully pry this cap off with a flathead screwdriver.
Use the appropriate screwdriver to remove the screw, then gently pull the handle away from the faucet stem. If the handle feels stuck, applying a little penetrating oil and waiting a few minutes can help loosen it.
Replacing The O-ring
Once the handle is off, you’ll see the O-ring—a small rubber ring that seals the faucet and prevents leaks. Over time, O-rings can crack or wear out, causing water to escape around the handle.
Remove the old O-ring with a small flathead screwdriver or needle-nose pliers, being careful not to damage the faucet. Replace it with a new O-ring of the same size and type, which you can find at any hardware store.
Before putting the handle back, apply a bit of plumber’s grease to the O-ring to ensure smooth operation and a better seal. Then, reattach the handle, tighten the screw, and turn the water supply back on to test for leaks.
Repairing A Dripping Spout
A dripping kitchen sink faucet wastes water and increases your bill. Fixing the drip saves money and stops annoying sounds. Focus on the faucet’s spout, where most drips come from. The cause is often a worn cartridge or washer. These parts control water flow and seal the faucet. Replace or repair them to stop the leak.
Accessing The Cartridge
Turn off the water supply under the sink. Open the faucet to release pressure. Remove the handle by loosening the screw hidden under a cap or decorative cover. Use a screwdriver or Allen wrench for this task. Once the handle is off, remove the retaining nut that holds the cartridge in place. Pull the cartridge straight up to remove it. Note the cartridge’s position for easy reassembly. Inspect the cartridge for cracks or worn seals.
Replacing The Washer
Check the base of the cartridge or the stem for a small rubber washer. This washer seals the faucet and prevents leaks. Remove the old washer with a flat screwdriver or needle-nose pliers. Match the new washer size exactly to avoid future leaks. Place the new washer in the same spot securely. Reassemble the cartridge and handle in reverse order. Turn on the water supply and test for leaks.

Credit: www.youtube.com
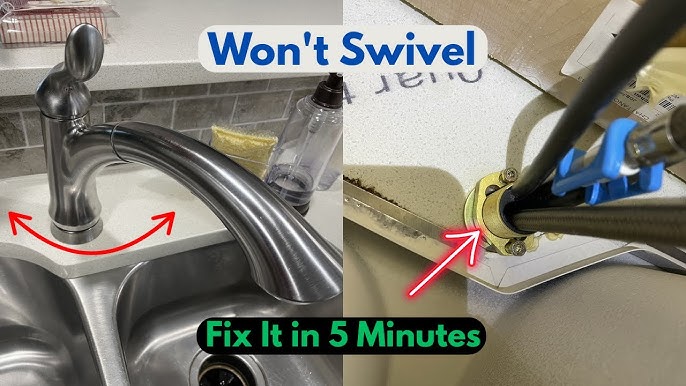
Addressing Leaks From The Base
Leaks at the base of your kitchen sink faucet can be more than just a nuisance; they can cause water damage and increase your water bill. These leaks often occur due to loose connections or worn-out seals where the faucet meets the sink. Fixing this issue requires a careful approach to ensure the leak doesn’t return.
Tightening Loose Connections
Start by checking the faucet’s mounting nuts underneath the sink. Over time, these nuts can loosen, causing water to seep from the base. Grab a basin wrench or an adjustable wrench to tighten these nuts securely, but be careful not to overtighten and damage the fittings.
Have you noticed how a simple twist can stop the drip? In my experience, many faucet leaks come down to just a loose connection waiting to be tightened. Before replacing parts, always try this first—it often saves time and money.
Sealing With Plumber’s Tape
If tightening doesn’t solve the leak, the next step is to apply plumber’s tape (also called Teflon tape) to the faucet threads. This tape creates a waterproof seal that prevents water from escaping through small gaps.
- Remove the faucet from the sink carefully.
- Wrap plumber’s tape clockwise around the threaded part of the faucet about 3-5 times.
- Reinstall the faucet and tighten the connections again.
Using plumber’s tape is a simple trick that many overlook. It acts like a shield against leaks and is easy to apply. Have you ever tried this? It might just be the fix you need without buying new parts.
Testing The Repair
After you’ve tightened connections and replaced faulty parts, it’s time to test your repair. This step confirms whether the leak is truly fixed or if further attention is needed. Testing helps you avoid water damage and ensures your faucet works smoothly.
Checking For Remaining Leaks
Turn on the water slowly and watch every joint and seam carefully. Leaks can be tiny and easy to miss, so use a dry cloth or tissue to spot even small drips. Don’t forget to check under the sink where water might collect unnoticed.
Have you ever found a leak that only appeared after running the water for a few minutes? This happens because pressure builds up, revealing hidden issues. Let the water run for a bit to catch any delayed leaks.
Ensuring Proper Water Flow
Once you’re confident no leaks remain, observe how the water flows from the faucet. It should come out steady and strong without sputtering or irregular pressure. If the flow feels weak or uneven, debris might still be inside the aerator or valves.
Try removing the aerator and cleaning it if the flow seems off. Sometimes, mineral buildup reduces water pressure and causes unwanted spraying. Ensuring proper flow means your faucet is not only leak-free but also fully functional.
Preventive Measures
Preventing a kitchen sink faucet leak is easier than fixing one. Small actions can save water and money. Taking care of your faucet regularly stops leaks before they start. Focus on simple habits and wise choices for long-lasting results.
Regular Maintenance Tips
- Check faucet parts for damage every few months.
- Clean faucet aerators to remove mineral buildup.
- Tighten loose handles and connections gently.
- Replace worn-out washers and O-rings promptly.
- Turn off water supply before cleaning or repairs.
- Use a soft cloth and mild cleaner to avoid scratches.
Choosing Quality Faucet Parts
Select parts made from durable materials like brass or stainless steel. Avoid cheap plastic pieces that wear out fast. Match parts exactly to your faucet model for a perfect fit. Quality parts reduce leaks and improve faucet performance. Investing in good parts saves money over time.
Frequently Asked Questions
How Do I Stop My Kitchen Faucet From Leaking?
First, turn off the water supply. Next, tighten loose parts or replace worn washers. Check the O-ring and cartridge for damage. Regular maintenance prevents leaks. If unsure, call a professional plumber.
What Tools Are Needed To Fix A Leaking Faucet?
You typically need an adjustable wrench, screwdriver, replacement washers or O-rings, plumber’s grease, and a flashlight. These basic tools help disassemble and repair most faucet leaks quickly and effectively.
How Long Does It Take To Fix A Leaking Faucet?
Fixing a leaking faucet usually takes 30 to 60 minutes. The time depends on the leak’s cause and your experience. Simple repairs like changing washers are quicker, while cartridge replacements might take longer.
Can I Fix A Leaking Faucet Without A Plumber?
Yes, many faucet leaks can be fixed by homeowners. Follow step-by-step guides and use basic tools. However, complex leaks or persistent issues may require professional help to avoid further damage.
Conclusion
Fixing a leaking kitchen sink faucet saves water and money. Small leaks can cause big problems over time. Follow each step carefully for best results. Use the right tools and parts to avoid damage. Test the faucet after repair to ensure no leaks remain.
Regular checks keep your faucet working well longer. Simple fixes help keep your kitchen clean and dry. A little effort today stops bigger repairs tomorrow.


