Are you staring at that brick wall, unsure how to start drilling without causing damage? You’re not alone.
Drilling into brick can feel tricky and even a bit intimidating if you don’t have the right steps. But what if you could learn a simple, reliable way to get a clean hole every time? In this guide, you’ll discover easy-to-follow tips that make drilling into brick safe and effective—no guesswork, no mess.
Keep reading, and soon you’ll be confident tackling your project like a pro.
Credit: www.tiktok.com
Tools And Materials Needed
Drilling a hole in a brick wall requires specific tools and materials. Using the right equipment ensures a clean hole without damage. Prepare all items before starting to save time and effort.
Essential Tools
- Power drill with hammer function
- Masonry drill bits of various sizes
- Measuring tape or ruler
- Marker or pencil to mark drilling spots
- Vacuum or brush to clean dust
Safety Equipment
- Safety goggles to protect eyes from debris
- Dust mask to avoid inhaling brick dust
- Work gloves to protect hands
- Ear protection against drill noise
Necessary Materials
- Wall plugs or anchors to secure screws
- Appropriate screws for the intended fixture
- Water spray bottle to cool drill bit (optional)
Preparing The Wall
Preparing the wall is a vital step before drilling into brick. It ensures safety and accuracy. Taking time to prepare helps avoid damage to the wall and tools. Follow simple steps to get the wall ready for drilling.
Choosing The Right Location
Select a spot on the brick wall that is solid and flat. Avoid areas near cracks or loose bricks. Check the wall surface for any signs of damage. Choose a location that can support the weight of what you plan to hang or install.
Marking The Spot
Use a pencil or chalk to mark the exact spot for drilling. Make the mark small but visible. Ensure the mark is at the right height and position. Double-check the placement before drilling to avoid mistakes.
Checking For Obstructions
Look behind the wall for any pipes, wires, or cables. Use a stud finder or wall scanner to detect hidden objects. Avoid drilling near electrical wires or plumbing. This step prevents accidents and costly repairs.
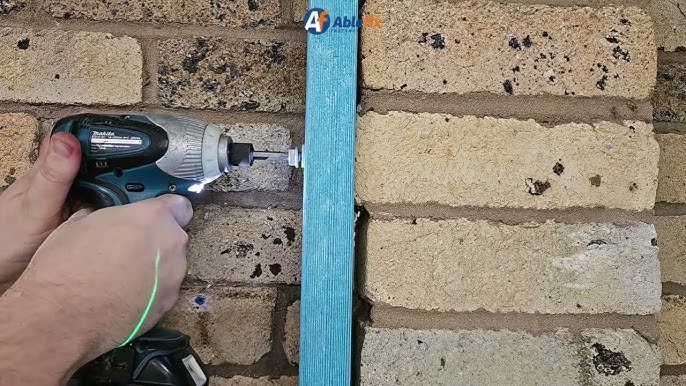
Setting Up Your Drill
Setting up your drill correctly is essential for a clean, accurate hole in a brick wall. Proper preparation helps avoid damage to both the drill and the wall. It also makes the drilling process easier and safer. Focus on choosing the right drill bit, adjusting settings, and securing stability before starting.
Selecting The Drill Bit
Pick a masonry drill bit made for brick and stone. These bits have a special tip that cuts through hard materials. Match the bit size to the hole you need. Larger holes require thicker bits. Ensure the bit is sharp and in good condition for best results.
Adjusting Drill Settings
Set your drill to hammer mode for brick walls. This setting helps the bit break the brick while spinning. Use a low to medium speed to maintain control. Avoid high speeds that can overheat the bit or cause slipping.
Ensuring Stability
Hold the drill firmly with both hands. Keep your body steady and balanced. Position the drill bit at a right angle to the wall. Use a level or guide to keep the drill straight. Stability prevents the bit from wandering or slipping.

Credit: www.instagram.com
Drilling The Hole
Drilling a hole in a brick wall needs care and focus. The right technique prevents damage and makes the job easier. This section guides you through the drilling process, helping you create a clean hole safely.
Positioning The Drill
Hold the drill perpendicular to the wall surface. This angle helps the bit cut evenly into the brick. Mark the spot clearly before you start. Use a pencil or chalk for visibility. Keep your hands steady and the drill stable.
Starting The Drill
Begin with a slow drill speed to create a small indentation. This guides the bit and prevents slipping. Apply light pressure at first. Once the bit grips the brick, increase speed gradually. Avoid pushing too hard to stop bit damage.
Maintaining A Steady Pace
Drill with consistent speed and pressure throughout the process. Pause now and then to clear dust from the hole. Use a brush or blow air gently to remove debris. This keeps the bit cool and working well. A steady pace reduces the risk of cracking the brick.
Finishing Touches
Finishing touches complete the hole drilling process and ensure a clean, safe result. These final steps protect the wall and prepare it for mounting or further work. Taking time with these details improves the overall outcome and durability.
Cleaning Up Debris
Remove dust and small pieces of brick from the hole and surrounding area. Use a brush or vacuum to clear loose particles. This prevents dirt from interfering with mounting or sealing. Keeping the site tidy also improves safety and appearance.
Inspecting The Hole
Check the hole for cracks or uneven edges. Use a flashlight to see inside clearly. Smooth rough spots with sandpaper or a file. Make sure the hole size matches your anchor or screw. A well-prepared hole holds fixtures firmly and lasts longer.
Applying Sealant If Needed
Apply sealant to protect the hole from moisture and damage. Use silicone or masonry sealant for best results. Spread a thin layer around the hole’s edge and inside if possible. Let the sealant dry before inserting anchors or screws. This step helps prevent crumbling and water leaks.
Credit: www.tiktok.com
Troubleshooting Common Issues
Drilling into a brick wall can bring unexpected challenges. Knowing how to handle common problems saves time and frustration. This guide covers frequent issues and simple fixes. Stay prepared to keep your project moving smoothly.
Dealing With Brick Cracks
Cracks may appear around drilled holes. These weaken the wall and can spread. Use a masonry bit that matches the brick size. Drill slowly to avoid extra pressure. If cracks form, stop drilling immediately. Fill cracks with mortar or epoxy before continuing. Support the wall if cracks are large. Take care to prevent damage to surrounding bricks.
Managing Overheating
Drill bits can get very hot quickly. Overheating dulls the bit and may damage the brick. Pause drilling often to let the bit cool down. Spray water lightly on the drill area to reduce heat. Use a drill with variable speed control for better handling. Keep steady, gentle pressure instead of forcing the drill. Replace worn bits to maintain efficiency.
Correcting Misaligned Holes
Misaligned holes cause mounting issues and look unprofessional. Mark the drilling spot carefully before starting. Use a level or guide to ensure accuracy. If the hole is off, widen the hole slightly to fit anchors. Fill any unwanted holes with mortar patch. Redrill at the correct spot with precision tools. Take time to measure twice and drill once.
Frequently Asked Questions
What Tools Do I Need To Drill A Brick Wall?
You need a hammer drill, masonry bit, safety goggles, dust mask, and a pencil for marking. These tools ensure precise and safe drilling.
How Do I Prevent Brick From Cracking When Drilling?
Use a masonry bit and start with a small pilot hole. Drill slowly and apply gentle pressure to avoid cracks.
Can I Use A Regular Drill On Brick Walls?
A regular drill may struggle. Use a hammer drill for effective drilling in brick walls to ensure proper penetration.
What Drill Bit Size Is Best For Brick Walls?
Choose a masonry bit slightly smaller than the anchor or screw size. This ensures a secure fit and strong hold.
Conclusion
Drilling a hole in a brick wall is simple with the right steps. Use a drill with a masonry bit for best results. Take your time and mark the spot clearly. Wear safety glasses to protect your eyes. Keep the drill steady and avoid rushing.
Small mistakes can cause cracks or damage. Practice on a scrap piece if unsure. With care, you will create a clean hole. Now you can hang shelves, pictures, or hooks easily. Just follow these tips for a safe, strong hole every time.


