
If your Moen kitchen faucet is leaking, making strange noises, or just needs a good cleaning, knowing how to dismantle it yourself can save you time and money. You don’t need to be a plumbing expert to take it apart carefully and correctly.
In this guide, you’ll get clear, step-by-step instructions that make the process simple and stress-free. By the end, you’ll feel confident handling your faucet like a pro—and ready to fix or replace parts without calling a plumber. Keep reading to discover how easy it can be to take control of your kitchen faucet repairs.
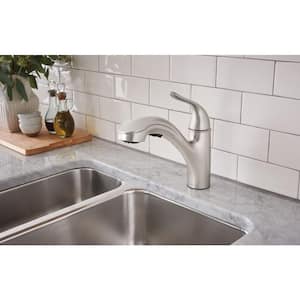
Credit: www.tiktok.com
Tools And Materials Needed
Before dismantling a Moen kitchen faucet, gather the right tools and materials. Having everything ready makes the process smoother. It also reduces the risk of damage or injury.
Most tools are common in household toolkits. Some materials help protect your sink and faucet parts. Organize them on a clean surface before starting.
Essential Tools For Dismantling
- Adjustable wrench – for loosening nuts and bolts
- Allen wrench (hex key) – fits set screws on handles
- Screwdrivers (Phillips and flathead) – remove screws
- Pliers – grip small parts and connectors
- Utility knife – cut sealants or tape
- Towel or rag – catch drips and protect surfaces
Helpful Materials To Have Nearby
- Bucket – to catch water from disconnected pipes
- Penetrating oil – loosens stuck nuts or screws
- Plumber’s tape (Teflon tape) – seals threaded connections
- Plastic container – store small parts and screws
- Cleaning cloth – wipe away dirt and grime
Credit: www.homedepot.com
Preparing The Workspace
Preparing the workspace is the first important part of dismantling a Moen kitchen faucet. A clean and organized area makes the task easier and safer. It helps avoid losing small parts and prevents damage to your kitchen surfaces.
Gather all tools needed for the job before starting. Keep a towel or bucket nearby to catch any water drips. Good lighting also helps you see small screws and connectors clearly.
Clearing The Area
Remove all items from around the sink and countertop. Clear dishes, soap bottles, and cleaning supplies. This gives you space to work freely and protects your belongings from water or dirt.
Use a towel or plastic sheet to cover the sink bottom. It prevents parts from falling down the drain. Keep a small container ready to hold screws and washers safely.
Shutting Off Water Supply
Locate the water shutoff valves under the sink. Turn both the hot and cold valves clockwise until tight. This stops water flow and avoids leaks during dismantling.
Open the faucet to release any water left in the pipes. Keep the faucet open until you finish the job. This prevents pressure build-up and water spills.
Removing The Handle
Removing the handle is the first step to dismantle a Moen kitchen faucet. It gives access to the inner parts that control water flow. The process is simple but needs care to avoid damage. Follow the steps carefully to remove the handle smoothly.
Accessing The Handle Screw
Look for a small cap on the handle. This cap hides the screw that holds the handle in place. Use a flathead screwdriver to gently pry off the cap. Be careful not to scratch the faucet surface.
Once the cap is off, you will see the screw. Use a screwdriver that fits well to avoid stripping the screw head. Turn the screw counterclockwise to loosen it. Keep the screw in a safe place for reassembly.
Detaching The Handle
After removing the screw, gently pull the handle upwards. The handle should slide off the faucet stem with little force. If it feels stuck, wiggle it slightly to loosen it.
Do not use excessive force as this can damage the faucet. If the handle is tight, apply a small amount of penetrating oil around the base. Wait a few minutes, then try again.

Credit: www.youtube.com
Taking Off The Spout
Taking off the spout is a crucial step when dismantling your Moen kitchen faucet. It lets you access internal parts for cleaning or replacement. Doing this carefully prevents damage and ensures a smooth reassembly.
Loosening The Spout
Start by locating the set screw that holds the spout in place. It’s usually hidden under a decorative cap or at the base of the spout.
Use an Allen wrench or screwdriver that fits perfectly to avoid stripping the screw. Turn the screw counterclockwise until it feels loose but don’t remove it completely yet. This helps you keep control over the spout during the next step.
Lifting The Spout
Once the screw is loosened, gently lift the spout straight up. If it resists, avoid forcing it—check for any remaining screws or clips you might have missed.
Sometimes mineral buildup can make the spout sticky. You can try wiggling it slightly side to side to break the seal. Have you noticed how a little patience here saves you from extra repairs later?
After lifting, keep the spout on a soft surface to avoid scratches. This is the moment you get to inspect the O-rings and seals for wear, which often cause leaks.
Disassembling The Cartridge
Disassembling the cartridge is a key part of taking apart your Moen kitchen faucet. The cartridge controls the flow and temperature of your water, so handling it carefully is crucial. Let’s look at how to free it without causing damage, making your repair or replacement smoother.
Unscrewing The Retainer Nut
First, locate the retainer nut holding the cartridge in place. This nut is usually visible once you remove the faucet handle. Use an adjustable wrench or pliers with a gentle grip to avoid scratching the faucet.
Turn the retainer nut counterclockwise to loosen it. It might feel tight at first, but patience pays off. If it won’t budge, a little penetrating oil can help break the seal. Have you noticed how some nuts loosen faster after a short wait with oil?
Extracting The Cartridge
After removing the retainer nut, the cartridge should be ready to pull out. Sometimes it slides out easily, but other times it sticks due to mineral deposits. Use pliers to grip the cartridge stem firmly, then pull straight up.
If the cartridge resists, try wiggling it gently side to side while pulling. Avoid twisting as this can damage the faucet body. Once out, inspect the cartridge for wear or debris—it often tells the story behind your faucet’s issues.
Cleaning And Inspecting Parts
After dismantling your Moen kitchen faucet, the next crucial step is cleaning and inspecting each part. This ensures the faucet functions smoothly once reassembled and helps you spot any issues that might cause future problems. Taking time here can save you from unexpected leaks or poor water flow later on.
Checking For Damage
Carefully examine every component for cracks, corrosion, or wear. Pay close attention to rubber seals and O-rings, as these parts often wear out first and cause leaks. If you spot any damaged pieces, consider replacing them to maintain your faucet’s performance.
Have you noticed your faucet dripping even after a simple fix? It might be a worn-out cartridge or a cracked valve that’s easy to miss without a thorough inspection. Taking this step seriously can help you avoid repeated repairs.
Cleaning Components
Use a soft brush and mild soap to clean dirt, mineral buildup, and old grease from the parts. Avoid harsh chemicals that can damage delicate surfaces. Rinse everything well with warm water and dry with a soft cloth to prevent water spots and corrosion.
Pay special attention to the aerator and cartridge, as these parts often collect debris that restricts water flow. Soaking them in vinegar can help dissolve mineral deposits without harming the materials.
- Remove stubborn buildup gently to avoid scratching parts.
- Check if small parts like springs or washers need cleaning or replacing.
- Keep track of tiny pieces to avoid losing them during reassembly.
Cleaning isn’t just about appearance—it directly affects how well your faucet works. What small detail might you overlook that could make a big difference in your faucet’s lifespan?
Reassembly Tips
Reassembling a Moen kitchen faucet requires care and attention. Proper alignment and secure connections ensure smooth operation. Take your time to avoid leaks and loose parts. Follow these tips to put everything back correctly and enjoy a fully functional faucet.
Aligning Components
Start by lining up the faucet parts in the order you removed them. Check each piece for damage or dirt before placing it back. Use gentle pressure to fit components together. Make sure the handle and spout move freely without resistance. Misalignment can cause leaks or poor water flow.
Securing Connections
Tighten all nuts and screws firmly but not too tight. Over-tightening can crack plastic parts or strip threads. Use a wrench or pliers carefully. Check the O-rings and seals sit properly in their grooves. Test for leaks by turning on the water slowly after reassembly. Tighten connections again if any drip appears.
Testing The Faucet
Testing the faucet after dismantling your Moen kitchen faucet is a crucial step. It helps you ensure everything is working properly before you finish up. Skipping this can lead to unnoticed leaks or water flow issues that cause bigger problems later.
Turning On Water Supply
Before turning on the water supply, double-check that all connections are tight. Slowly open the shut-off valves under your sink to let water flow back into the faucet. Pay attention to how the water flows—smooth and steady is what you want.
If the water pressure feels weak or uneven, it might mean something wasn’t reassembled correctly. Don’t rush this step; a gentle, controlled flow can prevent sudden bursts or damage to your plumbing.
Checking For Leaks
Leaks can hide in the smallest places. Use a dry cloth or paper towel to carefully wipe around all joints and connections. Look closely for any signs of moisture or dripping.
Even a tiny drip can waste water and cause damage over time. If you find any leaks, tighten the fittings a bit more and test again. Have you ever ignored a small leak only to find it caused a bigger problem? Catching leaks early saves you time and money.
Frequently Asked Questions
How Do I Turn Off Water Supply For Moen Faucet?
Locate the shut-off valves under the sink. Turn them clockwise to stop water flow. Test by turning on the faucet. This prevents leaks during dismantling.
What Tools Are Needed To Dismantle Moen Kitchen Faucet?
You need an adjustable wrench, Allen wrench, and a screwdriver. A bucket helps catch water drips. These tools allow safe and efficient faucet removal.
How To Remove The Moen Faucet Handle Safely?
Use an Allen wrench to loosen the handle screw. Pull the handle straight off gently. Avoid forcing it to prevent damage to the faucet.
Can I Dismantle A Moen Faucet Without Plumbing Experience?
Yes, Moen faucets are designed for easy disassembly. Follow step-by-step guides and safety tips. Basic tools and patience are sufficient for most users.
Conclusion
Dismantling a Moen kitchen faucet can be simple with the right steps. Take your time and follow each instruction carefully. Keep tools and parts organized to avoid confusion. Stay safe by turning off the water before starting. Practice makes perfect, so don’t worry if it takes a bit longer.
You will feel more confident with each attempt. This guide helps you handle basic faucet repairs at home. Save money and avoid calling a plumber for small fixes. Try it yourself and see how easy it can be.


