
Have you ever faced the challenge of needing to cut a ceramic tile that’s already installed? It can feel tricky and even a little scary.
But what if you knew simple, effective ways to do it without cracking or ruining your beautiful tile? You’ll discover easy steps and tips to help you cut your ceramic tile cleanly and safely. Keep reading, and you’ll gain the confidence to tackle this task like a pro—saving time, money, and stress along the way.
Tools Needed For Cutting Installed Tiles
Cutting ceramic tile that is already installed requires specific tools for a clean and precise job. The right tools make the task easier and prevent tile damage. This section lists the tools needed to cut installed ceramic tiles safely and effectively.
Essential Hand Tools
- Tape measure – for accurate measurements
- Pencil or marker – to mark cutting lines
- Tile nippers – for small, detailed cuts or curves
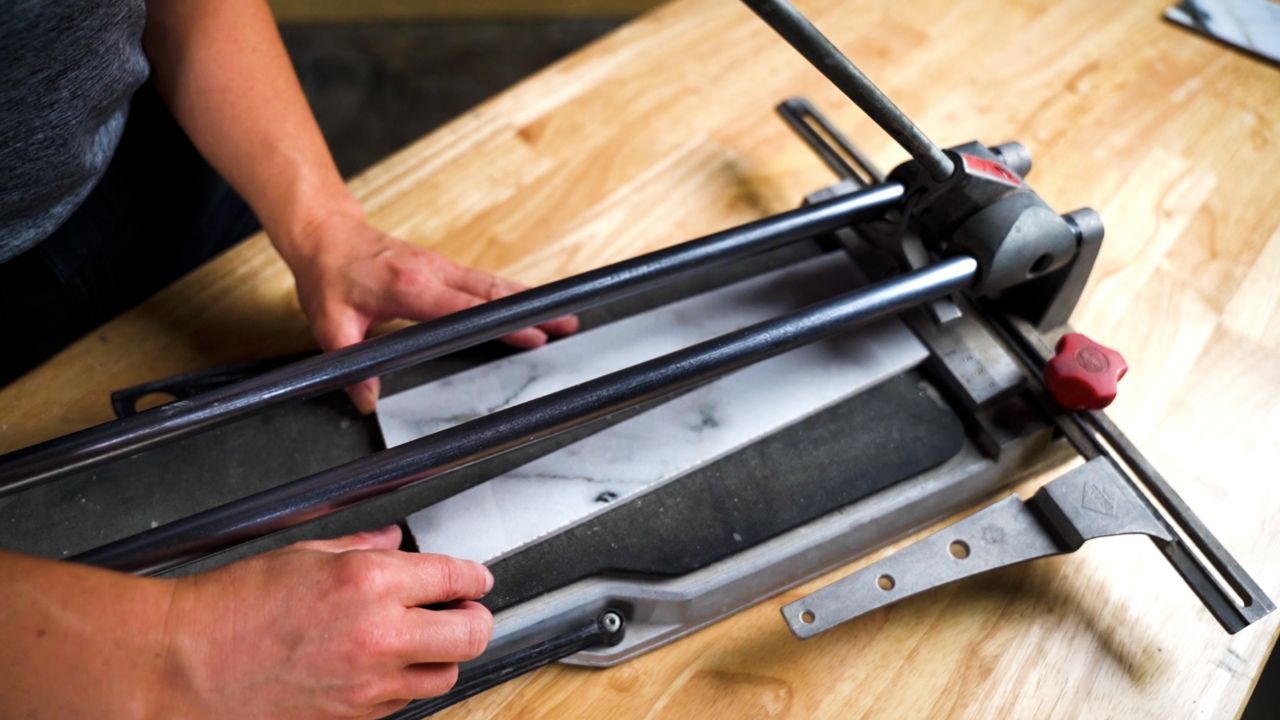
- Manual tile cutter – scores and snaps straight cuts
- Rubbing stone or sanding block – smooth rough edges
Power Tools Options
- Angle grinder with diamond blade – cuts through tile quickly
- Wet saw – offers precise, clean cuts with water cooling
- Dremel tool with ceramic cutting bit – best for intricate shapes
- Rotary tool – useful for small or detailed cuts
Safety Gear
- Safety glasses – protect eyes from dust and debris
- Dust mask – prevents inhaling fine particles
- Ear protection – reduces noise from power tools
- Gloves – protect hands from sharp tile edges

Credit: www.familyhandyman.com
Preparing The Tile And Workspace
Preparing the tile and workspace is essential before cutting ceramic tile already installed. This step ensures clean cuts and protects your home from damage. Take time to organize tools and clear the area. A well-prepared workspace keeps the project safe and efficient.
Cleaning The Tile Surface
Start by wiping the tile surface with a damp cloth. Remove dust, dirt, and grease for clear visibility. Clean tiles help accurate marking and prevent tool slipping. Use a mild detergent if needed, then dry the tile thoroughly.
Marking The Cut Lines
Use a pencil or a fine-tip marker to draw cut lines. Measure carefully to match the size needed. A straight edge or ruler helps keep lines straight. Mark both the front and edge of the tile for guidance during cutting.
Protecting Surrounding Areas
Cover nearby surfaces with painter’s tape or plastic sheets. Protect walls, cabinets, and floors from dust and debris. Use drop cloths or old newspapers to catch tile fragments. This step keeps the workspace clean and reduces cleanup time.
Cutting Techniques For Installed Tiles
Cutting ceramic tile that is already installed requires care and the right tools. Different techniques suit different tile sizes and cut types. Choose a method based on your tile’s thickness and the cut’s precision.
Scoring And Snapping Method
This technique works best for straight cuts on thin tiles. Use a carbide-tipped scoring tool to draw a line on the tile’s surface. Apply firm, even pressure to score the glaze. Then, snap the tile along the scored line by pressing down gently on both sides. This method produces clean breaks without dust or noise.
Using A Rotary Tool
A rotary tool with a diamond blade is good for small, curved cuts or notches. Mark the cutting line clearly. Move the tool slowly along the mark to avoid chipping. Wear safety glasses and a mask to protect from dust. This tool offers precise control in tight spaces.
Wet Saw Cutting
A wet saw handles thick or large tiles with ease. The blade is cooled by water to reduce dust and heat. Guide the tile slowly through the saw along the cut line. This method creates smooth and straight edges. Use this for heavy-duty cuts or complex shapes.
Tile Nippers For Small Adjustments
Tile nippers help trim small sections or irregular shapes. Grip the tile firmly and nibble off tiny pieces along the edge. This tool is perfect for fitting tiles around pipes or corners. Take your time to avoid cracking the tile.
Handling Difficult Cuts
Cutting ceramic tile already installed requires careful scoring and snapping with the right tools. Use a diamond blade or tile cutter to make precise, clean cuts. Take time to measure and mark accurately to avoid damaging surrounding tiles.
Handling difficult cuts in ceramic tiles can be challenging. It requires patience, precision, and the right tools. Installed tiles present extra hurdles since they can’t be easily removed. Focus on making precise cuts while avoiding damage. Use suitable tools and techniques for each scenario.Cutting Around Pipes And Fixtures
Cutting around pipes involves measuring carefully. Use a tile cutter or a rotary tool. Mark the area where you need to cut. Ensure the cuts fit snugly around the pipe. This prevents gaps and keeps the tile secure.Making Curved Or Irregular Cuts
Irregular cuts require a steady hand. Draw the curve on the tile with a pencil. Use a wet saw or a grinder to follow the curve. These tools help in achieving smooth edges. Work slowly to avoid breaking the tile.Dealing With Thin Or Fragile Tiles
Thin tiles need gentle handling. Use a manual tile cutter to prevent cracks. Score the tile lightly before making the cut. Apply gentle pressure to break along the score line. Avoid using excessive force to keep the tile intact.Finishing And Cleaning Up
After cutting ceramic tile that’s already installed, the job isn’t quite finished. The edges you just created can be sharp and uneven, which not only looks unprofessional but can also be unsafe. Paying attention to finishing and cleaning up will improve both the appearance and durability of your tile work.
Smoothing Rough Edges
Sharp edges can cause chips or even injuries, so smoothing them is crucial. Use a rubbing stone or a diamond sanding pad to gently grind down any rough parts. Move slowly and check your progress often to avoid over-sanding.
If you don’t have specialized tools, even a fine-grit sandpaper wrapped around a wooden block can work. Remember, the goal is to create a smooth, slightly rounded edge that feels safe to touch.
Cleaning Dust And Debris
Tile dust can be stubborn and messy, sticking to surfaces and settling in grout lines. Start by vacuuming the area thoroughly to remove loose particles.
Next, wipe the tiles with a damp cloth or sponge to pick up any remaining dust. Avoid harsh chemicals that might damage the tile surface; plain water or a mild detergent usually does the trick.
Sealing Cut Edges
Exposed edges can absorb moisture and stains, especially if your tiles are porous. Applying a tile sealer protects these vulnerable areas and extends the life of your work.
Choose a clear, penetrating sealer suitable for ceramic tiles. Use a small brush to carefully coat the cut edges without touching the tile face. Allow the sealer to dry completely before using the area.
Have you noticed how a simple step like sealing can drastically reduce future maintenance? It might seem minor now, but it saves you headaches down the road.
Credit: www.tileshop.com
Common Mistakes To Avoid
Cutting ceramic tile that’s already installed can be tricky, especially if you’re trying to avoid costly mistakes. Many DIYers rush the job and end up with cracked tiles or even injury. Knowing what to avoid can save you time, money, and frustration.
Applying Excessive Pressure
It’s tempting to press hard when cutting ceramic tile, thinking it will speed up the process. But too much force often causes the tile to crack or shatter unexpectedly.
Use a steady, controlled motion instead. Let your tool do the work—applying gentle, consistent pressure helps achieve a clean cut without damaging the tile.
Have you noticed how a delicate touch makes a huge difference in results? Try it next time and see how much smoother the process becomes.
Skipping Safety Precautions
Cutting tile produces sharp edges and flying debris, which can cause serious injuries if you’re not careful. Skipping safety gear like gloves, goggles, and a dust mask is a common but dangerous mistake.
Always protect your hands, eyes, and lungs before starting. Even a small chip can hurt your fingers, and inhaling dust can affect your health long term.
Ask yourself: Is a few minutes saved worth risking your safety? Taking precautions is a small effort for big peace of mind.
Ignoring Tile Type Differences
Not all ceramic tiles are the same. Some are glazed, others unglazed, and thickness can vary widely. Using the wrong cutting method on certain tile types can lead to poor cuts or damage.
Identify your tile type before cutting. For example, glazed tiles require a diamond blade for clean cuts, while unglazed tiles might handle scoring tools better.
Have you ever tried cutting a tile without knowing its type? The frustration of uneven edges or breakage can be avoided by matching your tools and technique to the tile.

Credit: www.youtube.com
Frequently Asked Questions
How Do I Cut Ceramic Tile After Installation?
Use a wet saw or angle grinder with a diamond blade. Score the tile gently first to avoid cracks. Always wear safety gear and cut slowly for a clean edge.
Can I Cut Ceramic Tile Without Removing It?
Yes, you can cut ceramic tile while installed using a wet saw or angle grinder. Mark your cut carefully and protect surrounding areas to prevent damage.
What Tools Are Best For Cutting Installed Ceramic Tile?
A wet saw, angle grinder with a diamond blade, or a manual tile cutter work best. Choose based on the cut type and tile thickness for precision and safety.
How To Avoid Cracking Ceramic Tiles When Cutting?
Score the tile surface lightly before cutting. Use sharp blades and cut slowly. Avoid applying excessive pressure and always wear safety equipment to prevent cracks.
Conclusion
Cutting ceramic tile after installation takes patience and care. Use the right tools to avoid cracks or damage. Mark the tile clearly before cutting for accuracy. Take your time and work slowly to get clean edges. Small mistakes can be fixed, so don’t worry too much.
With practice, this task becomes easier and less stressful. Keep safety in mind by wearing gloves and eye protection. Now you know how to handle tile cuts without removing them. Ready to try it yourself?


