
Is your ceiling fan’s lightbulb flickering or burnt out? Changing it might seem tricky, but it’s easier than you think.
You don’t need special tools or skills to get the job done safely and quickly. In this guide, you’ll learn simple steps to replace your lightbulb without any hassle. Keep reading, and by the end, you’ll have your room shining bright again in no time!
Preparation
Proper preparation makes changing a lightbulb on a ceiling fan easier and safer. It helps avoid accidents and saves time. Before starting, gather everything needed and understand safety measures. This ensures a smooth process and protects both you and your fan fixture.
Safety Precautions
Turn off the ceiling fan and light switch to cut the power. Use a sturdy ladder or step stool to reach the fan comfortably. Avoid standing on unstable surfaces. Wait a few minutes for the bulb to cool down before handling it. Keep your hands dry to prevent electric shocks. Remove any jewelry that could get caught or conduct electricity. Work in a well-lit area to see clearly.
Tools And Materials
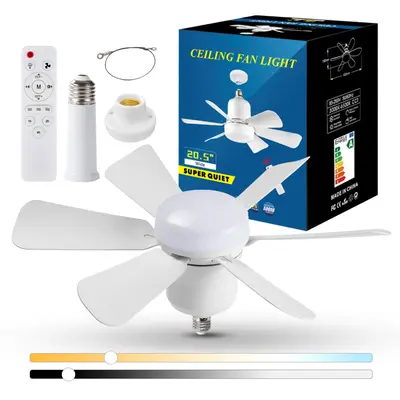
- Replacement lightbulb matching the fan’s specifications
- Sturdy ladder or step stool
- Soft cloth or gloves to grip the bulb
- Flashlight (optional for better visibility)
- Small screwdriver (if the fan has a glass cover)
Having these tools ready avoids interruptions. Check the bulb type before buying a new one. Using the correct bulb keeps the fan safe and working well.
Credit: www.tiktok.com
Accessing The Lightbulb
Accessing the lightbulb on a ceiling fan is the first step to a smooth replacement. It requires caution and careful handling to avoid damage or injury. Proper access ensures you can safely remove the old bulb and install a new one.
Follow these simple steps to reach the bulb correctly.
Turning Off Power
Safety is the top priority. Always turn off the power before touching the fan or light.
- Switch off the fan light from the wall switch.
- If no switch is available, turn off the circuit breaker.
- Use a voltage tester to confirm the power is off.
This step prevents electric shocks and protects you during the process.
Removing The Light Cover
The light cover protects the bulb and holds it in place. Removing it carefully is important.
- Look for screws, clips, or a glass dome securing the cover.
- Unscrew or unclip the cover gently with your hands or a screwdriver.
- Place the cover safely on a flat surface to avoid breaking it.
Once the cover is off, the bulb is fully accessible for replacement.
Replacing The Lightbulb
Replacing the lightbulb on your ceiling fan might seem straightforward, but choosing the right bulb and installing it correctly can make a big difference in both safety and performance. Getting this right ensures your fan’s light works efficiently and lasts longer without flickering or burning out quickly.
Selecting The Right Bulb
Before buying a new bulb, check the fan’s light fixture for specifications like wattage limits and bulb type. Using a bulb that exceeds the recommended wattage can cause overheating and damage your fan. Many ceiling fans use candelabra or small base bulbs, but some might require LED or specific shapes.
Think about what kind of light you want. Do you prefer a soft, warm glow or a bright, daylight effect? LEDs are often a smart choice because they use less energy and last much longer than traditional incandescent bulbs.
Installing The New Bulb
Make sure the fan’s light switch is off before you start. If possible, turn off the power at the circuit breaker for extra safety. Remove the old bulb carefully—sometimes they can be stuck or fragile after use.
When you screw in the new bulb, don’t overtighten. It should be snug but not forced, which can cause damage or make removal difficult next time. After installation, turn the power back on and test the light to confirm everything works perfectly.
Reassembling The Fixture
Reassembling the fixture after changing a lightbulb on your ceiling fan is a crucial step that ensures everything works safely and looks neat. Take your time to align each part correctly; rushing can lead to loose fittings or damage. Paying attention to detail here saves you from having to redo the process or deal with flickering lights later.
Reattaching The Light Cover
Start by carefully positioning the light cover back over the bulb. Make sure any clips, screws, or slots line up perfectly before securing it in place.
If your fan has screws, tighten them gently but firmly—over-tightening can crack the glass or plastic cover. For covers that snap or twist into place, ensure you hear a click or feel resistance to confirm it’s secure.
Have you noticed how some covers are easy to misalign? Take a moment to check that the cover sits flush with the fan housing; this prevents dust buildup and keeps the fixture looking tidy.
Testing The New Bulb
Once the cover is secure, turn your power back on and test the bulb. Switch on the ceiling fan light to confirm the bulb lights up immediately.
If the bulb doesn’t turn on, double-check that it’s screwed in tightly and that the power is actually restored. Sometimes the simplest fix is ensuring the bulb is properly seated.
Consider how different bulbs might affect your fan’s lighting. Have you tried LED bulbs for better brightness and energy savings? Testing different types can improve your room’s ambiance while lowering electricity bills.
Troubleshooting
Troubleshooting is a crucial part of changing a lightbulb on a ceiling fan. Sometimes, the bulb doesn’t light up right away, or you might face other unexpected issues. Knowing how to identify and fix these problems can save you time and frustration.
Common Issues
One frequent problem is the bulb not turning on after installation. This could be due to a loose connection, a burnt-out bulb, or the fan’s light switch being off. Double-check the bulb’s fit and try tightening it gently.
If the bulb flickers, it might be caused by a poor connection or a dimmer switch that’s incompatible with the bulb type. Try using a different bulb or turning off the dimmer to see if the flickering stops.
Sometimes the light fixture itself won’t work even after replacing the bulb. This might indicate a blown fuse, a tripped circuit breaker, or wiring issues within the fan. Have you tested the fan’s light socket with a working bulb to isolate the problem?
When To Seek Professional Help
If you notice sparks, burning smells, or the fan’s light won’t work despite multiple bulb changes, it’s time to call an electrician. Electrical problems can be dangerous and may require specialized tools and knowledge.
Also, if you’re uncomfortable working on electrical fixtures or unsure about the wiring, don’t hesitate to get professional help. Your safety is more important than saving a few bucks on a DIY fix.
Have you ever faced a tricky lightbulb issue that required expert intervention? Sharing your experience might help others know when to step back and get assistance.

Credit: m.youtube.com

Credit: www.dreo.com
Frequently Asked Questions
How Do I Safely Change A Ceiling Fan Lightbulb?
Turn off the fan and power at the breaker. Use a sturdy ladder to reach the bulb. Remove the old bulb carefully and replace it with the correct wattage bulb. Ensure the new bulb is securely fitted before restoring power.
What Type Of Bulb Fits Ceiling Fans?
Most ceiling fans use standard medium base bulbs. Check your fan’s manual for recommended wattage and bulb type. LED bulbs are energy-efficient and generate less heat, making them ideal for ceiling fans.
Can I Change A Ceiling Fan Bulb While It’s Spinning?
No, always turn off the ceiling fan and wait for the blades to stop. Changing a bulb while spinning is unsafe and can cause injury or damage the bulb.
How Often Should I Replace Ceiling Fan Lightbulbs?
Replace bulbs when they burn out or flicker. LED bulbs last longer, typically up to 25,000 hours. Regularly check and clean the fixture to ensure optimal lighting and fan performance.
Conclusion
Changing a lightbulb on a ceiling fan is simple and quick. Turn off the fan and power first. Use a sturdy ladder to reach safely. Remove the old bulb carefully and replace it with the correct type. Tighten the new bulb gently without forcing it.
Test the fan light to ensure it works. Regular checks keep your ceiling fan bright and safe. This small task saves you from darkness and hassle. Try it yourself next time the bulb burns out. Easy, safe, and done right!


