
Is your hand held shower head not working as well as it used to? Maybe it’s time for a change.
You might think replacing it is tricky, but it’s easier than you expect. Imagine stepping into your shower and feeling the water flow just the way you like. Changing your shower head can make that happen quickly, saving you money and hassle.
In this guide, you’ll learn simple, step-by-step instructions to swap out your old shower head and enjoy a better shower experience right away. Keep reading—you’re just minutes away from an upgrade that feels like a fresh start every day.
Tools And Materials Needed
Changing a hand held shower head requires a few simple tools and materials. Having these ready makes the process smooth and fast. Most items are common and easy to find.
Gather everything before starting the replacement. This helps avoid interruptions and frustration.
Adjustable Wrench
An adjustable wrench is vital for loosening and tightening nuts on the shower arm. It fits various sizes, making it a versatile tool for this job.
Teflon Tape
Teflon tape seals the threads between the shower arm and head. It prevents leaks and ensures a tight fit. Wrap it around the threads before installing the new shower head.
New Hand Held Shower Head
Choose a new hand held shower head that fits your needs. Check compatibility with your shower arm and water pressure. Unpack it carefully before installation.
Cleaning Cloth
A cleaning cloth helps wipe away old tape and dirt from the shower arm. Clean threads ensure a better seal and easier installation of the new head.
Bucket Or Towel
Place a bucket or towel under the shower to catch drips. It keeps your bathroom dry and clean during the replacement process.

Credit: www.reddit.com
Removing The Old Shower Head
Removing the old hand held shower head is the first step in upgrading your shower. It is important to do this carefully to avoid damage to the plumbing. Follow these simple steps to remove the shower head safely and prepare for installation of the new one.
Turn Off The Water Supply
Before starting, turn off the water supply to the shower. This prevents water from spraying out unexpectedly. Locate the main water valve or the shower valve and close it. Test by turning on the shower to confirm no water flows.
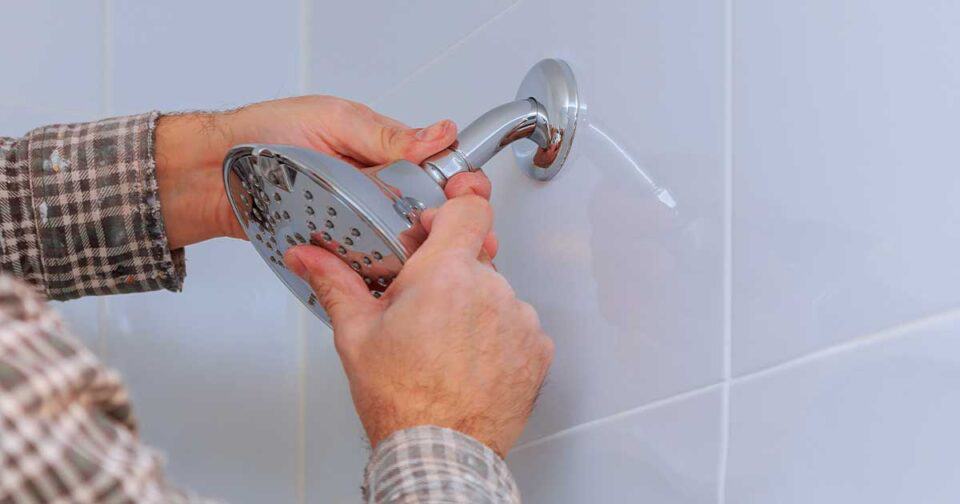
Loosen The Old Shower Head
Use your hand or a wrench to loosen the old shower head. Turn it counterclockwise to unscrew. If it is tight, wrap a cloth around the connection to protect it from scratches. Apply steady force to avoid breaking the pipe.
Detach The Shower Head
Once loosened, carefully pull the shower head away from the shower arm. Check for any old plumber’s tape or debris on the threads. Clean the threads to ensure a good seal for the new shower head. Keep the parts handy for reference if needed.
Preparing The Shower Arm
Preparing the shower arm is a crucial step before attaching your new hand held shower head. Taking the time to clean and ready the connection point ensures a tight fit and prevents leaks. Skipping this step might lead to frustrating drips that waste water and cause damage over time.
Clean The Threads
Start by inspecting the threads on the shower arm. Dirt, old tape, or mineral buildup can prevent a proper seal. Use a soft brush or cloth to gently clean the threads until they look smooth and free of debris.
If you notice stubborn mineral deposits, a quick rub with a bit of vinegar can help dissolve the buildup. Remember, a clean surface is key for a secure fit.
Apply Teflon Tape
Once the threads are clean and dry, wrap Teflon tape around them. This tape acts as a sealant, filling in gaps to stop leaks. Wrap the tape clockwise, matching the direction you’ll screw on the shower head.
Use 2-3 layers of tape, pressing it firmly into the threads. Too little tape won’t seal properly, and too much might make it difficult to screw on the shower head. Have you ever struggled with a leaking shower connection? Proper taping can save you from that hassle.
Credit: www.drewandjonathan.com
Installing The New Shower Head
Installing the new shower head is where the real transformation begins. This step is simple but requires your full attention to detail. A properly installed shower head ensures a satisfying shower experience every time.
Attach The New Shower Head
Start by wrapping plumber’s tape around the threads of the shower arm. This helps create a watertight seal and prevents leaks. Then, screw the new handheld shower head onto the shower arm by hand.
Make sure to turn it clockwise and stop when it feels snug. Avoid forcing it too hard as this can damage the threads or the shower head itself.
Tighten The Connections
Once you’ve attached the shower head, use an adjustable wrench or pliers to tighten the connection further. Hold the shower arm steady with one hand to avoid twisting it. Tighten just enough to secure the connection without over-tightening.
Over-tightening can crack the fittings or strip the threads, causing more problems than it solves. If you’re unsure, snug is usually enough.
Check For Leaks
Turn on the water gently to test your work. Watch closely around the connection points for any drips or moisture. Even a small leak can waste water and damage your bathroom over time.
If you spot leaks, try tightening the connection a bit more or add extra plumber’s tape and reinstall. Don’t ignore leaks—they’re a clear sign something needs adjusting.
Testing The New Shower Head
Testing the new shower head is an exciting moment where you get to see your handiwork come to life. It’s not just about checking if water flows; it’s about ensuring the shower head performs exactly how you want. Taking the time to test helps you catch issues early and adjust for the best shower experience.
Turn On The Water Supply
Start by turning the water supply back on slowly. Watch closely for any leaks around the connections. If you notice dripping, tighten the fittings gently until the leak stops.
Pay attention to water pressure as you turn it on. Is the flow strong and steady? If it feels weak, you might want to double-check the installation or clear any debris blocking the head.
Adjust Spray Settings
Most handheld shower heads have multiple spray patterns. Try each setting to see how the water feels on your skin. Does the massage spray hit the right spots? Is the gentle mist soothing enough?
Adjusting spray settings can reveal hidden problems like uneven spray or clogged nozzles. Take your time switching through the patterns and make note if any setting doesn’t perform well. This step ensures your new shower head matches your personal preferences perfectly.

Credit: www.theshowerheadstore.com
Maintenance Tips
Maintaining your hand held shower head keeps it working well and extends its life. Regular care stops clogs and damage. Simple steps help avoid costly repairs and keep water flowing smoothly.
Regular Cleaning
Clean your shower head every few weeks. Use a soft cloth and mild soap. Remove mineral buildup by soaking the head in vinegar for 30 minutes. Rinse well with water. This prevents blockages and keeps water pressure strong.
Inspect For Wear
Check the hose and connections regularly. Look for cracks, leaks, or loose fittings. Replace worn parts quickly to avoid water waste. Tighten any loose screws or joints. Early fixes keep your shower running without problems.
Frequently Asked Questions
How Do I Remove A Handheld Shower Head?
Turn off the water supply first. Unscrew the old shower head by hand or use a wrench. Be careful not to damage the pipe thread. Clean the threads before installing the new one.
What Tools Are Needed To Change A Shower Head?
You only need an adjustable wrench or pliers. Use plumber’s tape to seal threads. No special tools are required for most handheld shower heads.
How Do I Prevent Leaks When Installing A Shower Head?
Apply plumber’s tape around the shower arm threads. Tighten the shower head securely but avoid overtightening. Check for leaks by turning on the water after installation.
Can I Change A Handheld Shower Head Myself?
Yes, changing a handheld shower head is easy. It requires minimal tools and skills. Most replacements take less than 15 minutes.
Conclusion
Changing a handheld shower head is simple and quick. Just follow the steps carefully and use basic tools. You can save money by doing it yourself. A new shower head can improve your shower experience. Enjoy better water flow and easy cleaning.
Take your time to avoid leaks and ensure a tight fit. Now, you know how to change a handheld shower head with confidence. Give it a try and enjoy your upgraded bathroom.


