
Are you thinking about upgrading your floors but worried about the hassle of removing old tile? What if you could skip that messy, time-consuming step and install vinyl plank flooring right over your existing tile?
It sounds almost too good to be true—but it’s possible, and it could save you a lot of effort and money. You’ll discover exactly how to install vinyl plank flooring over tile, what to watch out for, and how to get a smooth, beautiful finish that lasts.
Keep reading to find out if this flooring shortcut is the right choice for your home.
Benefits Of Installing Vinyl Plank Over Tile
Installing vinyl plank flooring over tile offers several advantages. It saves money, reduces installation time, and improves room comfort. This method is ideal for those who want a fresh look without the hassle of tile removal.
Cost Savings Compared To Tile Removal
Removing tile can be expensive and labor-intensive. Installing vinyl plank over tile cuts costs on demolition and disposal. There is less need for extra materials or repairs. This makes the project budget-friendly and keeps expenses low.
Time Efficiency In Installation
Vinyl planks can be installed directly over tile. This skips the lengthy process of removing old tile and preparing the floor. The installation is faster and less disruptive. Homeowners can enjoy the new floor sooner with minimal downtime.
Enhanced Comfort And Warmth
Tile floors often feel cold and hard underfoot. Vinyl plank adds a layer of warmth and softness. It creates a more comfortable surface to walk or stand on. This improvement makes living spaces cozier and more inviting.
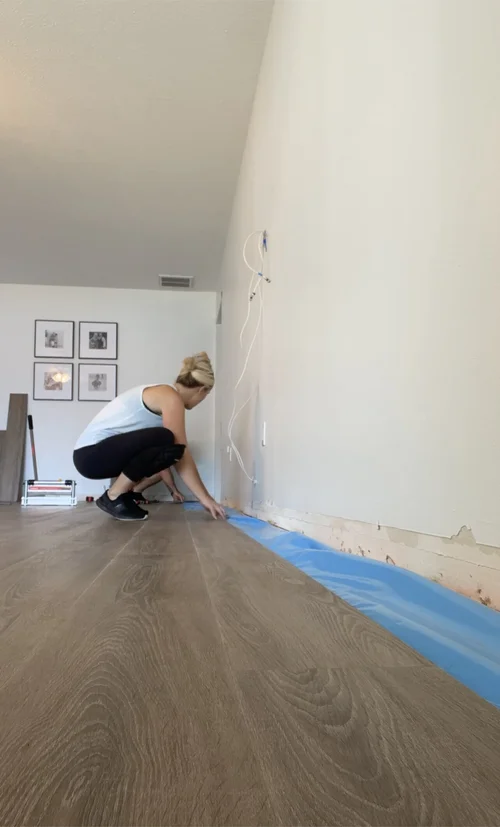
Credit: mrsashleyfrench.com
Assessing Tile Condition Before Installation
Before installing vinyl plank flooring over tile, it’s crucial to carefully assess the condition of your existing tile floor. The success and longevity of your new flooring depend heavily on the state of the tile underneath. Taking the time to evaluate and prepare the surface will save you from costly repairs or replacements later on.
Checking For Cracks And Loose Tiles
Start by inspecting the tile for any cracks or damage. Even small cracks can cause the vinyl planks to flex and eventually warp. Tap gently on tiles to check if any feel loose or hollow—these tiles need to be secured or replaced before installation.
Ignoring this step can lead to uneven wear and an unstable floor. Have you ever walked on a tile floor and felt it move beneath your feet? That’s a red flag you shouldn’t overlook.
Ensuring A Level Surface
A level surface is essential for vinyl plank flooring to lay flat and look smooth. Use a long level or straightedge to check for high spots or dips across the tile floor. Uneven tiles can cause gaps or cause the vinyl to buckle over time.
If you find uneven areas, consider using a floor leveling compound to create a flat base. Do you want your new floor to look flawless, or risk the annoyance of bumps and creases?
Cleaning And Preparing The Tile
Clean the tile thoroughly to remove any dirt, grease, or residues. Use a degreaser or a strong tile cleaner, then rinse well and let it dry completely. Even small amounts of dust or oil can prevent the adhesive from bonding properly.
Don’t forget to remove any baseboards or trim that might get in the way during installation. Preparing the tile surface carefully will make the installation process smoother and ensure your vinyl planks stay put for years.
Types Of Vinyl Plank Flooring Suitable For Tile
Choosing the right type of vinyl plank flooring is crucial when installing over tile. The existing tile surface can affect how well your new floor adheres and how it performs over time. Understanding the different types of vinyl planks can help you pick a product that not only fits your style but also ensures durability and ease of installation.
Rigid Core Vinyl Planks
Rigid core vinyl planks are known for their strong, stable core made from materials like wood plastic composite or stone plastic composite. This type of plank handles imperfections in tile surfaces better, providing a smoother finish. If your tile has slight unevenness, rigid core planks can offer better support and resist dents or bends.
I once installed rigid core vinyl over an old tile floor in my kitchen. Despite some grout lines being a bit raised, the floor laid down flat and held up great after months of use. This experience showed me how forgiving rigid core vinyl can be when dealing with tile imperfections.
Flexible Vinyl Planks
Flexible vinyl planks are thinner and bendable, making them easier to cut and fit in tight spaces. However, they tend to conform more closely to the surface underneath. If your tile is very uneven or cracked, flexible planks might show those imperfections more clearly.
Flexible vinyl is a good choice if your tile surface is smooth and level. It’s also budget-friendly and ideal for smaller spaces where you want quick, simple installation without extra floor prep.
Click-lock Vs. Glue-down Options
Vinyl planks come in two main installation types: click-lock and glue-down. Click-lock planks snap together and float above the floor, which works well over tile without needing adhesive. This method is less messy and allows for easier repairs or replacement.
Glue-down vinyl requires adhesive, creating a more permanent bond to the tile. This can offer a more solid feel underfoot but demands a very clean and flat tile surface. Have you checked if your tile grout lines are level enough for glue-down vinyl?
Choosing between these options depends on your tile’s condition and your long-term plans. Click-lock suits renters or those wanting flexibility, while glue-down is better if you want a durable, fixed floor.
Tools And Materials Needed
Installing vinyl plank flooring over tile can save you time and effort, but having the right tools and materials is crucial for a smooth process. Without proper preparation, you might face uneven surfaces or poor adhesion, which can shorten your floor’s lifespan. Let’s look at what you’ll need to get started and ensure a professional-quality finish.
Essential Tools For Installation
You’ll want to gather some basic tools to make your installation easier and more precise. A quality utility knife is key for cutting vinyl planks cleanly, while a tape measure helps you get accurate dimensions. Don’t forget a tapping block and a pull bar to snugly fit planks without damaging them.
- Utility knife with sharp blades
- Tape measure and pencil
- Rubber mallet or tapping block
- Pull bar for tight spaces
- Level to check surface evenness
- Safety gloves and knee pads
Have you checked if your tile surface is level? Using a level early on can save you from uneven flooring later.
Underlayment Options
Underlayment plays a big role in how your vinyl planks perform over tile. It cushions the floor, reduces noise, and helps with moisture control. Depending on your tile’s condition, you might use foam, cork, or even a specialized vinyl underlayment designed for installation over hard surfaces.
- Foam underlayment – affordable and easy to install
- Cork underlayment – offers natural sound insulation
- Vinyl-specific underlayment – designed for better adhesion and moisture resistance
Think about the room’s use and moisture levels when choosing underlayment. For example, bathrooms may need moisture barriers, while living rooms prioritize comfort and noise reduction.
Adhesives And Sealants
Adhesives keep your vinyl planks firmly attached, especially important when installing over tile. Some vinyl flooring options come with a click-lock system that doesn’t require glue, but for glue-down vinyl, selecting the right adhesive is critical. Look for products compatible with both vinyl and ceramic tile surfaces.
Sealants help protect edges and seams from moisture damage. A high-quality seam sealer can prevent water from seeping underneath, which is especially useful in kitchens or bathrooms.
- Vinyl plank adhesive suitable for tile
- Seam sealer for waterproofing edges
- Caulking gun for precise adhesive application
Have you considered how the adhesive’s drying time will fit into your project schedule? Patience here can prevent costly mistakes.
Step-by-step Installation Process
Installing vinyl plank flooring over tile is a smart way to refresh your floors without removing the old tile. The process is straightforward but requires careful preparation and attention to detail. Follow these steps to ensure a smooth installation and a beautiful finish that lasts.
Preparing The Tile Surface
Start by cleaning the tile thoroughly. Remove all dirt, grease, and grime using a strong cleaner. Check for any loose or cracked tiles and fix them before proceeding. Fill in grout lines with a floor-leveling compound to create a flat surface. Make sure the floor is dry and smooth to avoid bumps under the vinyl planks.
Laying The Underlayment
Choose an underlayment designed for vinyl floors. Roll it out over the tile and cut it to fit the room. Use tape to join seams and keep the underlayment flat. This layer helps reduce noise and adds comfort underfoot. It also protects the vinyl planks from moisture coming through the tile.
Installing The Vinyl Planks
Begin installation along the longest wall or the most visible area. Lay the first plank with the tongue side facing the wall. Click or glue the planks together according to the product instructions. Stagger the seams for a natural look and better stability. Use spacers to maintain a small gap around the edges for expansion.
Finishing Touches And Trims
Remove spacers once all planks are installed. Install baseboards or quarter-round molding to cover expansion gaps. Use transition strips at doorways or where the vinyl meets other flooring types. Clean the floor surface with a gentle cleaner to remove dust and debris. Your vinyl plank floor is now ready to use and enjoy.
Common Challenges And How To Avoid Them
Installing vinyl plank flooring over tile can present challenges like uneven surfaces and moisture issues. Ensure a level base by addressing tile imperfections and use waterproof barriers to prevent moisture damage. Proper preparation is key to a smooth installation process.
Installing vinyl plank flooring over existing tile is a popular choice. It offers a fresh look without removing old tiles. Yet, challenges can arise during the process. Understanding these can make installation smoother and more successful.Dealing With Uneven Tiles
Uneven tiles pose a major challenge. They can cause vinyl planks to warp. To avoid this, inspect the tile surface first. Use a leveling compound to smooth out dips and ridges. Ensure every inch is flat before starting.Preventing Moisture Issues
Moisture can damage vinyl planks. Check for moisture underneath the tiles. Use a moisture barrier to protect the planks. This will prevent warping or mold growth. Proper sealing is crucial for longevity.Avoiding Gaps And Buckling
Gaps occur when planks aren’t installed correctly. Measure the room carefully. Leave a small gap around the edges for expansion. This prevents buckling over time. Use spacers to maintain consistent gaps during installation.Maintenance Tips For Vinyl Over Tile
Maintaining vinyl plank flooring installed over tile is essential to keep it looking fresh and lasting longer. The unique setup means you need to consider both the vinyl’s durability and the tile underneath. With the right care, your floor can stay beautiful without extra hassle.
Cleaning Best Practices
Use a soft broom or vacuum with a hard floor setting to remove dirt and dust regularly. Avoid harsh scrubbers or abrasive tools that can scratch the vinyl surface. A damp mop with a mild, pH-neutral cleaner works best to clean spills and stains without damaging the finish.
Have you noticed how some cleaners leave a sticky residue? Avoid wax-based or oil soaps, as they can dull your vinyl’s shine over time. Instead, test any new product in a small, hidden area first to ensure it doesn’t cause discoloration or buildup.
Protecting Against Damage
Furniture can easily scratch vinyl floors, especially over tile where uneven pressure points might occur. Use felt pads under chair legs and heavy furniture to protect your floor. Place rugs or mats in high-traffic areas to reduce wear and tear.
Consider the impact of sharp objects or heavy drops. Vinyl may resist scratches better than some materials, but it’s not invincible. A dropped tool or heavy item can crack or dent the plank, so handle with care around your flooring.
When To Repair Or Replace
Minor scratches or dents can often be repaired with vinyl repair kits available in stores. If you start to see lifting or gaps between planks, it might mean the adhesive is failing or the tile underneath has shifted. Address these issues quickly to prevent water damage or further problems.
Ask yourself: Is the damage localized or widespread? Small repairs extend your floor’s life, but extensive wear may signal it’s time for replacement. Regular inspections help you catch issues early, saving money and effort in the long run.
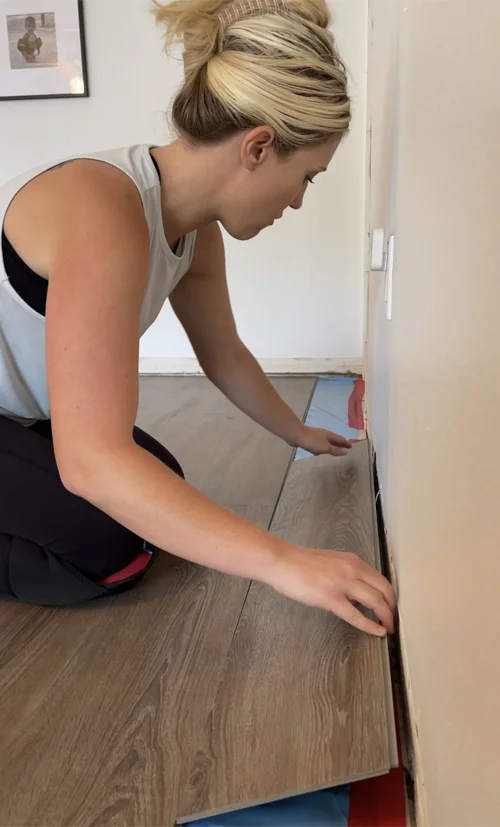
Credit: mrsashleyfrench.com
Cost Analysis And Budgeting
Understanding the costs involved in installing vinyl plank flooring over tile is crucial for managing your budget effectively. You want to know if this approach saves money or if removing the tile first is worth the extra expense. Careful cost analysis helps you make an informed decision that fits your financial plan.
Comparing Costs: Vinyl Over Tile Vs. Tile Removal
Installing vinyl plank flooring directly over tile usually costs less upfront. You avoid expenses related to demolition, disposal, and extra labor. This method can save you hundreds or even thousands of dollars depending on the size of the area.
However, removing tile might be necessary if the tile is damaged or uneven. While this adds to your budget, it can prevent future problems like uneven flooring or vinyl damage. Have you considered whether the long-term durability justifies spending more now?
Estimating Material And Labor Expenses
Material costs for vinyl plank flooring vary widely based on brand, quality, and style. On average, vinyl planks range from $2 to $7 per square foot. In contrast, tile removal labor costs typically run between $1 and $5 per square foot, depending on local rates and tile condition.
Labor for installing vinyl over tile is generally faster and less expensive since it skips the removal step. But if your subfloor needs leveling or repairs, factor those costs in as well. Creating a detailed budget with all these elements helps you avoid surprises and keeps your project on track.

Credit: www.facebook.com
Frequently Asked Questions
Can Vinyl Plank Flooring Be Installed Over Tile?
Yes, vinyl plank flooring can be installed over tile if the tile surface is clean, dry, and level. Proper preparation ensures a smooth installation and lasting results.
Do I Need To Remove Old Tile Before Vinyl Flooring?
Removing old tile is not always necessary. Vinyl planks can be installed directly over tiles if they are flat and secure.
What Surface Prep Is Needed Before Vinyl Over Tile?
You must clean the tile thoroughly and fill grout lines to create an even surface. Sanding rough tiles can improve adhesion.
Will Vinyl Flooring Stick To Ceramic Tile?
Vinyl flooring adheres well to ceramic tile when the surface is smooth, dry, and properly primed or underlayment is used.
Conclusion
Vinyl plank flooring works well over tile with the right prep. Make sure tiles are clean, dry, and level before installing. Uneven or damaged tiles can cause problems later. Vinyl planks add warmth and style to your space. This option saves time and avoids tile removal mess.
Choose quality materials for better durability and comfort. A smooth surface helps the vinyl stick properly. You can refresh your floors without major work. Simple steps lead to great results and lasting floors.


