
Are you ready to give your ceiling a fresh, clean look but unsure how to start? Rolling ceiling paint might seem tricky, but with the right steps, you can achieve a smooth, professional finish yourself.
Imagine transforming your room without the mess or cost of hiring a pro. In this guide, you’ll discover simple tips and techniques that make the process easier and faster than you think. Keep reading, and soon you’ll feel confident tackling your ceiling paint project like a pro.
Choosing The Right Paint
Choosing the right paint for your ceiling is more important than you might think. The paint affects not only the look but also how easy it is to apply and how well it hides imperfections. Picking the wrong type can lead to extra coats, longer drying times, or a finish that doesn’t meet your expectations.
Types Of Ceiling Paint
Ceiling paint is designed differently from wall paint to handle the unique challenges of ceilings. Typically, ceiling paints are thicker to prevent drips and splatters while you work overhead.
You can find options like:
- Flat or Matte Ceiling Paint:This is the most common type, great at hiding flaws and reflecting minimal light.
- Stain-Blocking Paint:Perfect if your ceiling has water stains or smoke marks.
- Low-Odor Paint:Useful if you’re painting in a living space and want to avoid strong smells.
Which type suits your ceiling’s condition and your room’s needs?
Matte Vs. Satin Finishes
Matte finish is the classic choice for ceilings. It hides imperfections well and has a soft look that doesn’t draw attention.
Satin finish, on the other hand, has a slight sheen and is easier to clean. It can be a better choice for kitchens or bathrooms where moisture is a concern.
Think about where your ceiling is located. Would a subtle shine help brighten the space, or will it highlight bumps you want to conceal?
Paint Quality And Coverage
Higher-quality paints usually offer better coverage, meaning fewer coats are needed. This saves you time and effort, especially on large ceiling areas.
Look for paints labeled as “high hide” or “premium.” They often contain more pigment and thicker binders to cover previous colors or stains effectively.
Have you checked reviews or asked for samples? Trying a small patch can show you how well the paint covers and how it looks once dry.

Credit: www.homedepot.com
Selecting Tools And Materials
Choosing the right tools and materials can make a huge difference when rolling paint on your ceiling. The right roller and supplies not only save time but also help achieve a smooth, even finish. Let’s break down what you need to get the job done right and avoid common pitfalls that can lead to frustration.
Best Rollers For Ceilings
Ceiling rollers are different from wall rollers. They usually have a thicker nap to hold more paint and cover textured surfaces better. A ¾-inch to 1-inch nap roller works best for most ceilings, especially if yours has a popcorn or textured finish.
Using a roller with too short a nap can cause uneven coverage, while too long a nap might leave excess paint drips. If your ceiling is smooth, a ⅜-inch nap roller will help you get a fine, even coat. Have you checked your ceiling texture before picking your roller?
Using Extension Poles
Extension poles are a game-changer for ceiling painting. They reduce strain on your arms and help you reach high areas without a ladder. Choose a lightweight pole with a secure locking mechanism to keep your roller steady.
Many rollers come with a threaded end designed to fit standard poles, so make sure your roller and pole are compatible. Have you ever tried painting a ceiling without one? It’s much harder than it looks.
Other Essential Supplies
- Painter’s tape:Protect edges where the ceiling meets walls or trim.
- Drop cloths:Use plastic or canvas to cover floors and furniture.
- Paint tray and liners:Liners make cleanup easier and keep paint fresh.
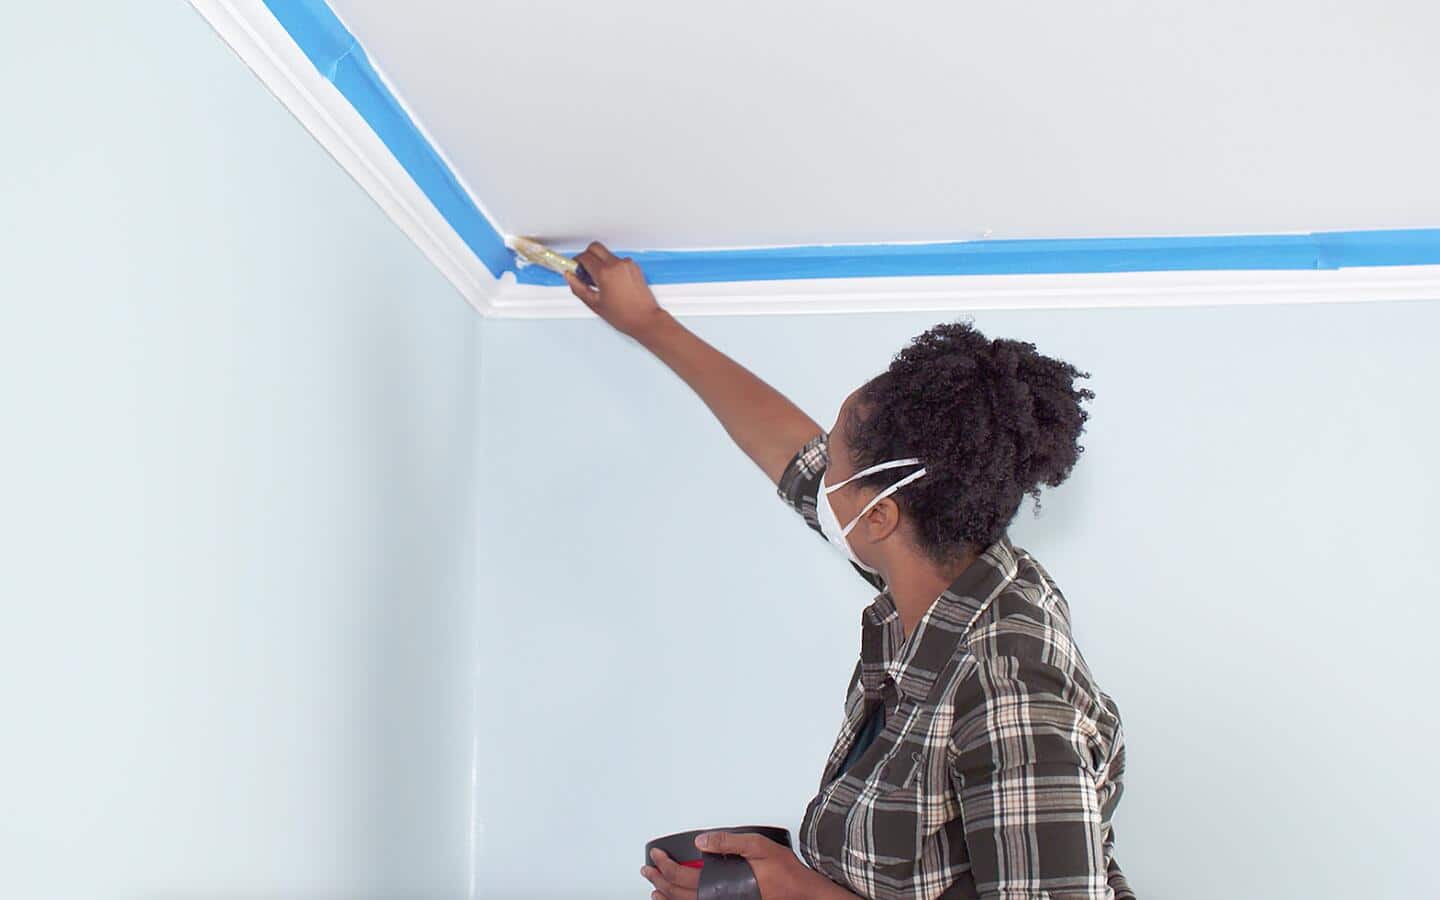
- Brushes:A 2-3 inch angled brush helps cut in corners and edges.
- Stir sticks:Keep your paint mixed and consistent.
Having these supplies ready before you start prevents interruptions and keeps your workflow smooth. Do you have all these items on hand, or will you need a quick trip to the store?
Preparing The Ceiling Surface
Preparing the ceiling surface is a crucial step before you start rolling paint. Skipping this can lead to uneven coverage and peeling later on. Taking time to clean, repair, and protect your ceiling sets the foundation for a smooth and lasting finish.
Cleaning And Repairing
Start by removing dust, cobwebs, and any loose paint using a broom or vacuum. Dirt and grime can prevent paint from sticking properly, so a clean surface is essential.
If you notice cracks or holes, fill them with a lightweight spackle. After it dries, sand the area gently to make it smooth. This small effort ensures your ceiling looks flawless after painting.
Priming The Ceiling
Priming seals the surface and improves paint adhesion, especially on new drywall or patched spots. Choose a primer suitable for ceilings and apply it evenly with a roller.
Don’t rush this step—let the primer dry completely before painting. Have you ever painted over stains without priming? It often results in ugly bleed-through that ruins the finish.
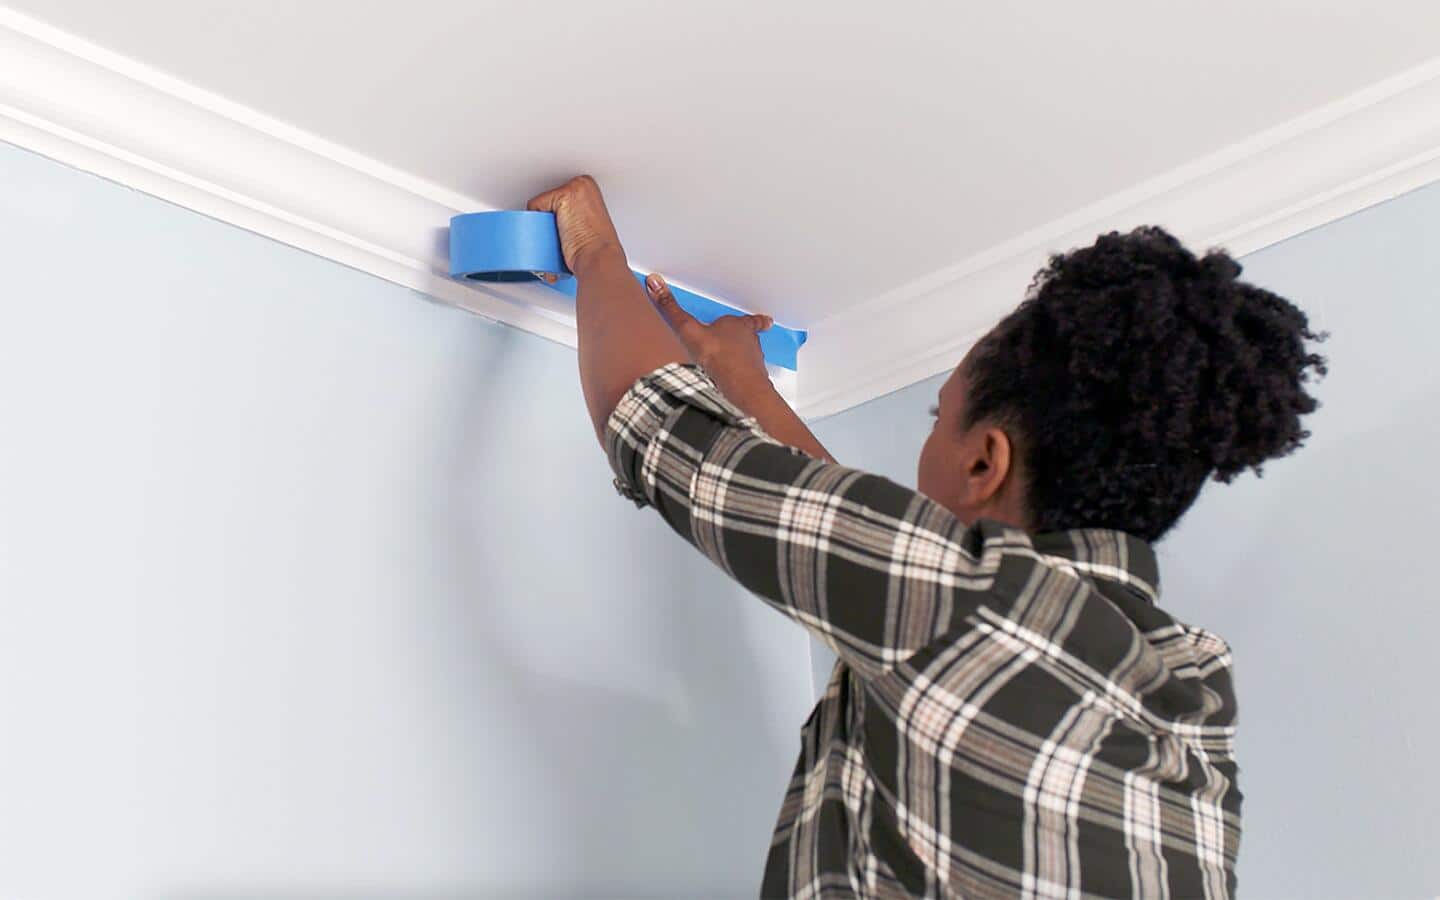
Protecting Surrounding Areas
Cover your floors and furniture with drop cloths or plastic sheets to avoid paint splatters. Use painter’s tape along the edges where the ceiling meets walls or fixtures.
This simple protection saves you hours of cleanup and keeps your space looking neat. How often do you wish you had taped off better after a messy paint job? Taking this step seriously pays off.
Credit: www.homedepot.com
Techniques For Rolling Paint
Mastering the techniques for rolling ceiling paint can make a big difference in your painting project. The right approach ensures a smooth, even finish without annoying drips or missed spots. Let’s look at key techniques that help you work smarter, not harder.
Loading The Roller Correctly
Loading your roller with the right amount of paint is crucial. Too much paint causes drips, while too little means more passes and uneven coverage.
Dip the roller lightly into the paint tray’s well, then roll it on the tray’s slope to remove excess paint. This helps spread paint evenly over the roller’s surface.
Think of the roller like a sponge—you want it saturated but not dripping. This balance keeps your ceiling looking flawless and saves paint.
Applying Paint Evenly
Start by rolling in a small section, about 3 feet by 3 feet, to keep control. Use long, smooth strokes and apply gentle pressure.
Overlap each stroke slightly to avoid missed spots and streaks. Avoid pressing too hard; let the roller do the work.
If you notice thick spots or drips, stop and smooth them out immediately. This prevents uneven texture and saves time on touch-ups.
Maintaining A Wet Edge
Keeping a wet edge means you paint into the area you just finished while it’s still wet. This avoids lap marks and color inconsistencies.
Work quickly in manageable sections, and don’t let painted areas dry before moving on. If the paint starts drying, the edges won’t blend properly.
Ask yourself: Are you moving fast enough to maintain the wet edge? If not, adjust your pace or reduce the size of your sections.
Handling Common Challenges
Painting a ceiling can be tricky, especially when common challenges pop up. Knowing how to handle these issues can save you time and frustration. Let’s dive into practical tips that will help you keep your ceiling looking flawless.
Avoiding Drips And Streaks
Drips and streaks are the most frequent problems when rolling ceiling paint. To prevent drips, don’t overload your roller with paint. Instead, dip it lightly and roll off excess paint on the tray’s ridges before applying it to the ceiling.
Roll in smooth, even strokes and maintain a wet edge to avoid streaks. If you notice any drips, catch them quickly with your roller or a brush before they dry. Are you applying too much pressure? Light, consistent pressure often gives the best finish.
Dealing With Textured Ceilings
Textured ceilings require a different approach because paint can miss crevices or build up unevenly. Use a thicker nap roller (¾ inch or more) to get into all the nooks and crannies. This helps you cover textured surfaces evenly without excessive effort.
Sometimes a brush is necessary to reach deep spots the roller can’t cover. Don’t rush; take your time to ensure full coverage. Have you tried painting a textured ceiling? What challenges did you face, and how did you overcome them?
Fixing Mistakes Quickly
Mistakes happen. Whether it’s a drip, missed spot, or uneven coverage, acting fast is key. Keep a damp cloth or sponge nearby to gently wipe off fresh paint before it dries.
If paint has dried but looks uneven, you can lightly sand the area once it’s fully dry and then apply a thin second coat. Patience pays off here—fix small issues promptly to avoid bigger problems later.
Finishing Touches
As you near the end of your ceiling painting project, the finishing touches are crucial for a flawless result. These final steps ensure your ceiling looks professional and smooth, leaving no room for imperfections. Let’s explore how to wrap up your painting with precision and care.
Inspecting For Missed Spots
Once the paint dries, take a moment to inspect the ceiling for any missed spots. Stand back and look from different angles to catch any areas that might need extra attention. A flashlight can be a handy tool here, as it highlights inconsistencies that might be invisible under regular lighting. Addressing these spots now saves you from future frustration and ensures a uniform look.
Applying A Second Coat
Applying a second coat may seem tedious, but it’s often necessary for achieving a rich, consistent finish. If the first coat appears patchy or uneven, don’t hesitate to roll over it again. This step ensures the paint’s durability and longevity, preventing the ceiling from showing wear prematurely. Remember, patience pays off with a stunning ceiling.
Cleaning Up Properly
Proper cleanup is the unsung hero of any painting project. Wash your brushes and rollers thoroughly to extend their lifespan. Take care of any accidental drips or spills while the paint is still fresh. Lastly, store leftover paint securely for future touch-ups or projects. A tidy workspace keeps your mind clear and ready for whatever comes next.
Credit: www.homedepot.com
Frequently Asked Questions
How Do You Prepare A Ceiling Before Painting?
Clean the ceiling to remove dust and cobwebs. Cover furniture and floors with drop cloths. Repair cracks or holes with filler. Allow the surface to dry completely before painting.
What Type Of Roller Is Best For Ceiling Paint?
Use a roller with a thick nap (¾ to 1 inch) for ceilings. It holds more paint and covers textured surfaces well. Choose a sturdy roller frame for even application.
How Should You Apply Ceiling Paint With A Roller?
Start by cutting in edges with a brush. Use the roller in a W or M pattern. Work in small sections and maintain a wet edge to avoid streaks.
How Many Coats Of Paint Are Needed On Ceilings?
Typically, two coats provide full coverage and a smooth finish. Let the first coat dry completely before applying the second. This ensures durability and even color.
Conclusion
Rolling ceiling paint takes some practice but is simple to learn. Start with clean surfaces and use good quality tools. Apply paint in small sections and keep a steady hand. Take breaks to avoid streaks or drips. Clean your roller well after finishing.
With patience, your ceiling will look fresh and smooth. Keep these tips in mind for your next paint job. Painting can be easy and satisfying with the right approach.


