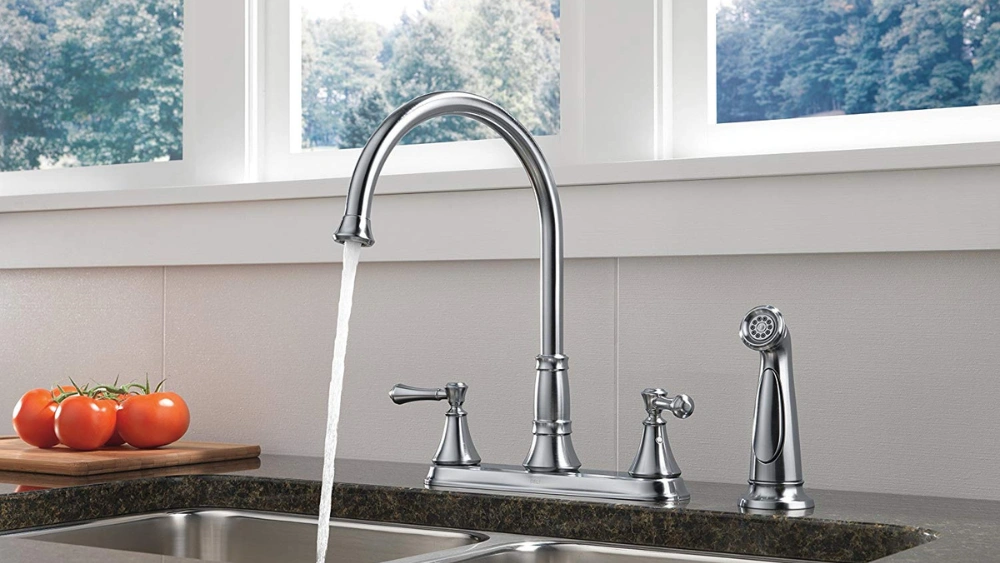
Is your kitchen faucet dripping nonstop and driving you crazy? A leaky two-handle faucet not only wastes water but also raises your bills and creates annoying sounds.
The good news? You don’t need to call a plumber or spend a fortune to fix it. With a few simple steps, you can stop the leak yourself and enjoy a quiet, drip-free kitchen. Keep reading, and you’ll learn exactly how to fix your leaky kitchen faucet quickly and easily.
Your peace of mind and savings are just a few minutes away.
Tools And Materials Needed
Fixing a leaky kitchen faucet with two handles needs the right tools and materials. Having these ready saves time and makes the process smoother. Each tool has a specific role in the repair. Using the correct items prevents damage to the faucet and ensures a proper fix.
Essential Tools
- Adjustable wrench – to loosen and tighten nuts
- Screwdrivers (flathead and Phillips) – to remove screws
- Pliers – to grip and turn parts
- Allen wrench – for removing handle screws
- Utility knife – to cut old seals or tape
Necessary Materials
- Replacement washers and O-rings – common causes of leaks
- Plumber’s grease – to lubricate parts
- Plumber’s tape (Teflon tape) – for sealing threads
- Cleaning cloth – to wipe parts clean
- Bucket or bowl – to catch water during repair
Optional Helpful Items
- Flashlight – to see inside the faucet assembly
- Small brush – for cleaning hard-to-reach areas
- Replacement cartridge or valve – if the faucet has severe damage
Credit: www.tiktok.com
Identifying The Leak Source
Identifying the source of a leak in a two-handle kitchen faucet is the first step toward a fix. A careful check helps save time and prevents extra damage. Leaks often hide in places that seem dry at first. Knowing where to look makes repairs easier and faster.
Start by turning off the water supply. Dry the faucet completely. Watch for water drops forming again. This reveals the exact spot where water escapes. The leak could come from the handles, spout, or base.
Checking Around The Handles
Leaks often appear near the handles. Remove the handle caps and inspect underneath. Look for worn washers or loose parts. Water may drip when you turn the handles on or off.
Inspecting The Spout
The spout is a common leak source. Look for water dripping from the spout base or tip. Sometimes the spout seal wears out. A loose spout can also cause leaks.
Examining The Faucet Base
Water can leak where the faucet meets the sink. Check for cracks or loose fittings here. Water may pool around the base or seep under the sink.
Using A Tissue Test
A simple tissue test helps find small leaks. Press a dry tissue around suspect areas. Wet spots on the tissue show where water escapes. This test works well in tight spaces.
Turning Off Water Supply
Turning off the water supply is the first and most important step. It stops water flow to the faucet. This action prevents water damage and keeps the work area dry. Knowing how to shut off the water saves time and frustration.
Locate The Shut-off Valves
Find the shut-off valves under the sink. They are usually small handles or knobs. One valve controls hot water, the other controls cold water. Both need to be turned off to stop water flow completely.
Turn The Valves Clockwise
Use your hand to turn each valve clockwise. Turn gently but firmly. Do not force the valve if it resists. Turning clockwise closes the valve and stops water from flowing.
Check For Water Flow
After closing the valves, open the faucet handles. Watch if water still comes out. If water flows, the valves are not fully closed. Turn the valves more until water stops.
Use The Main Water Supply If Needed
If no shut-off valves are found under the sink, go to the main water supply. This valve is often near the water meter or where the water line enters the house. Turn it off to stop all water in the home.
Removing Faucet Handles
Removing faucet handles is the first crucial step to fix a leaky two-handle kitchen faucet. It allows you to access the internal parts that often cause drips and leaks. The process might seem tricky, but with the right approach, you can do it quickly and safely.
Locate And Remove The Handle Caps
Start by looking for small caps on top of the handles. These caps usually cover the screws that hold the handles in place. Gently pry them off using a flathead screwdriver or a butter knife to avoid scratching your faucet.
Once the caps are off, you will see the screws underneath. Use the correct screwdriver to loosen and remove these screws carefully. Keep them safe—you’ll need them to reassemble the faucet later.
Use The Right Tools To Pull Off The Handles
Handles can sometimes stick due to mineral build-up or corrosion. If they don’t come off easily, don’t force them by hand. Instead, use a handle puller tool or wrap a cloth around the handle and gently wiggle it back and forth until it loosens.
Applying a little penetrating oil around the base can help loosen stubborn handles. Allow the oil to sit for a few minutes before trying again. This step can save you from damaging the faucet or hurting your hands.
Keep Track Of Each Handle’s Position
Two-handle faucets have separate hot and cold handles, and mixing them up can cause confusion during reassembly. Mark each handle with a piece of tape or take a photo before removal. This simple step ensures you put everything back correctly.
Have you ever struggled with putting handles back in the wrong place? This little tip can save you time and frustration. It’s a small action with big payoffs.
Inspecting And Replacing Washers
Inspecting and replacing washers is a key step to fix a leaky two-handle kitchen faucet. Washers are small rubber or plastic rings that seal the faucet valve. Over time, they wear out and cause drips. Checking these washers can stop leaks quickly and save water.
Finding the faulty washer is simple with the right tools. Removing the handles and valve seats lets you see the washers clearly. Replacing the worn washers with new ones restores the faucet’s seal. It is a low-cost fix that anyone can do.
Tools Needed For Washer Inspection
- Screwdriver
- Adjustable wrench
- Replacement washers
- Towel or rag
- Flashlight (optional)
How To Remove The Faucet Handles
Turn off the water supply under the sink. Use a screwdriver to remove the handle screws. Gently pull the handles off the faucet. Place them safely aside.
Checking The Washers For Damage
Look inside the valve assembly for the washers. Check for cracks, flattening, or hardening. A damaged washer will not seal properly. Replace any washer that looks worn out.
Replacing The Washers Properly
Remove the old washers carefully with a screwdriver. Match the size and type of new washers exactly. Place the new washers in the same position. Tighten the valve assembly securely but not too tight.
Testing The Faucet After Replacement
Turn the water supply back on. Open the faucet handles slowly. Watch for any drips or leaks. If the faucet is dry, the repair worked well.
Replacing The Valve Seat
Replacing the valve seat is a key step to fix a leaky two-handle kitchen faucet. The valve seat connects the faucet handle to the water supply. Over time, it can wear out or get damaged, causing leaks. Changing this part can stop the drip and restore proper water flow.
The process requires some tools and careful handling but is doable with basic skills. This guide explains how to remove the old valve seat and install a new one safely.
Gathering The Necessary Tools
- Adjustable wrench
- Valve seat wrench or seat removal tool
- Replacement valve seat
- Teflon tape
- Cleaning cloth
Turning Off The Water Supply
Start by shutting off the water valves under the sink. Open the faucet handles to drain leftover water. This step prevents water from spilling during the repair.
Removing The Faucet Handles
Use a screwdriver or wrench to take off the faucet handles. This reveals the valve stem and seat inside. Keep all screws and parts safe for reassembly.
Extracting The Old Valve Seat
Insert the valve seat wrench into the seat and turn it counterclockwise. The seat should loosen and come out. Clean the surrounding area to remove debris or buildup.
Installing The New Valve Seat
Wrap Teflon tape around the threads of the new valve seat. Screw it gently into the faucet body using the seat wrench. Tighten securely but avoid over-tightening to prevent damage.
Put the valve stem and handles back in place. Tighten all screws firmly. Turn on the water supply and check for leaks. Adjust if needed to ensure a proper seal.
Reassembling The Faucet
Reassembling your two-handle kitchen faucet is a crucial part of fixing that annoying leak. It’s where all your careful work comes together. If you rush or skip steps here, the faucet might still drip or even get damaged further.
Take your time and make sure each part fits perfectly. If you’ve cleaned or replaced washers, cartridges, or O-rings, now’s the moment to put everything back just right. Missing a seal or not tightening a screw enough can undo your efforts.
Aligning The Handles And Spouts Correctly
Start by placing the spout back onto the base. Make sure it sits flush and turns smoothly without resistance.
Next, carefully position each handle over its valve stem. Handles often have a specific orientation to work properly, so check for any alignment marks or grooves.
Ask yourself: Are the handles turning fully open and closed? If not, adjust their position slightly before tightening screws.
Securing Screws And Nuts Firmly
Use a screwdriver or wrench to tighten all fasteners snugly but avoid over-tightening. Too much force can crack plastic parts or strip threads.
Double-check that all screws and nuts are in their original spots. Missing or loose hardware is a common cause of leaks after reassembly.
Do you hear any creaks or feel wobbling? That’s a sign to back off and try again more gently.
Testing For Leaks Before Final Assembly
Before putting decorative caps or covers back, turn your water supply on slowly. Watch closely for drips or moisture around seals and joints.
If you spot a leak, turn the water off immediately. Disassemble and inspect washers or O-rings—they might need repositioning or replacing.
Getting this right now saves you from tearing it apart again later. Patience pays off.
Testing For Leaks
Testing for leaks is a key step in fixing a two-handle kitchen faucet. It helps find the exact spot where water escapes. This step saves time and prevents water damage. Detecting leaks early means a faster, easier repair.
Turn Off The Water Supply
Start by shutting off the water supply under the sink. This stops water flow and keeps the area dry. Use the shut-off valves for hot and cold water. Turning them clockwise usually closes the valves. Always double-check that the water is off before moving on.
Dry The Faucet And Surrounding Area
Use a clean cloth to dry the faucet and sink area. Removing all moisture helps spot fresh leaks. Pay attention to the base, handles, and spout. A dry surface makes new drips easy to see.
Turn On The Water Supply Slowly
Open the valves slowly to let water flow back. Watch the faucet closely for drips or wet spots. Open both handles one at a time. Check for leaks around the handles and spout. Moving slowly helps catch leaks without flooding.
Use Tissue Or Paper Towels To Detect Drips
Place tissue or paper towels under the faucet parts. Watch for wet spots on the towels. This shows where water escapes. Replace towels if they get too wet. This method works well in low-light or tight spaces.
Check Under The Sink
Look under the sink for water puddles or wet pipes. Leaks can happen at pipe connections too. Use a flashlight to see clearly. Tighten any loose connections if found. This check helps catch hidden leaks.
Preventive Maintenance Tips
Preventive maintenance helps keep your kitchen faucet working well. Small actions can stop leaks before they start. Regular care saves money and time.
Check your faucet often. Look for drips or loose parts. Tighten any loose handles or nuts carefully. Use the right tools to avoid damage.
Clean faucet parts regularly. Dirt and mineral buildup can cause leaks. Use a soft cloth and mild cleaner. Avoid harsh chemicals that may harm the finish.
Inspect And Replace Worn Out Washers
Washers wear out and cause leaks. Remove the handles and check the washers. Replace them if they look cracked or stiff. New washers create a tight seal and stop drips.
Lubricate Moving Parts
Apply plumber’s grease to the faucet’s moving parts. This keeps handles turning smoothly. It also prevents wear and tear. Use a small amount to avoid buildup.
Check Water Pressure
High water pressure can damage faucet parts. Measure the pressure with a gauge. Adjust the pressure if it is too high. Lower pressure reduces stress on the faucet.
Tighten Loose Connections
Loose connections cause leaks and water damage. Inspect the pipes under the sink. Use a wrench to tighten any loose fittings. Be careful not to over-tighten and crack pipes.
Replace Old Seals And O-rings
Seals and O-rings wear out over time. These parts stop water from leaking inside the faucet. Check them yearly and replace if needed. Use the correct size for a proper fit.

Credit: www.youtube.com

Credit: www.youtube.com
Frequently Asked Questions
How Do I Stop A Two-handle Kitchen Faucet From Leaking?
Turn off water supply first. Remove handles, replace worn-out washers or O-rings. Reassemble and test for leaks. This fixes most leaks effectively.
What Tools Are Needed To Fix A Leaky Two-handle Faucet?
You need a wrench, screwdriver, replacement washers or O-rings, plumber’s grease, and a towel. These tools help disassemble and repair the faucet properly.
Why Does My Two-handle Faucet Drip After Repair?
Dripping may occur if washers aren’t seated correctly or parts are damaged. Check installation and replace faulty components to fix the drip.
How Long Does It Take To Fix A Leaky Kitchen Faucet?
Fixing a leaky two-handle faucet usually takes 30 to 60 minutes. Time depends on your skill and faucet condition.
Conclusion
Fixing a leaky two-handle kitchen faucet saves water and money. Small leaks can cause big problems over time. Follow the steps carefully to replace worn parts. Use the right tools and take your time. You can stop the drip without calling a plumber.
A little effort goes a long way. Keep your kitchen dry and quiet again. Simple fixes make your home more comfortable and efficient. Don’t ignore leaks; fix them soon to avoid damage. Everyone can learn to handle this task with patience.


